
Some time ago I already had instructions on how to get one Take a screenshot of an entire website in Firefox on a Mac can. Today I needed the same function, but unfortunately in Google Chrome. It's not that simple here, because there is no button that you can simply press.
Chapter in this post:
Take screenshots with commands in Chrome
If the normal screenshot is no longer sufficient for the visible area and you also want to capture the parts of a website in a screenshot that can only be reached by scrolling, then you have to proceed as follows.
Here are the quick instructions:
- Call up the corresponding website.
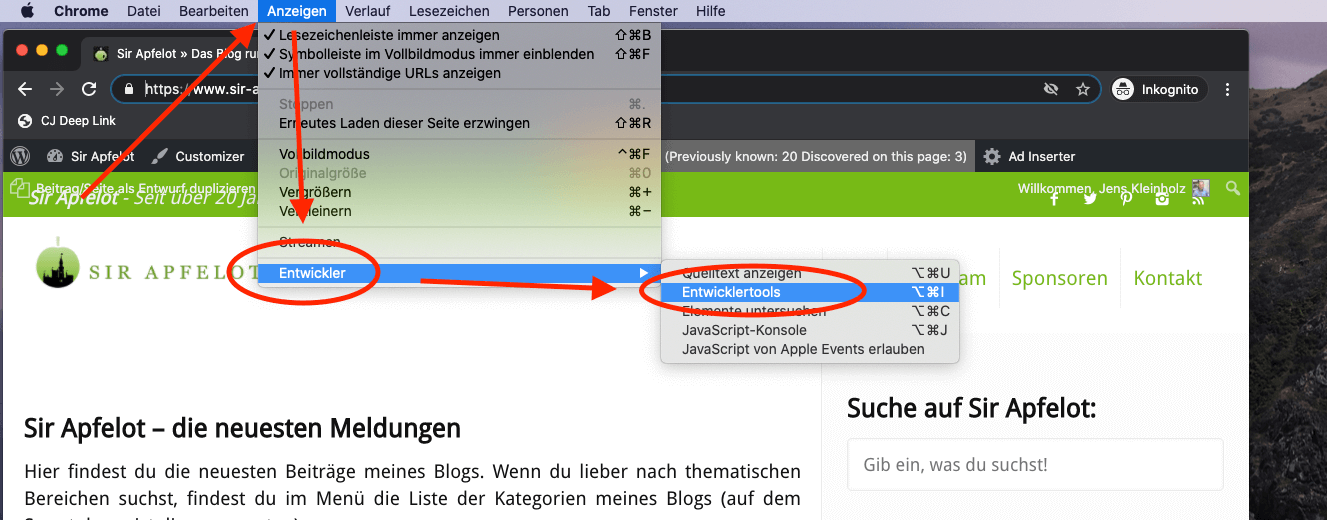
- Now go to the menu “View” > “Developer” > “Developer tools” (also works on Mac with ALT + CTRL + I).
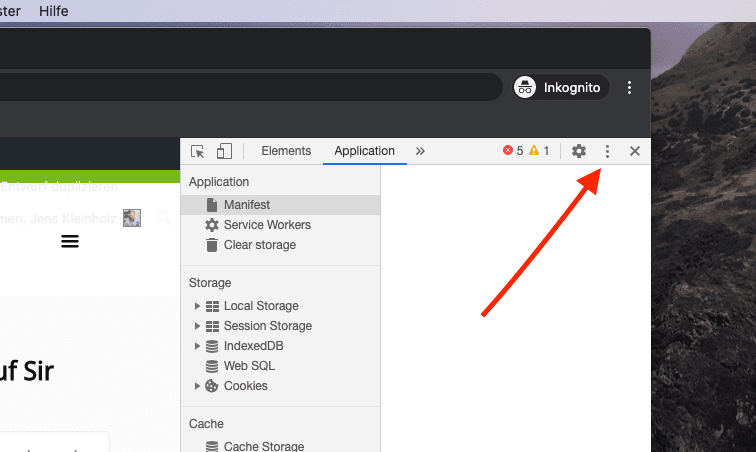
- In the developer area, click on the three dots next to the close button at the top right.
- In this menu you select the item “Run Command”.
- Now type “Screenshot” as the filter and then select the command “[Screenshot] Capture full size Screenshot”.
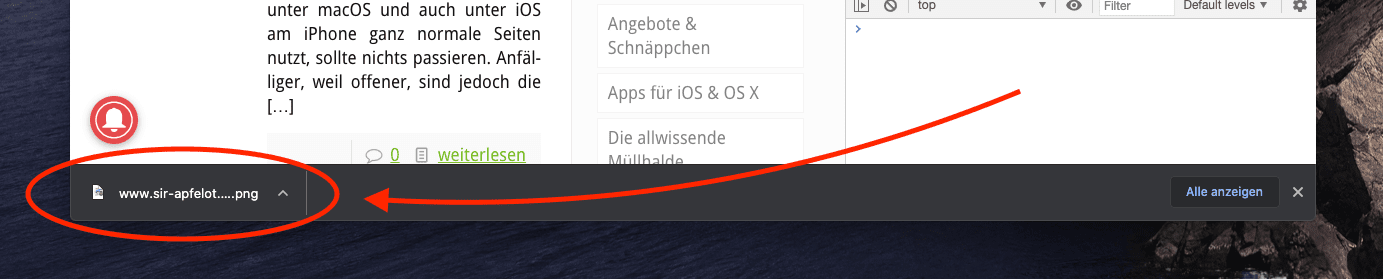
- A PNG file containing an image of the entire website is now stored in the downloads.
The instructions with screenshots
In order to show the individual steps in more detail, I've made screenshots of the individual actions. So you can see in more detail where you have to click and what the individual menu items look like.

You may also find these posts about screenshots worth reading:
- Take a screenshot on the iPhone and iPad
- Display all screenshots on the Mac
- Take screenshots on the Mac
- Create a screenshot in YouTube
- Take a screenshot on the Apple Watch
Related Articles
 WordPress Plugin: Upload Media By URL – my pick of the week
- What exactly is Markdown?
- WordPress login is not working – you can do this!
- Mac: Pressing the space bar brings up a blue frame around the window
- Review: Manuals with video courses for macOS Sonoma, iPhone (iOS 17) and iPad (iPadOS 17) – from amac buch Verlag
- Sir Apfelot newsreel week 42, 2023
- After installing Chrome: Delete Google services from Launchpad
- Is it called Mac or MAC? Explanation of both terms!


Jens has been running the blog since 2012. He acts as Sir Apfelot for his readers and helps them with technical problems. In his spare time he rides electric unicycles, takes photos (preferably with the iPhone, of course), climbs around in the Hessian mountains or hikes with the family. His articles deal with Apple products, news from the world of drones or solutions to current bugs.