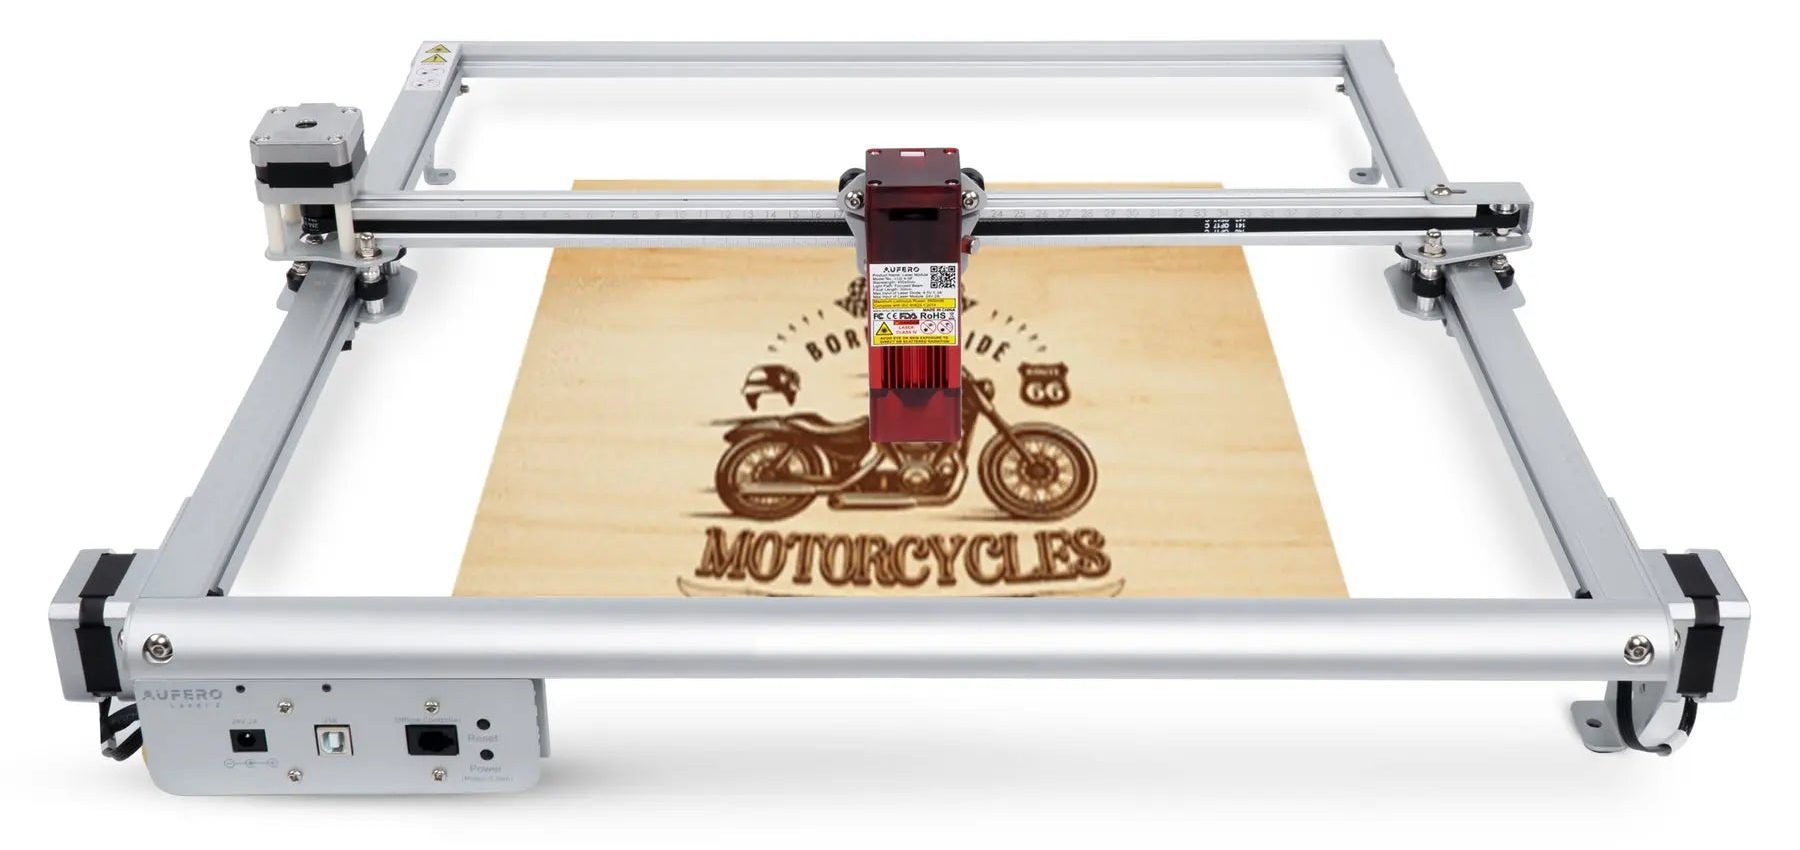
After my first Experiences with the Aufero Laser 1, a laser and engraving entry-level model from Ortur, the manufacturer approached me again. This time it was about the successor model, about that Laser Aufer 2 Laser multifunction device (laser engraver and laser cutter). This is quite similar to the first model but has a solid, rectangular frame. This ensures more stability and certainly also safer use in busy workplaces. But that's not the only improvement, because the engraving area has also been increased from 180 x 180 mm to 390 x 390 mm. Further technical data, details and pictures can be found in this article.
Chapter in this post:
- 1 Transparency notice: Neutral rating despite free device
- 2 Ortur Aufero Laser 2 Specifications
- 3 materials the laser can engrave/cut
- 4 safety features of the Ortur Aufero Laser 2 laser machine
- 5 Assembly: Assemble the Ortur Aufero Laser 2
- 6 Three laser modules with special areas of application
- 7LU2-2, 7W
- 8 LU2-4-SF, 20W
- 9 LU2-4-LF, 20W
- 10 My assessment: good further development of the predecessor
- 11 Auto-stop at the edges of the frame is missing
- Buy 12 Aufero Laser 2 in the Ortur shop
- 13 Similar posts
Note on transparency: Neutral rating despite the free device
As in the test report linked above, here is the note that the manufacturer provided me with the device shown for a test and a corresponding blog post free of charge. However, this does not affect my way of testing or evaluating the laser engraving machine.
I like to read practical reports myself in order to make a purchase decision, and I therefore know how shabby those praises are that are not based on the quality of the product but on the cooperation between the manufacturer and the person writing it. There won't be anything like that here. Promised!
Ortur Aufero Laser 2 Specifications
First, let's look at the specifications of the device. These do not differ significantly from the predecessor (hehe), especially since the same laser modules are used. If there are notable differences, I write the values of the Aufero Laser 1 in brackets so that you have a direct comparison to the Aufero Laser 2:
- Manufacturer: Ortur
- Model: Aufero Laser 2
- Dimensions: 582mm x 580mm x 140mm (Laser 1: 315mm x 422mm x 125mm)
- Weight: 3 kg (Laser 1: 1,6kg)
- Mainboard: OLM-PRO-V1.2, 32-bit ESP32MCU
- Firmware: OLF-V180 (Ortur Laser 1.8)
- Frame: aluminum profile and sheet metal
- Motors: NEMA 17 stepper motors
- Mechanical accuracy: Y: 12,5 µm, X: 12,5 µm
- Engravable area: 390 mm x 390 mm (Laser 1: 180mm x 180mm)
- Wavelength: 445 ± 5nm
- Focus: fixed focus
- Control mode: PWM
- Performance rate: S0-S1,000
- Engraving speed: an average of 10.000 mm / minute (Laser 1: 5.000mm/minute), up to 15.000 mm / minute with sufficient stability
- Baud rate: 115200 - 921600 (default: 115200)
- Supported operating systems: Windows XP, Windows 7, Windows 8, Windows 10 (laserGRBL) as well as Mac and Linux (light burn)
- Formats: BMP, JPG, PNG, JPEG, SVG, etc.
- Input voltage: 110V - 220V
- Power supply: 24V / 2A
- Working temperature: -20 ° C - 50 ° C
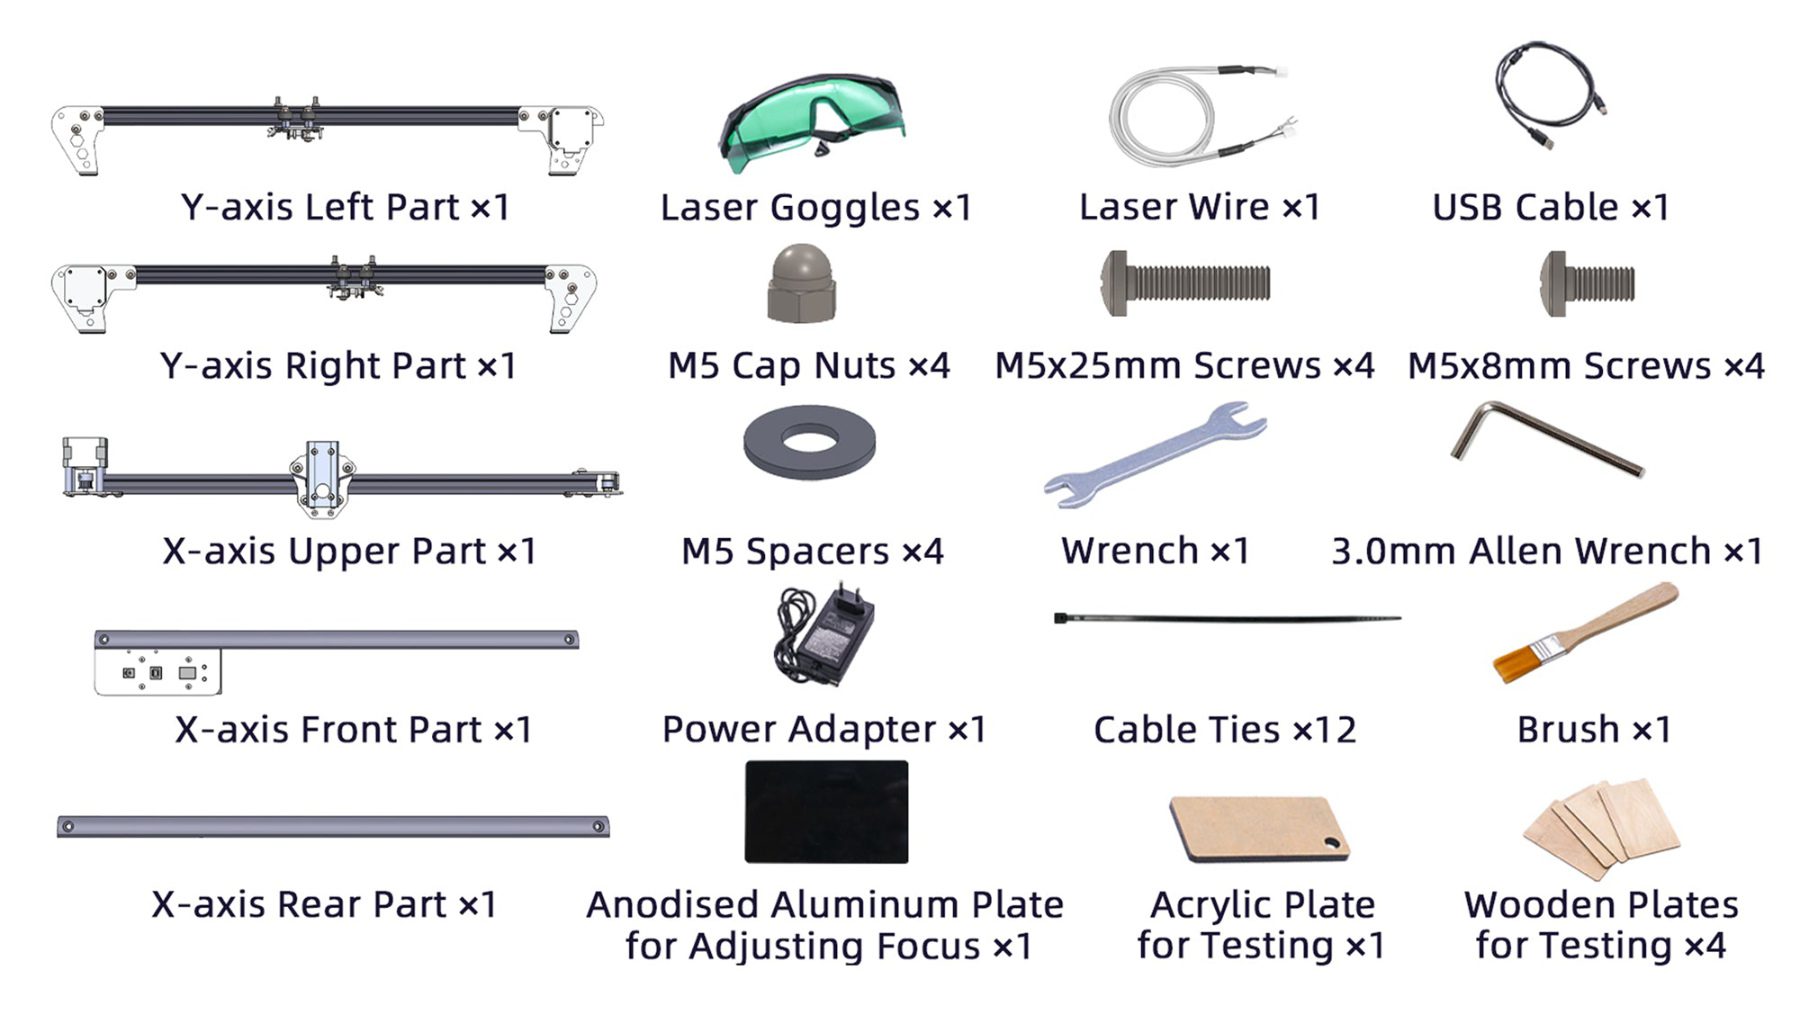
- Scope of delivery: Engraving machine consisting of frame, motors and connectors, USB cable, laser module LU2-2, LU2-4 SF (better for engraving) or LU2-4 LF (better for cutting), power supply, screws with washers and nuts, tools for assembly, brushes, cable ties, laser cable, aluminum plate for calibration, acrylic plate and wooden plates for first tests, safety goggles (important!)
- Source: Ortur shop
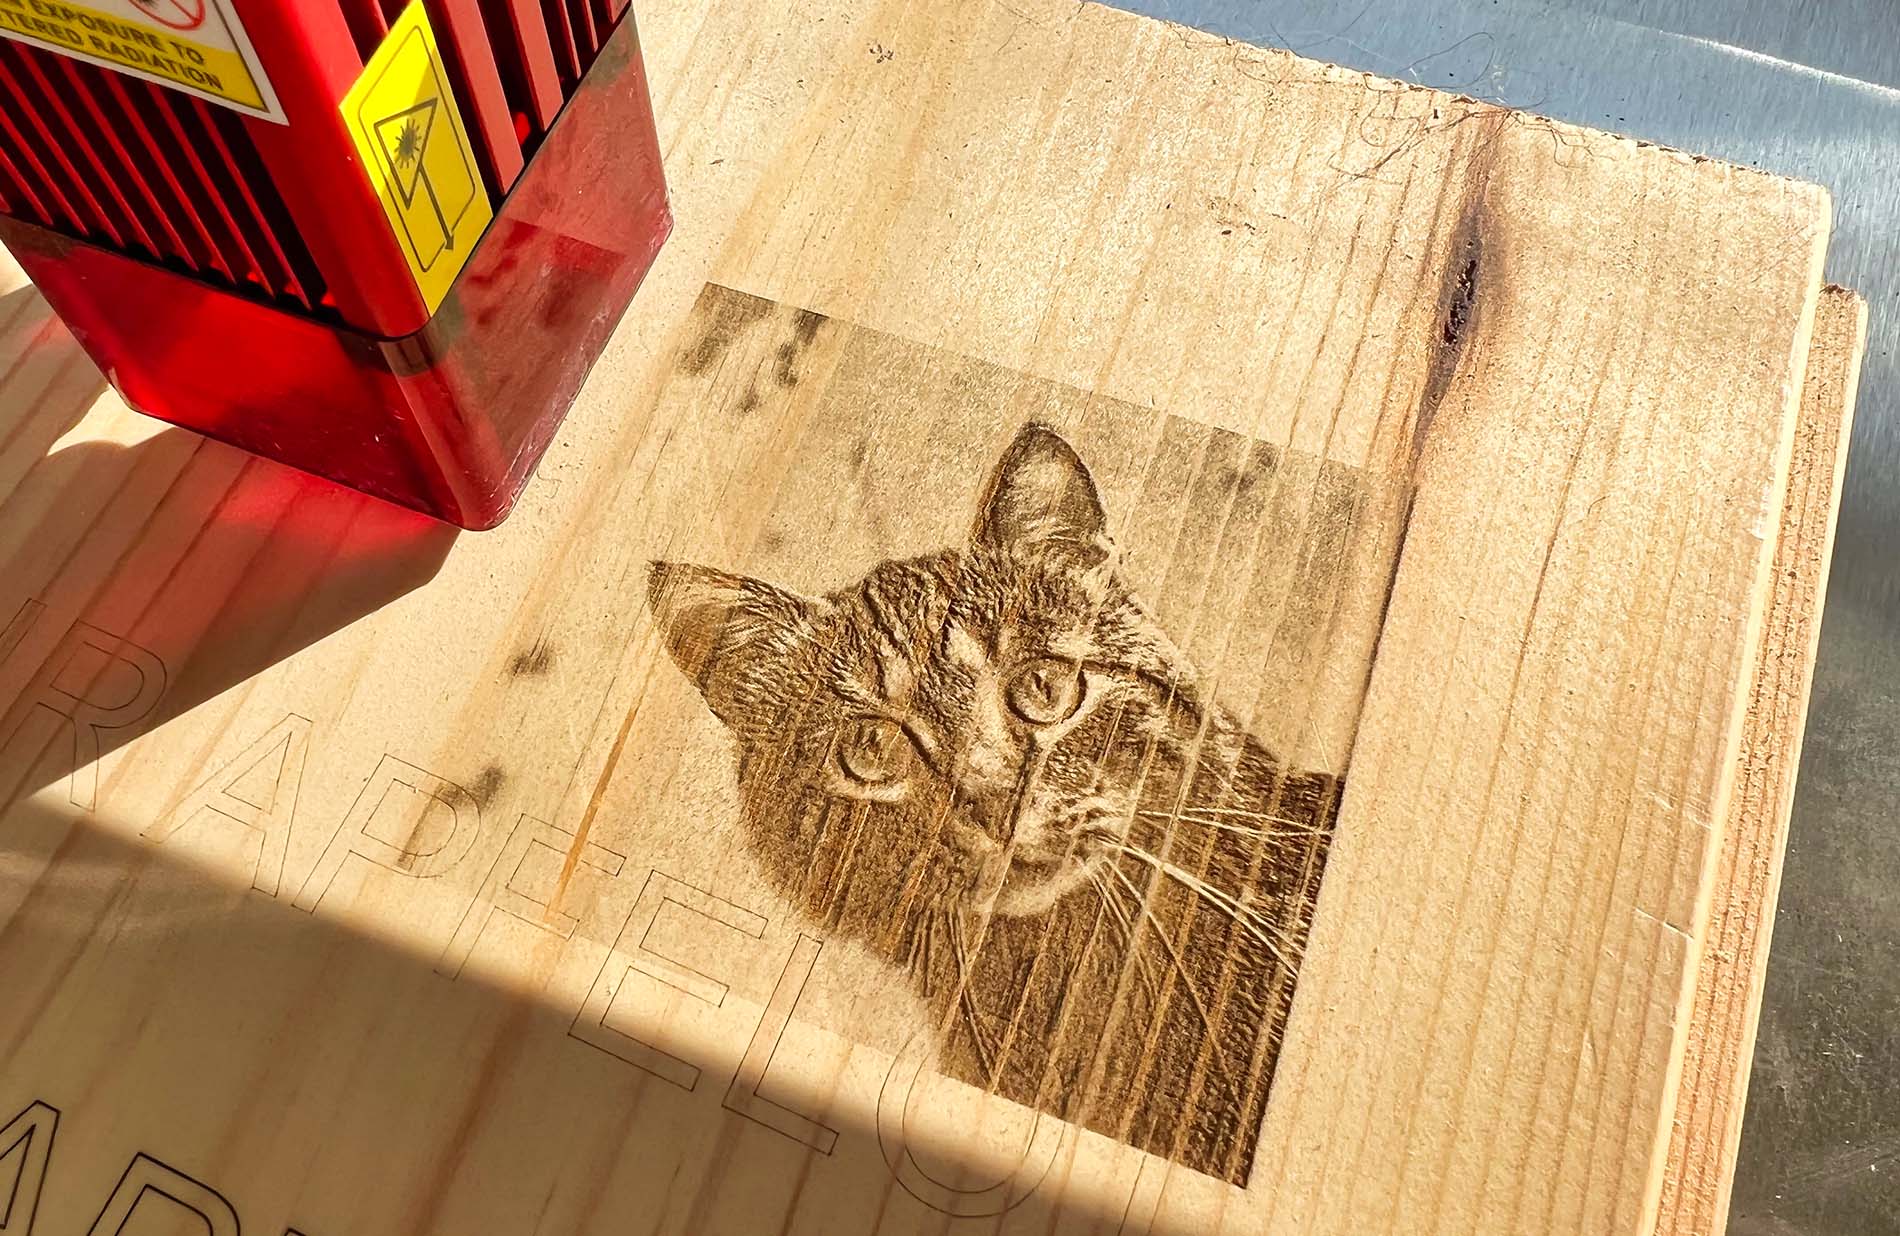
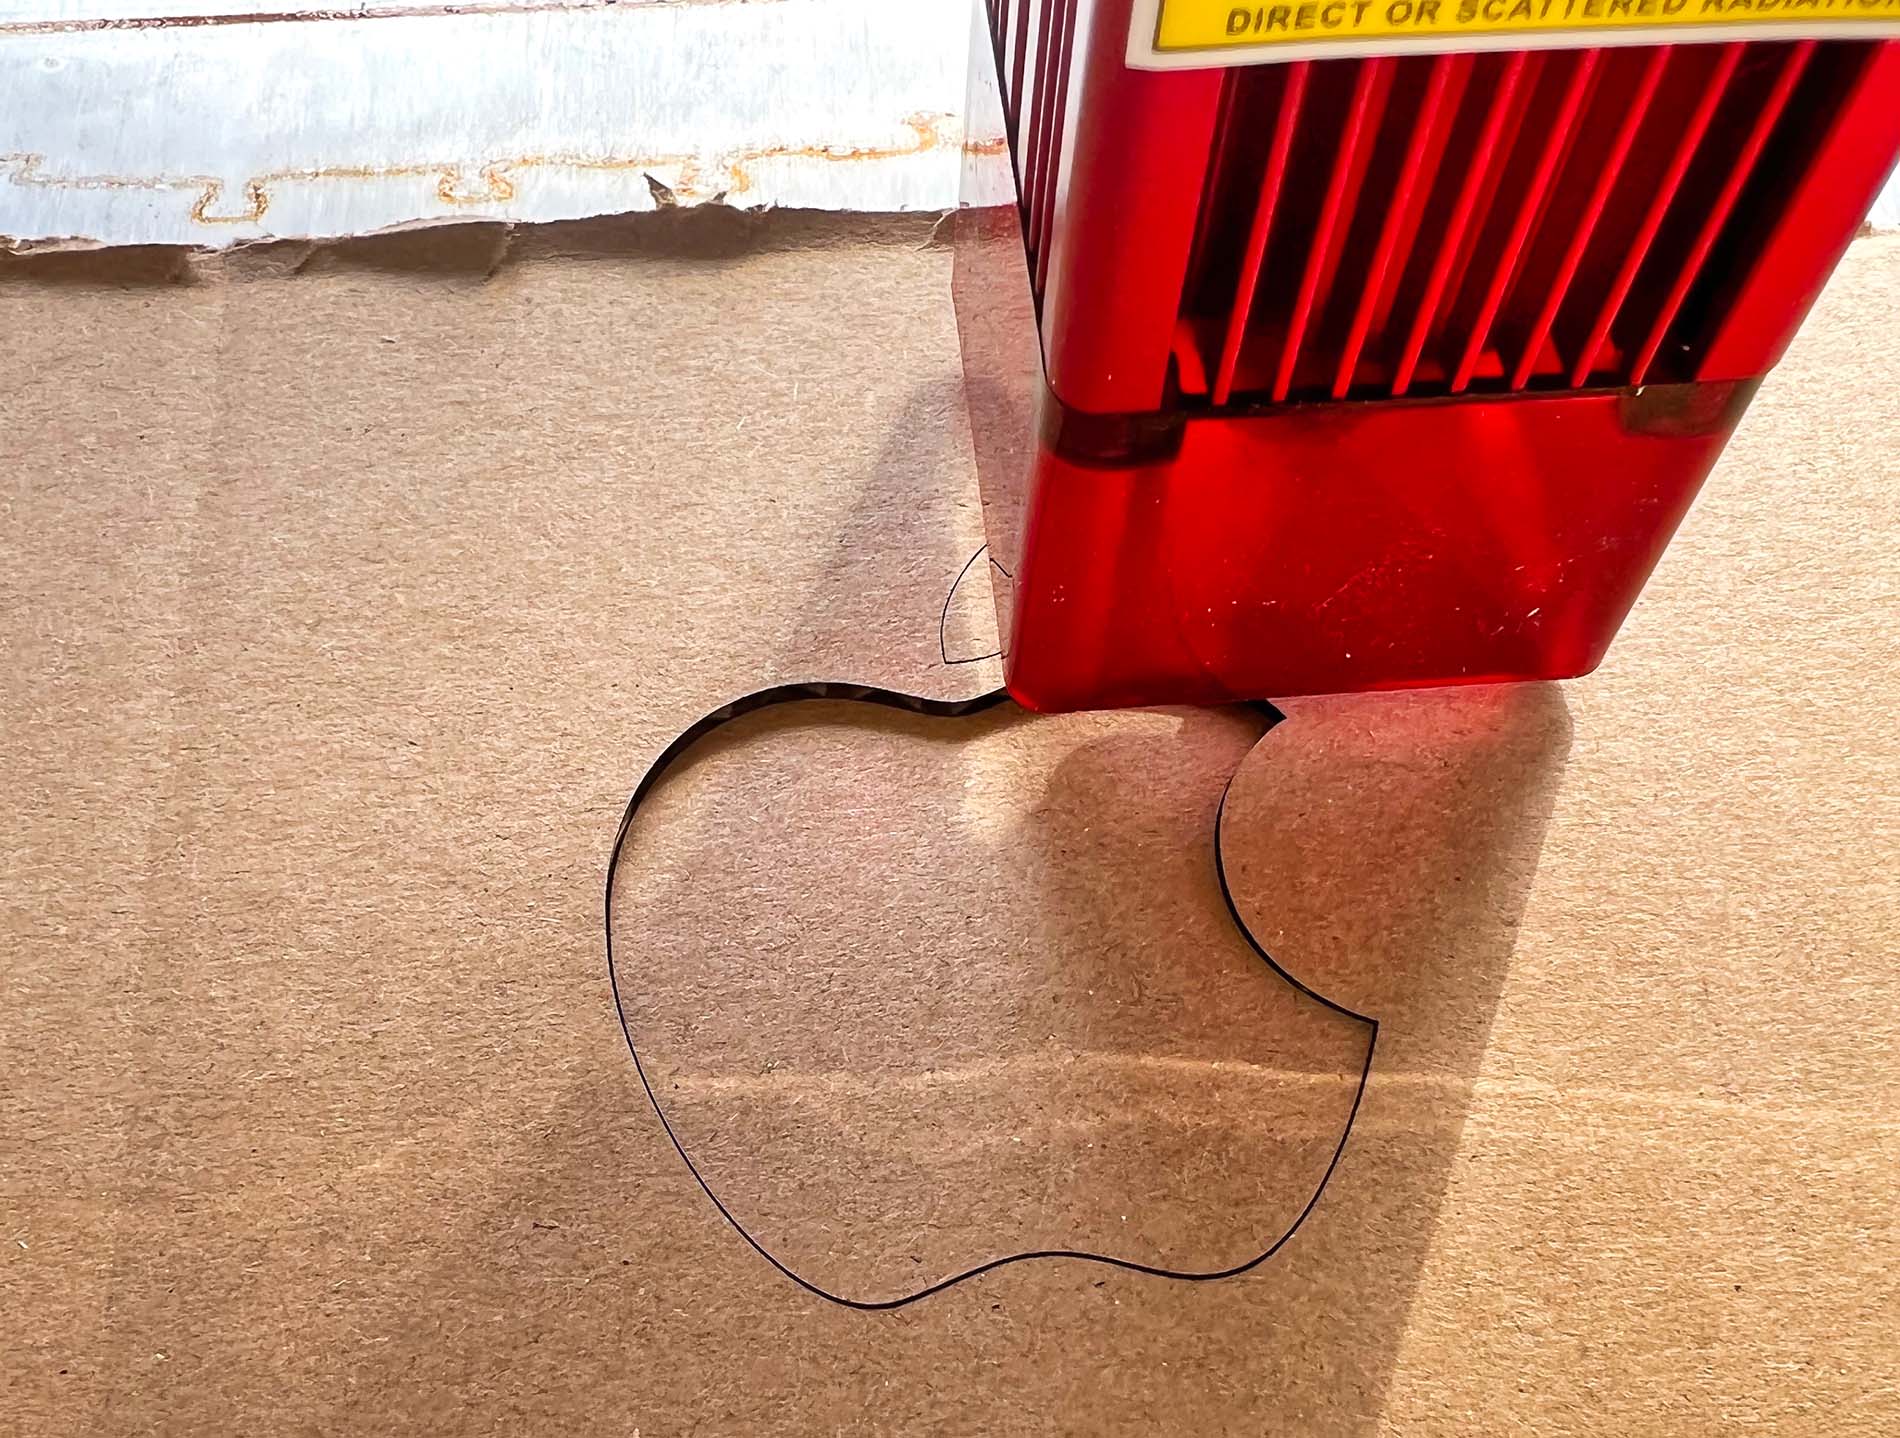
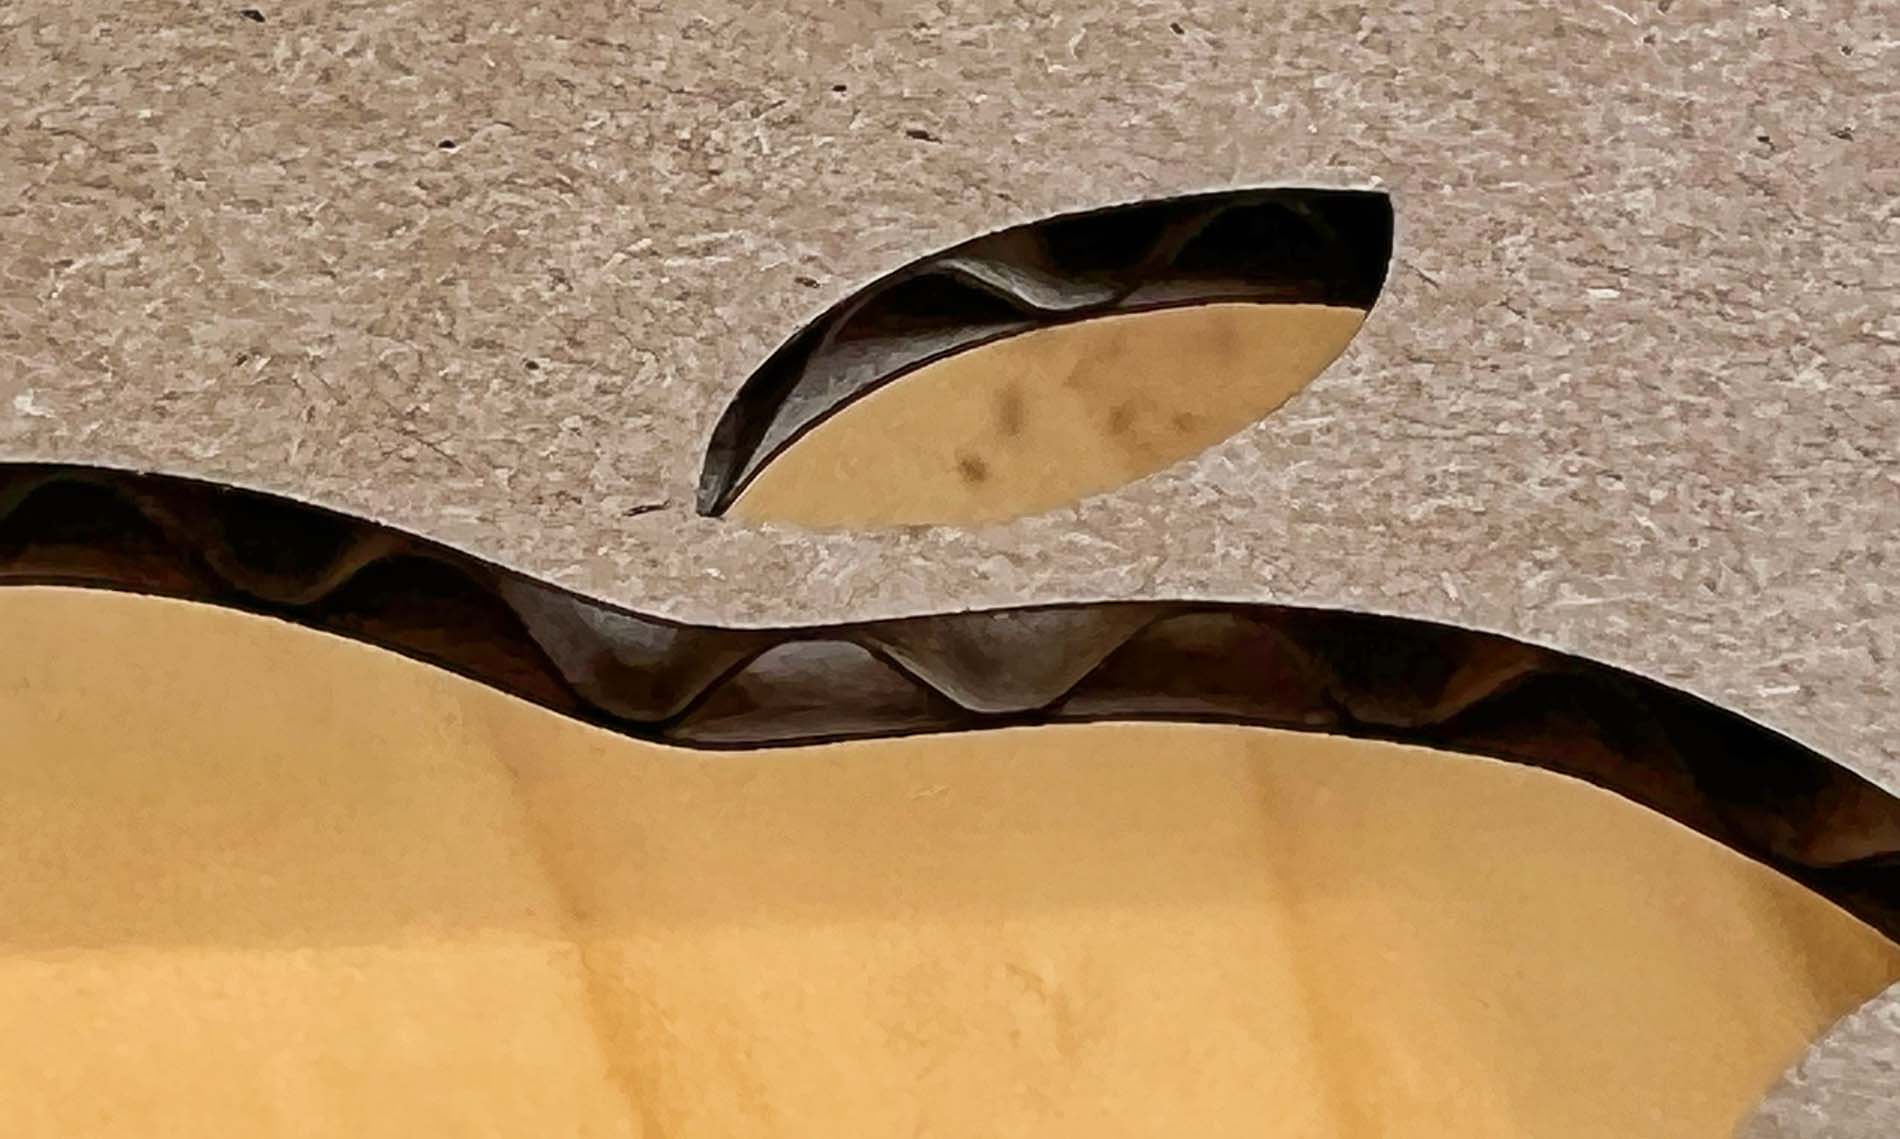
Materials that the laser can engrave/cut
You may be wondering what the purpose of such a combined laser engraver and laser cutter machine is, especially in private household use. Now that so many different materials can not only be engraved but also cut with the machine, you can do a lot with it. A whole new handicraft hobby could arise for one or the other. These materials can be engraved and/or cut with the Ortur Aufero Laser 2:
- wood (also cork and bamboo)
- Acrylic
- Manager
- metal (e.g. aluminum)
- Ceramics
- Stein
- Textiles
- Paper and board
- Food
- Glass
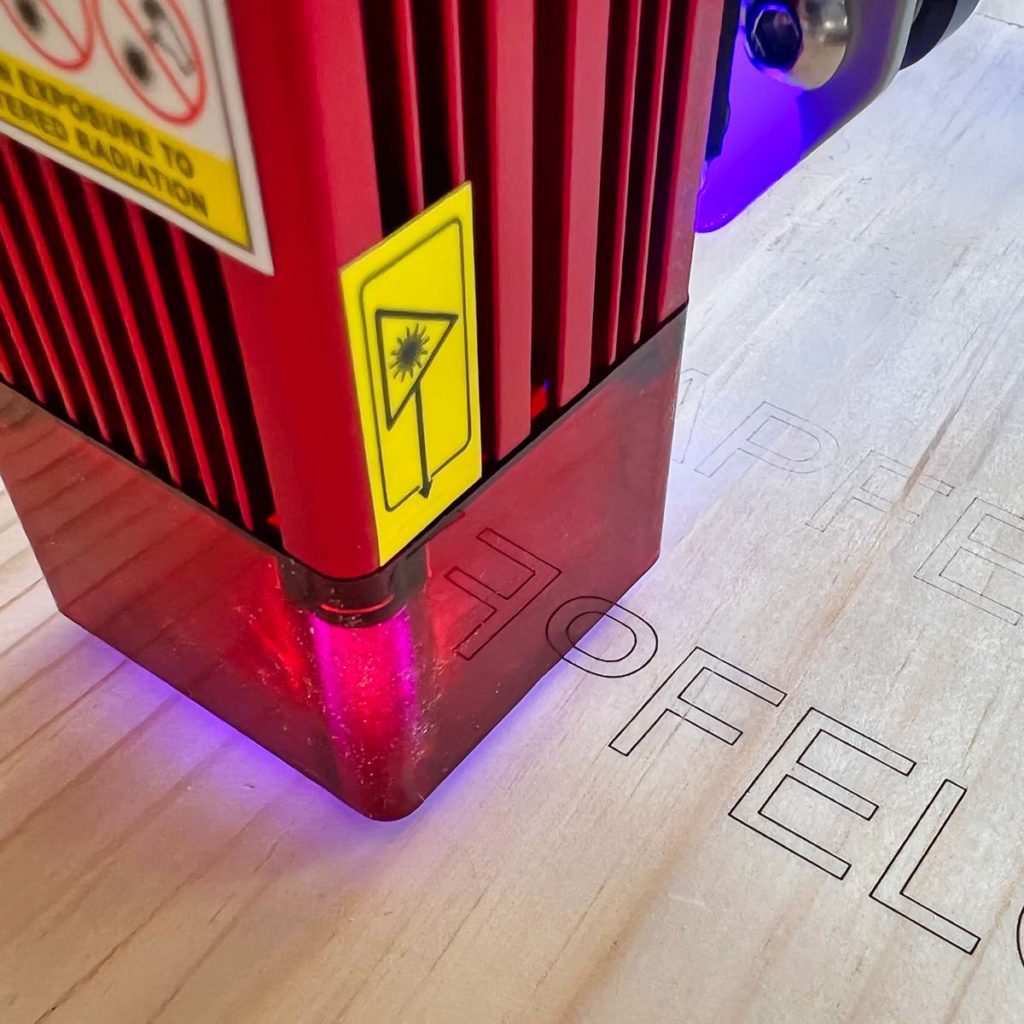
Safety features of the Ortur Aufero Laser 2 laser machine
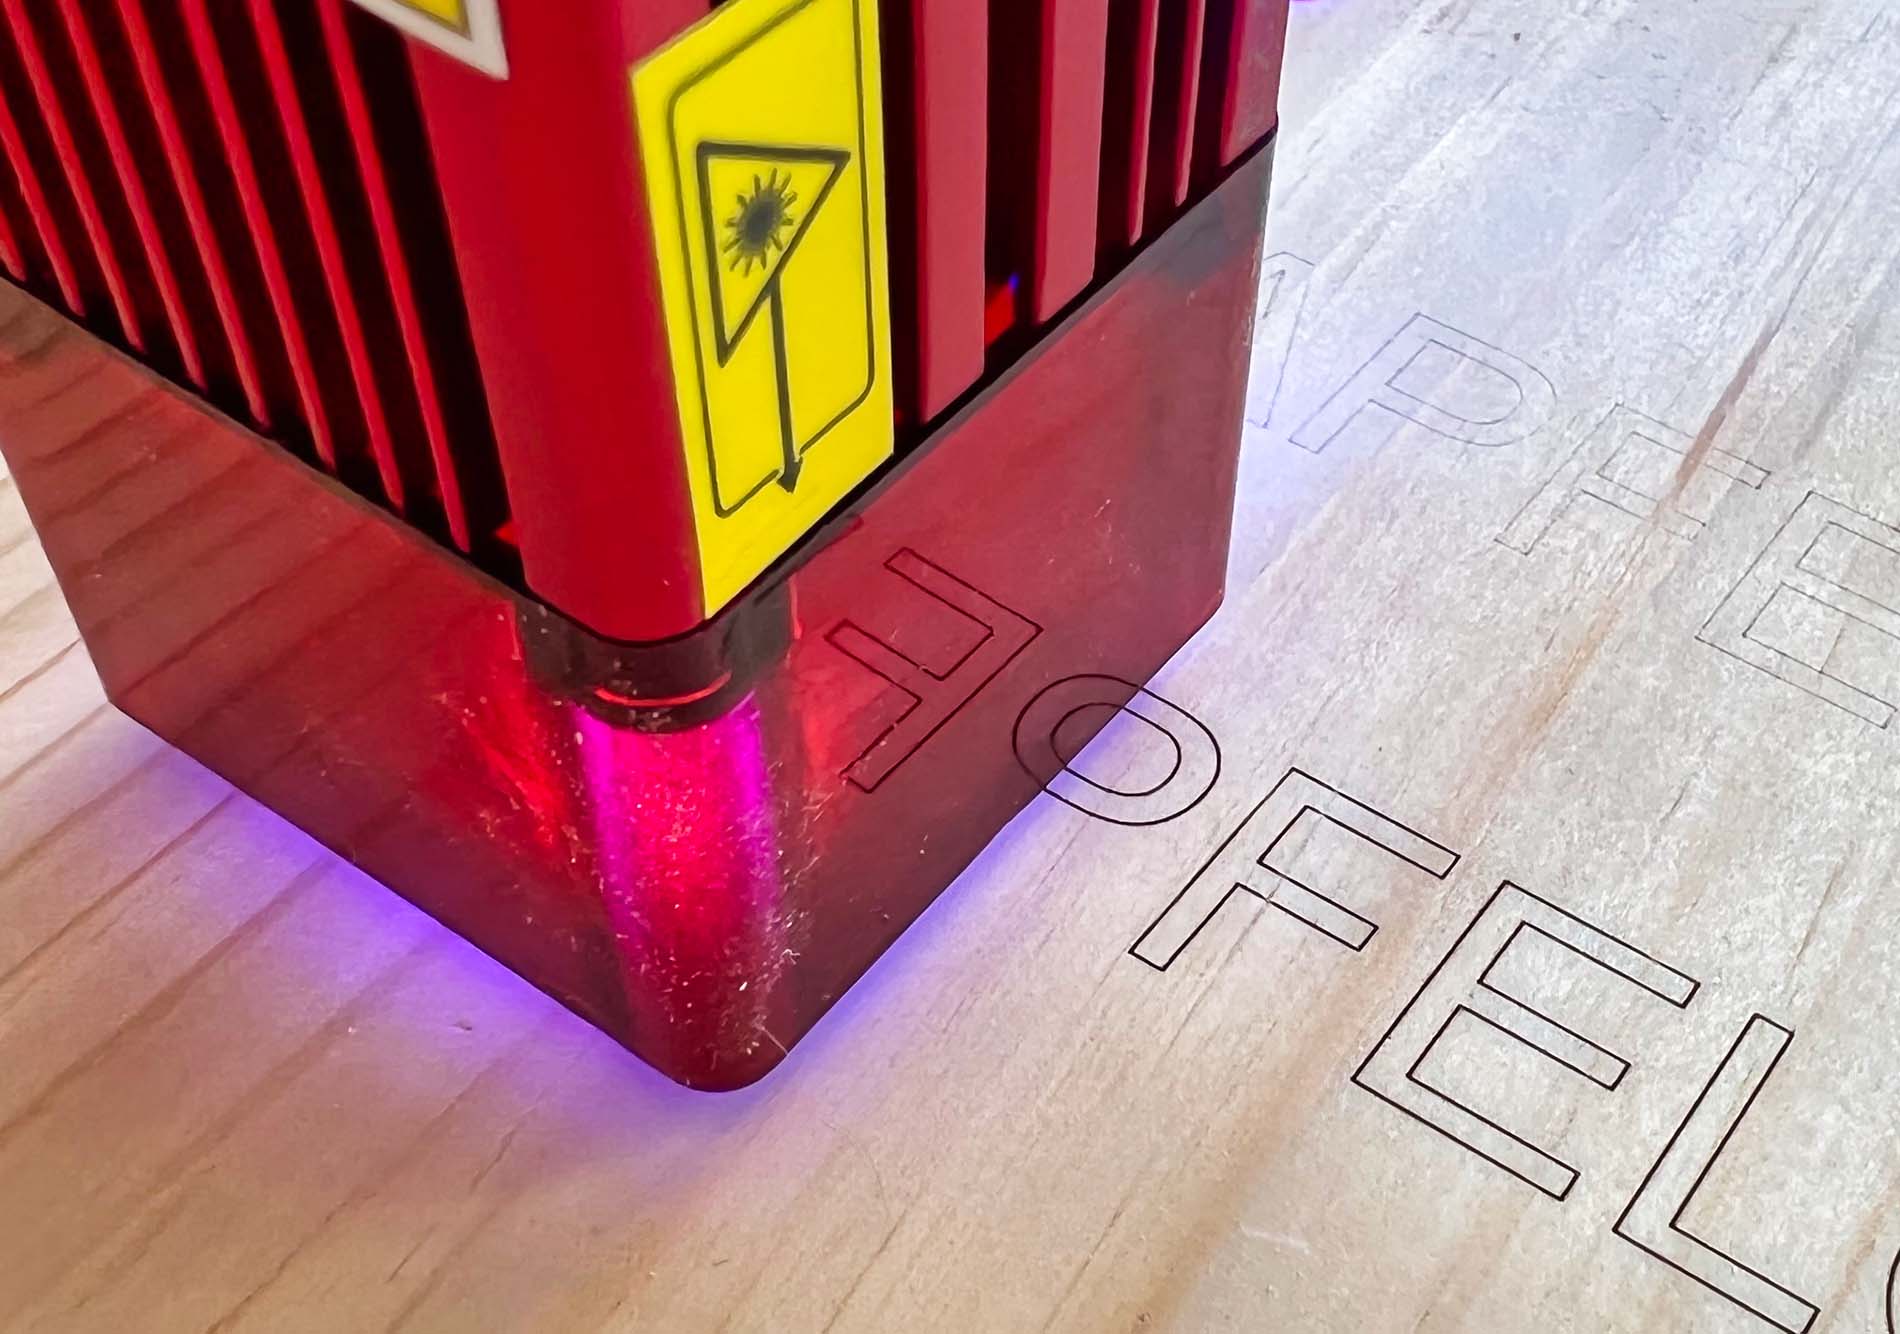
Working with a laser is not child's play, but should take place with some preparation. You have to become familiar with the software on the Mac or PC, calibrate the laser, find the right settings, always wear safety glasses(!) and of course place the device on a flat, stable surface. For safe use, the Ortur Aufero Laser 2 laser machine also has its own safety functions integrated.
For example, the engraving or cutting process will stop if the frame is moved or lifted. The same happens when the computer loses connection or crashes. If the laser does not move, it will automatically turn off to prevent burning through the material. In the event of voltage deviations (below 21 V or above 27 V), the power supply to the laser module is also cut off. So nothing goes wrong in regular operation.
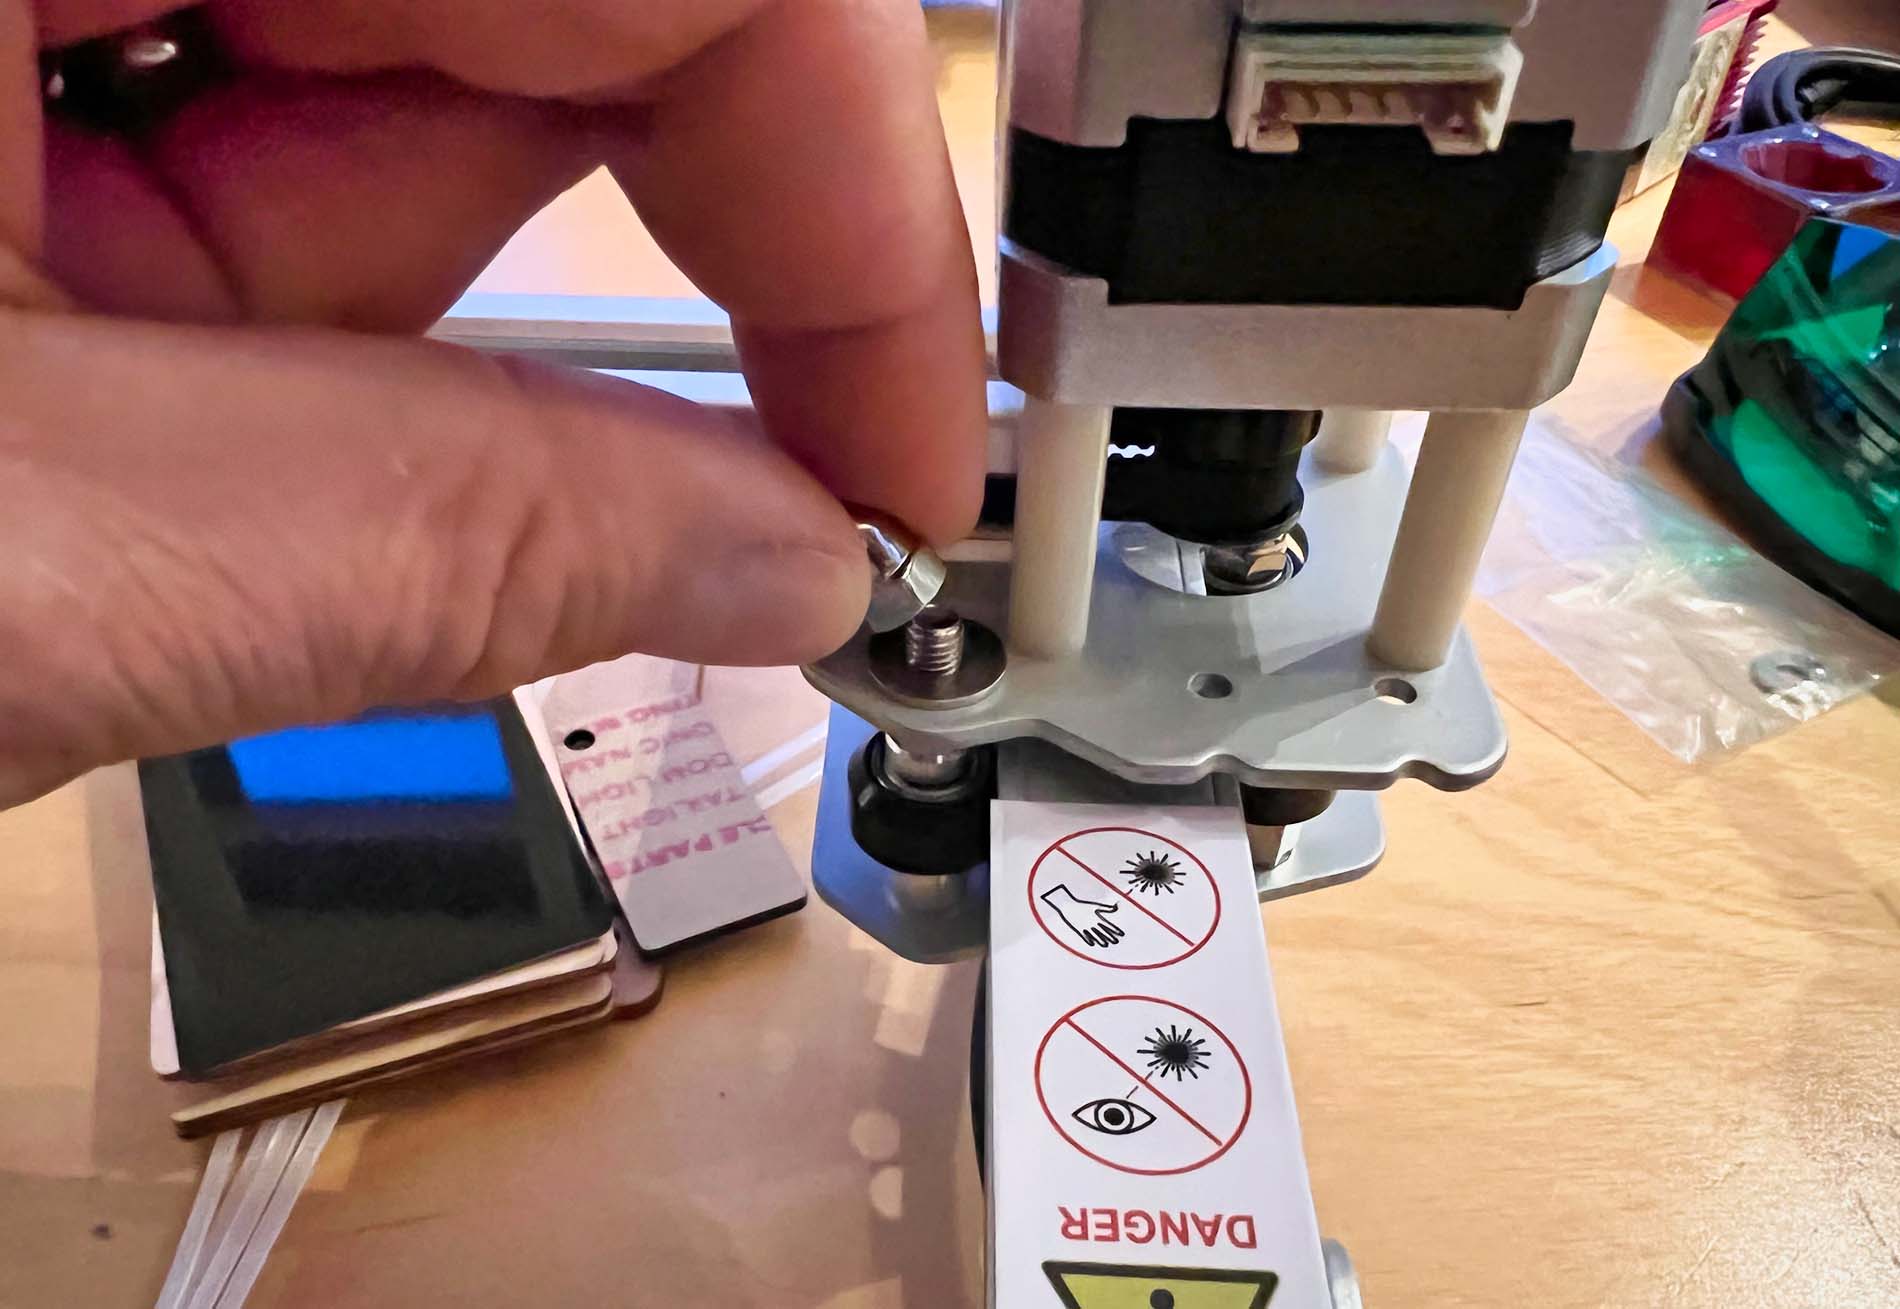
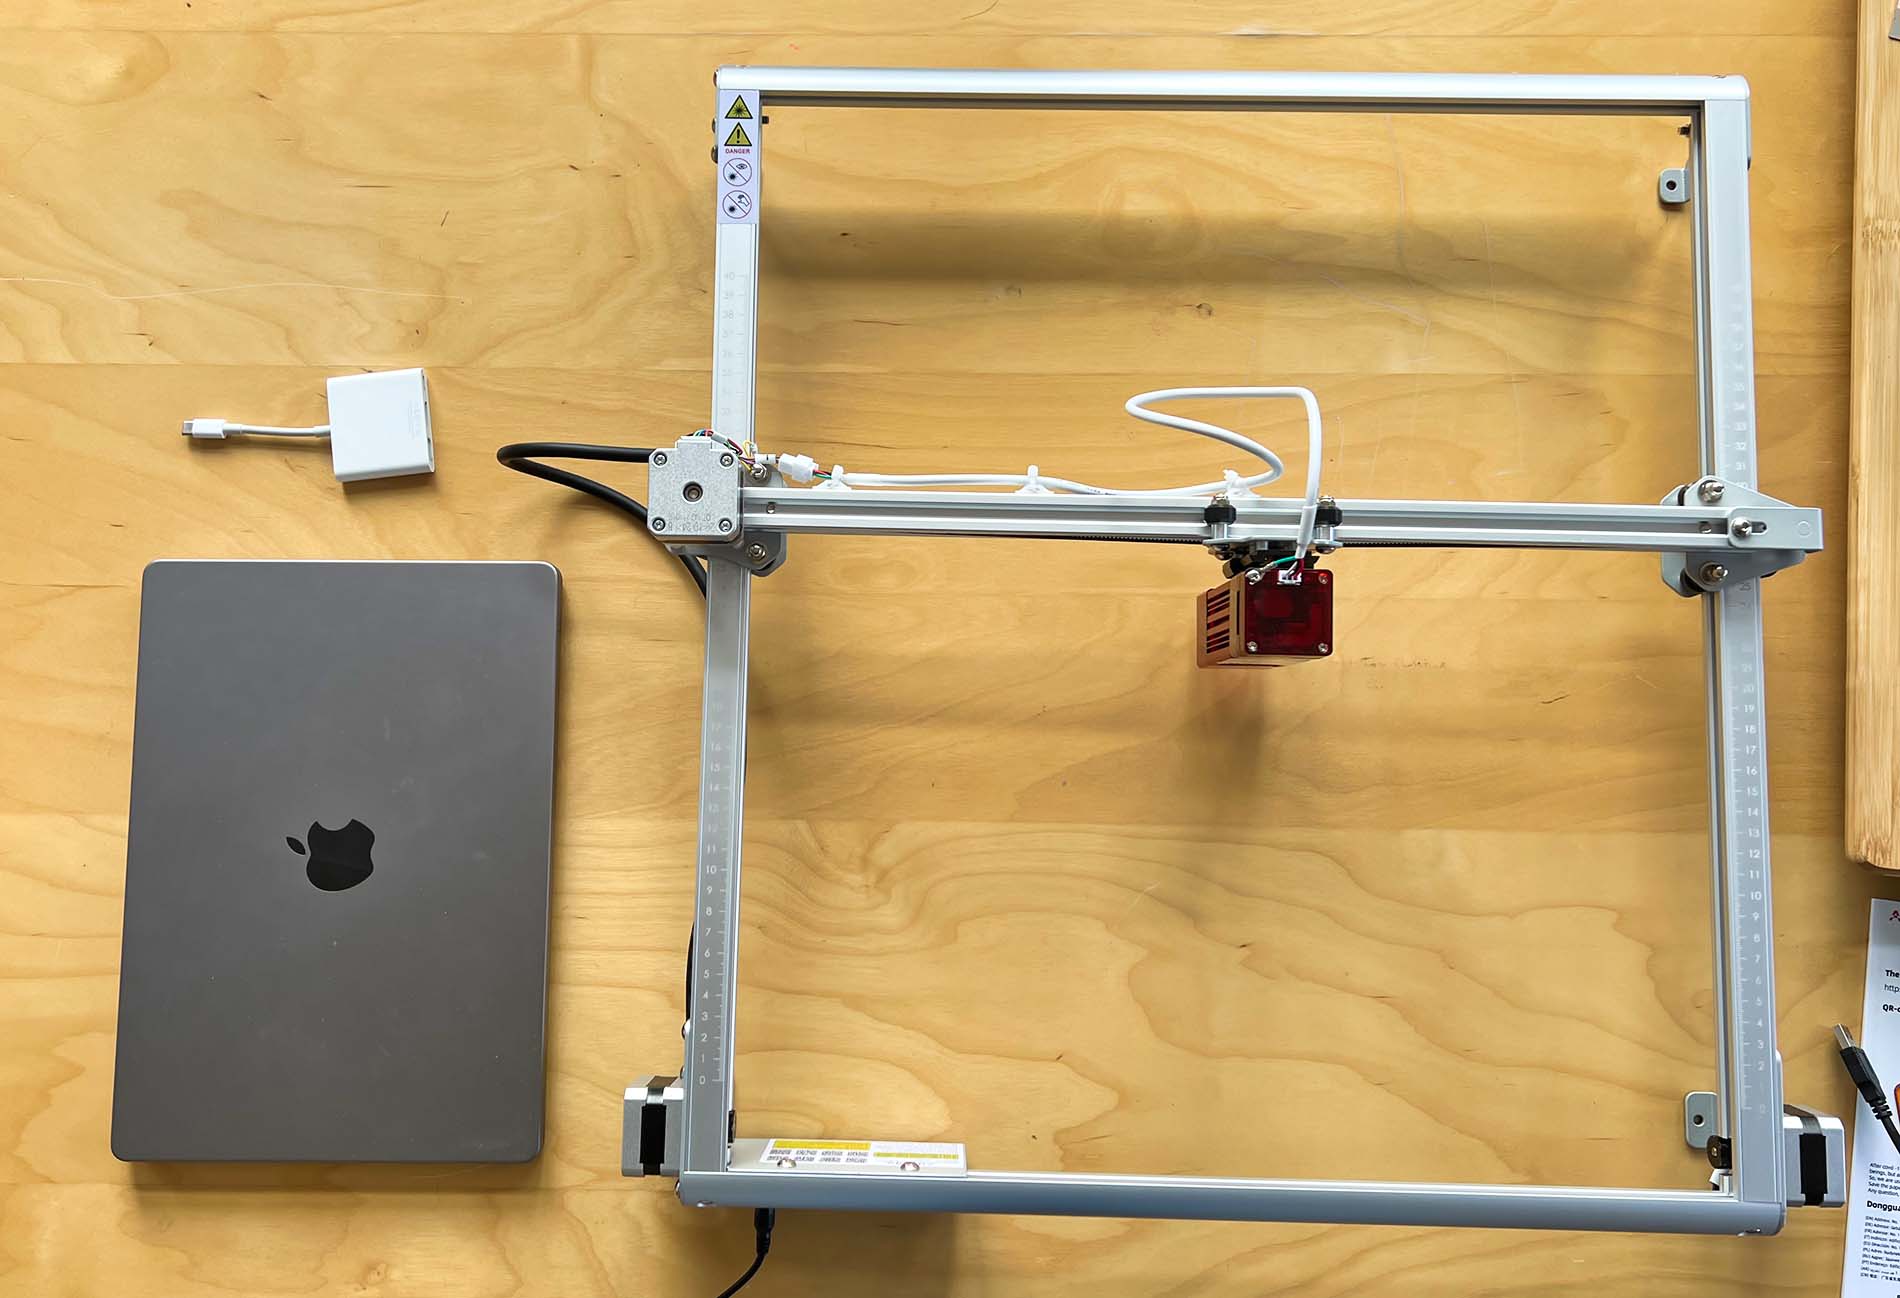
Assembly: Assemble the Ortur Aufero Laser 2
You don't have to screw the engraving machine together down to the last small component, which is an advantage. However, before use, it is necessary to assemble the individual parts of the frame using the screws and tools provided. Once the frame is complete, the rail for the laser module is placed and fixed. The wiring is fixed with the cable ties to secure everything. Finally, the laser module is installed and wired. Even for me, who has two left hands, it wasn't a problem.
Here is a video showing the whole thing in time lapse:
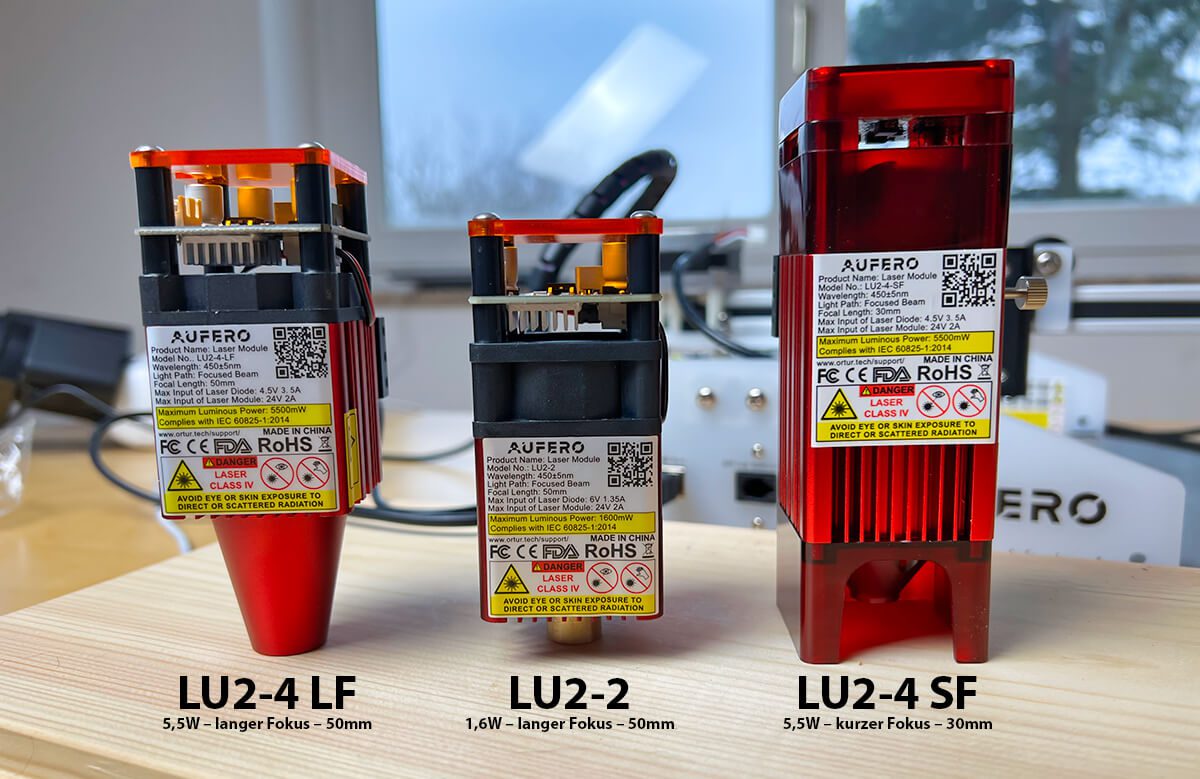
Three laser modules with special areas of application
As in the Review of the Ortur Aufero Laser 1 described, the engraving and cutting machines can be equipped with different laser modules. I don't have to reinvent the wheel here, but can list the three models again as usual. The LU2-4 SF module was included in the set:
LU2-2, 7W
- Optical Power: 1,6W
- Focal point: 0,07 x 0,06 mm
- Suitable for very fine engravings in wood, cork, stone and leather as it has the smallest focal point; less suitable for metal or for cutting work because it is too weak
LU2-4-SF, 20W
- Optical Power: 5,5W
- Focal point: 0,12 x 0,15 mm
- Suitable for fine engravings in hard materials such as metal, stone, ceramics; also suitable for cutting thin metal or up to 10 mm wood due to the optical performance
LU2-4-LF, 20W
- Optical Power: 5,5W
- Focal point: 0,17 x 0,25 mm
- Suitable for fine engravings, not very suitable for metal because the focal point is not fine enough; suitable for cutting; can be operated with Air Assist and thus ensures finer cuts
My assessment: Good further development of the predecessor
The Ortur Aufero Laser 2 laser machine for engravings and clean cuts in different materials is a good further development of the Ortur Aufero Laser 1. Since the same laser modules are used, there is not a big difference in quality in terms of images, lettering and cuts.
However, the larger frame provides two key advantages: the area that can be engraved is significantly increased and the speed can be increased due to the more stable frame. The set also includes everything you need to get started. For currently €242,89 to €332,85 (depending on the laser module), this is a good purchase for a hobbyist.
Auto-stop at the edges of the frame is missing
One thing worth mentioning is the fact that the Aufero 2 doesn't have little switches at the end of the rails like the Aufero 1 does. This means that if you send the laser head to the lower left corner, which is usually the "home position", it will go down but then not realize that it has arrived at the bottom. The result is that he keeps trying to drive down to the left and makes loud rattling noises until you stop him manually.
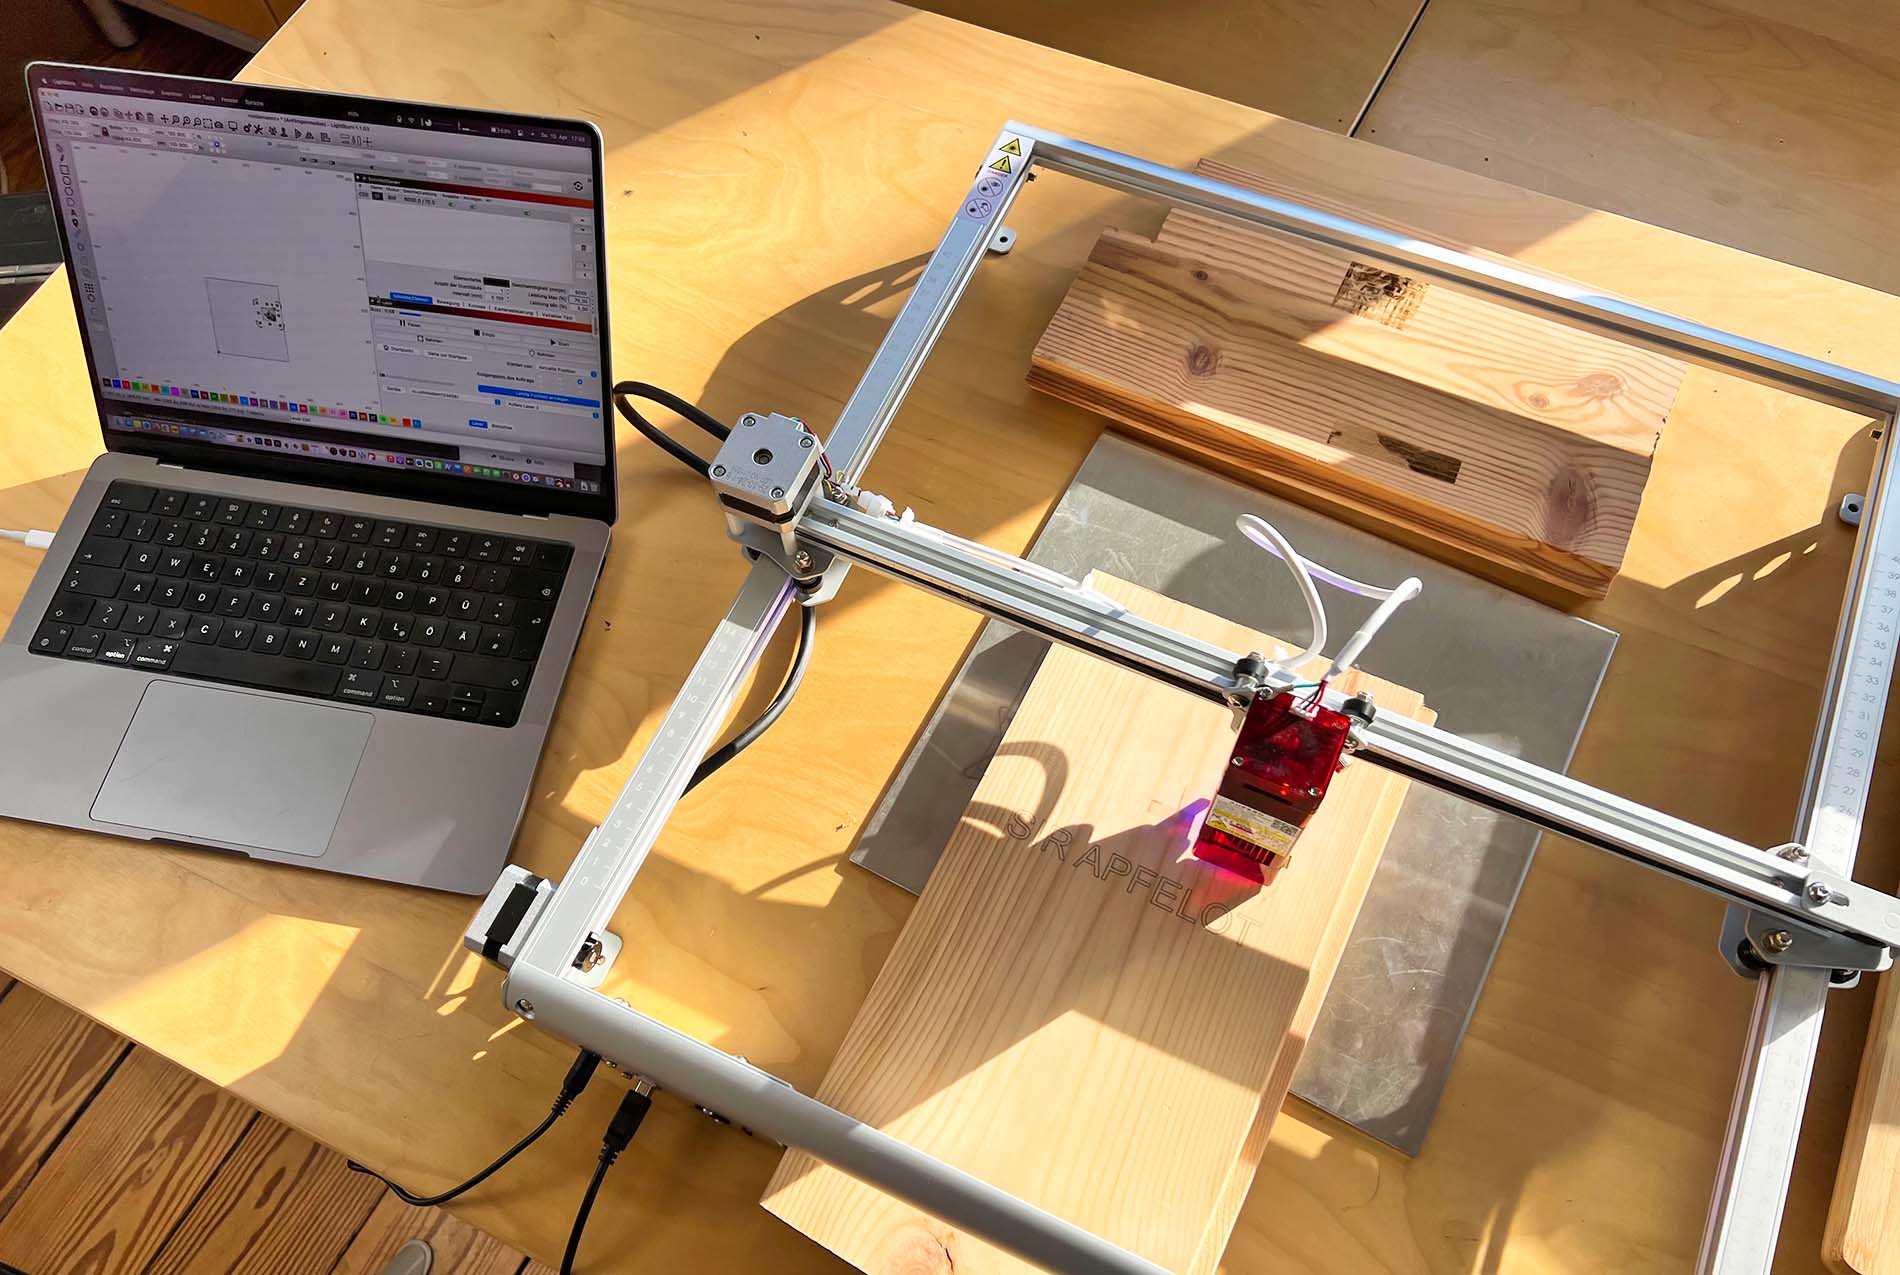
Once you know that, you can simply position it by hand where you want it to be parked. I also did the engraving by working with “relative” positions. So I placed my board in the engravable area, placed the motif in the Lightburn software and then selected the option that it simply starts where the laser head is. With the option “traverse the motif edges” you can also check whether the area to be engraved is where you expect it to be. Of course, it would have been nicer to have such switches, like on the Aufero 1.
Buy the Aufero Laser 2 in the Ortur shop
If you want to buy the Aufero Laser 2 machine, you can do so in the Ortur shop to do. Select Euro as the currency on the shop page and the abbreviation EU under "Plug Type". So you don't need an adapter to use it at home. You can also select your preferred laser module (see above) on the product page. I would recommend the LU2-4-SF as an all-rounder for beginners. You come to the shop and the options with this link.
Related Articles
 Humane Ai Pin: Test reports show weaknesses and limitations of the device
- CT scans of VR glasses: Apple Vision Pro, Meta Quest Pro and Meta Quest 3 in comparison
- In the test: Two Trees SK1 3D printer with CoreXY system
- Small smartphone in 2024: The smallest iPhone and the smallest Android
- DALL-E and Sora: OpenAI shows new AI developments
- [Update] Overview: Battery capacity (mAh & Wh) of the Apple iPad models
- Which memory card should I use for the GoPro Hero 12 / HERO12 Black?
- Fiber optic internet: Up to 4,5 million times faster thanks to E-band


![[Update] Overview: Battery capacity (mAh & Wh) of the Apple iPad models](https://a391e752.rocketcdn.me/wp-content/uploads/2024/04/ipad-battery-capacity-mah-wh-150x150.jpg)