
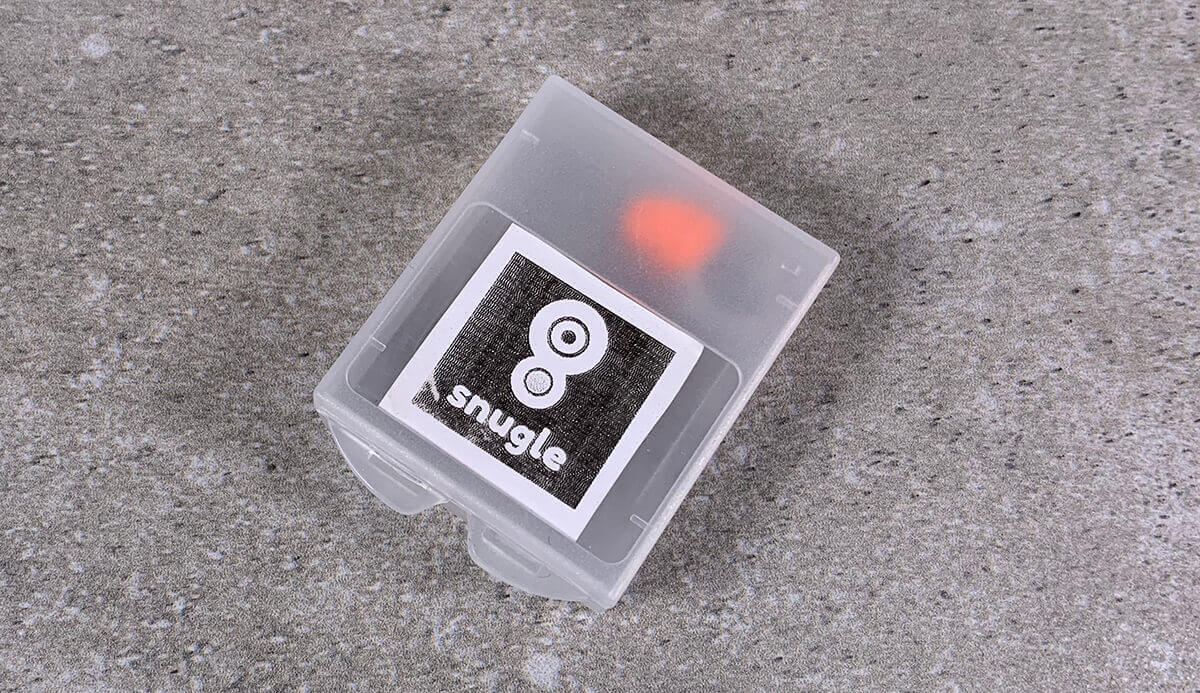
A few weeks ago I had in my Instagram profile a few likes from a user who had very nice macro photos in their profile. On the profile page I found a link to Snugle - a small macro lens for smartphones.
Since the website had a German imprint, I just wrote harmlessly to the email stored there and asked for a test copy of the lens, as I really like to take macro shots, but unfortunately currently don't have a suitable lens for the iPhone XS. After a nice e-mail answer, my first Snugle arrived a few days later - ready for the first test photos!
Chapter in this post:
- 1 Why is the Snugle Macro Lens Special?
- 2 Minimalism makes you flexible
- 3 Snugle fits with and without a case
- 4 Snugle I, II or III
- 5 Macro lens optical performance
- 6 edited macro photos taken with the Snugle I and iPhone XS
- 7 Tip: Take lots of photos!
- 8 additional lenses confuse the camera automatic
- 9 When can I buy the Snugle?
- 10 Similar posts
Why is the Snugle Macro Lens Special?
Additional lenses for the iPhone and other smartphones are now a dime a dozen. But the main problem with the lenses is that they usually only fit on a special iPhone model, as the position of the camera lens on the iPhone changes almost every year and two lenses have been installed for several generations. We'll probably even find three lenses in the upcoming 2019 iPhone.
As a result, you can actually buy a new set of additional lenses with every iPhone, because the attachment of the smartphone lenses is usually tailored to a specific iPhone model and is no longer compatible with the new device.
Minimalism makes you flexible
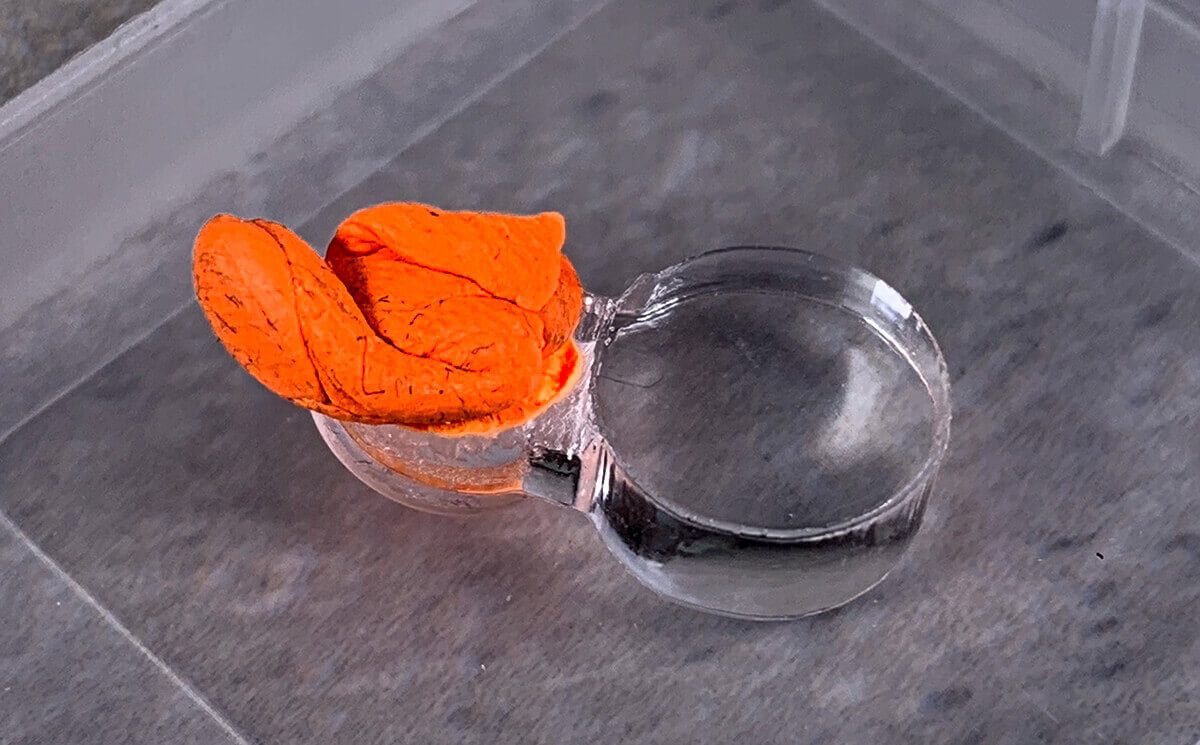
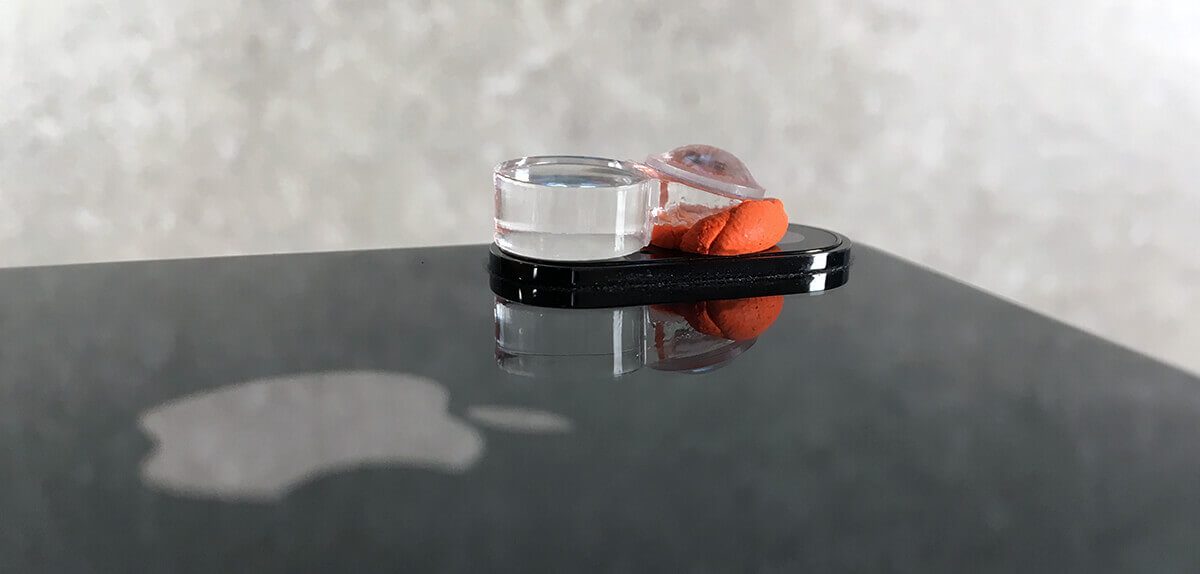
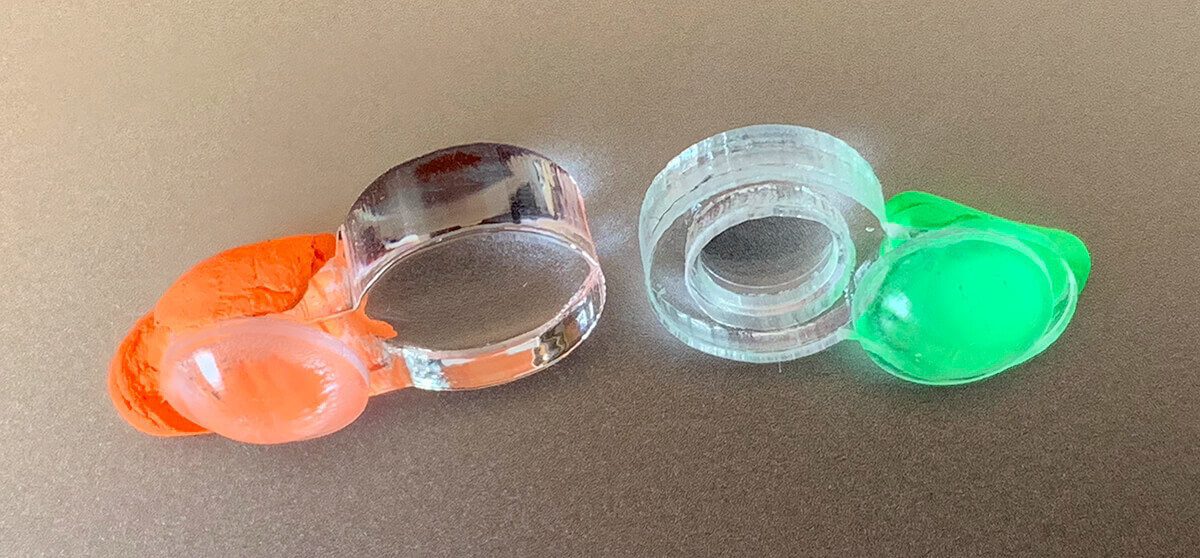
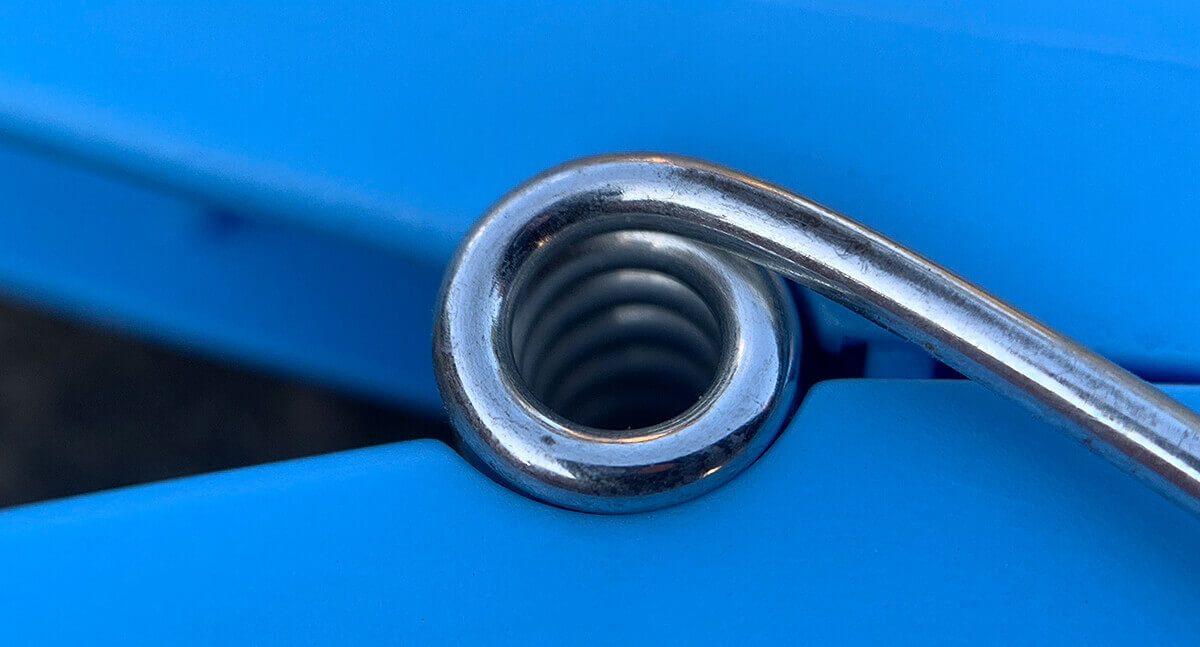
The makers of the Snugle Macro Lens are taking a refreshingly uncomplicated and innovative approach: Instead of rigid mounts, there is a small blob of adhesive dough with which the Snugle lens can be attached not only to any iPhone model, but even to any smartphone leaves. In my photos you can see how to get from the clay lump to the attached lens.
Snugle fits with and without a case
The use of my iPhone case has also always been critical in the past, because most additional lenses for the iPhone either come with their own case or are designed in such a way that they wrap directly around an edge of the Apple smartphone. If you have a favorite cover, you can actually assume that it is guaranteed to be incompatible with the lens system.
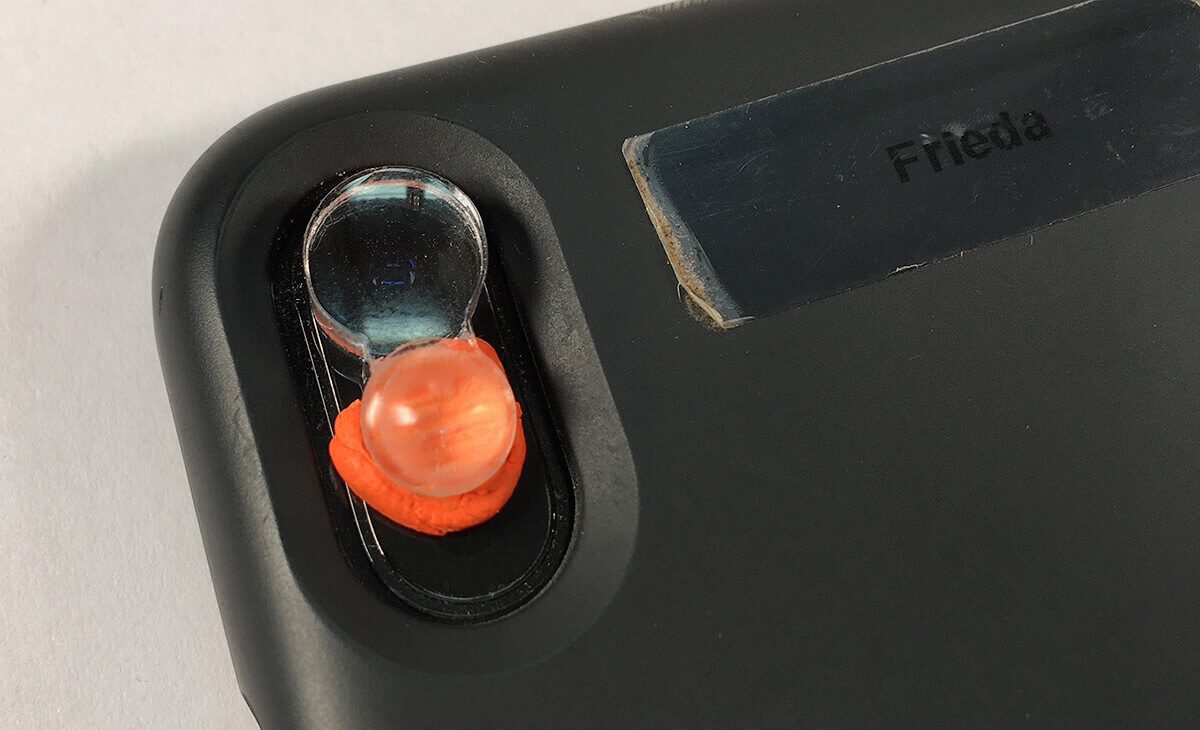
Due to the unconventional attachment with a small lump of clay and thanks to its small design, the Snugle lens can be used with any iPhone protective case - or even without a case.
Snugle I, II or III
Currently there are only the models Snugle I and Snugle II, which have a quasi-light and a medium magnification factor. The Snugle III model is planned with a special holder, as it has the greatest magnification and accordingly it is easy to shake and there is a greater risk that the lens will not be placed completely centered.
For my test, I received the advance versions of Snugle I and II and was able to take photos with them. I hope to receive the Snugle III for another test when it becomes available. The recordings shown below were all taken with the Snugle I. I will soon take a few more photos with the Snugle II and then present them in a separate post, as this one has already grown a bit because of the Snugle I photos.
Macro lens optical performance
When using the Snugle lens, it is particularly important that you place it directly over the existing camera lens and center it properly. If you are "off the mark" here, you will get blurry and distorted areas in the image that you do not want. The kneading attachment not only has advantages, but there are also many additional lenses that are attached to the iPhone with a clip and also do not center themselves automatically. So these models have the same problem.
Once the macro lens has been attached to the iPhone, you can take photos. Accessories like that Photo ball you can safely leave it at home, because the lens is primarily intended for close-ups and - like all macro lenses - does not bring much Depth of field into the picture. A smartphone lens that is inherently faint is not necessarily an advantage.
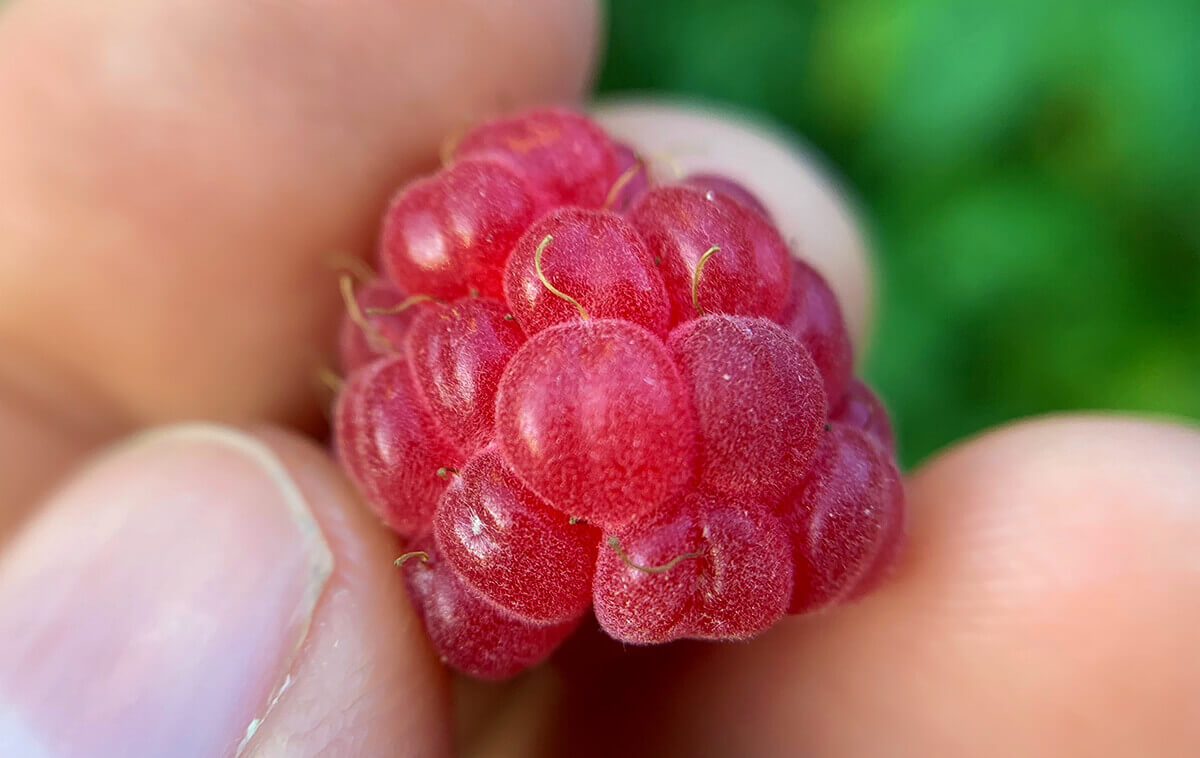
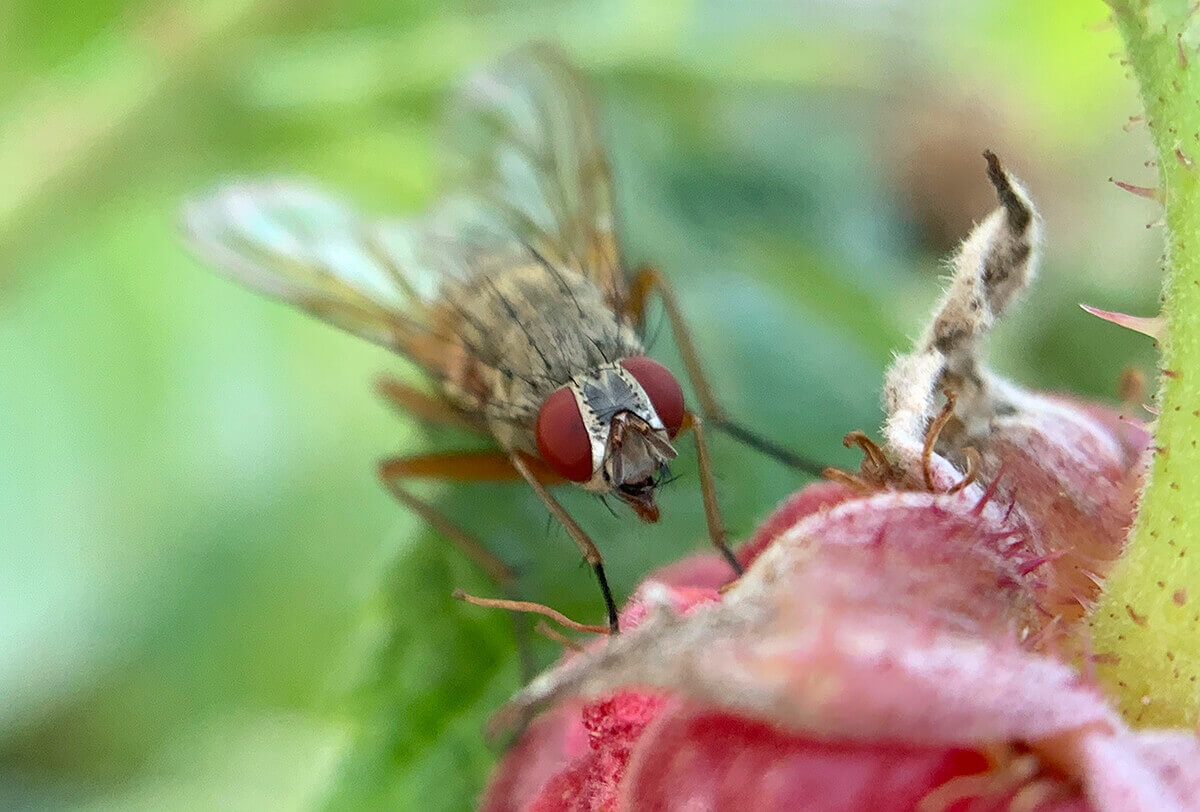
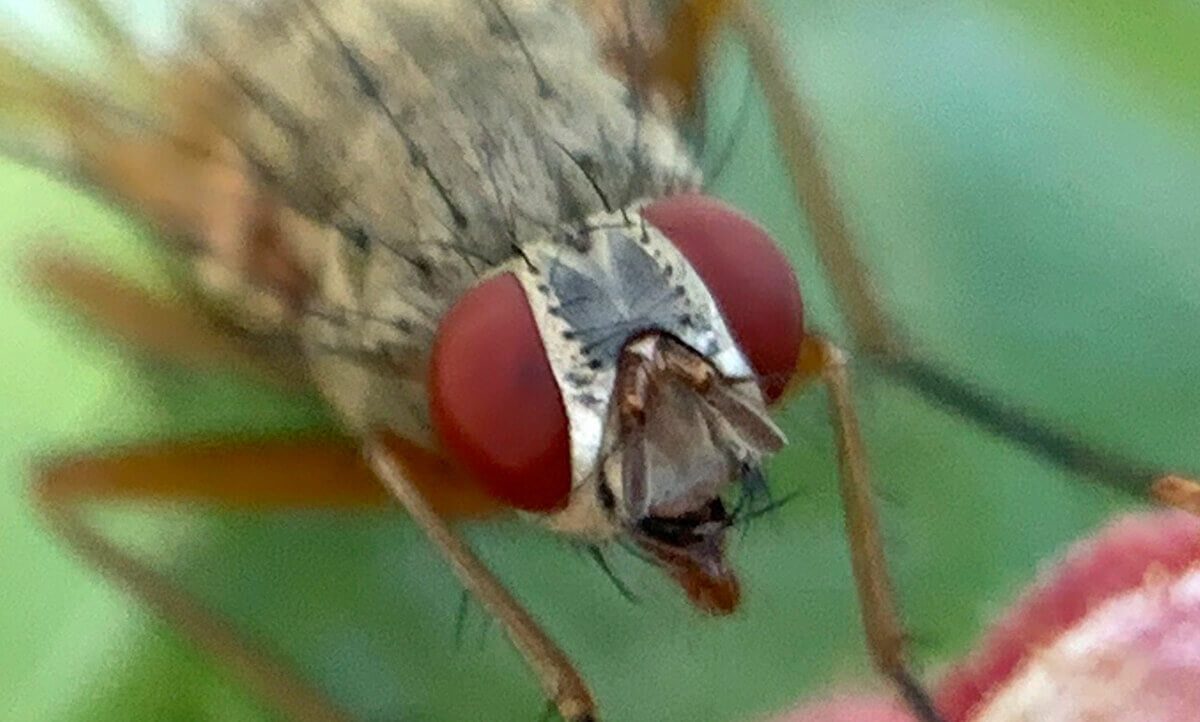
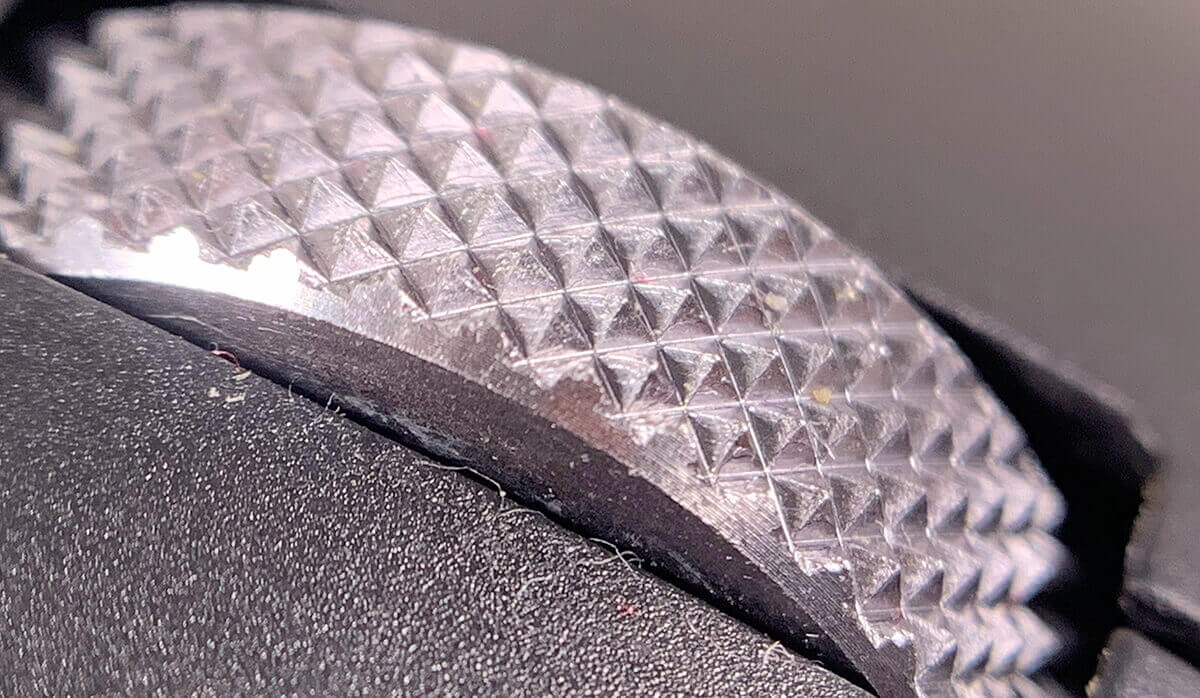
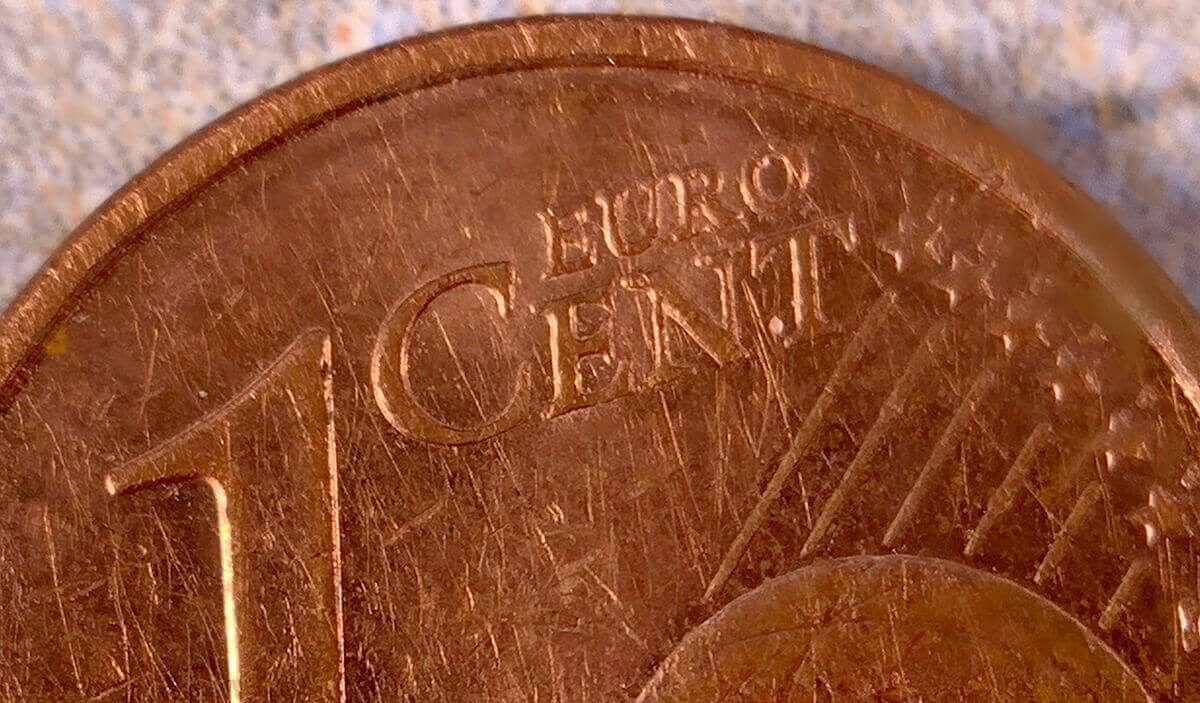
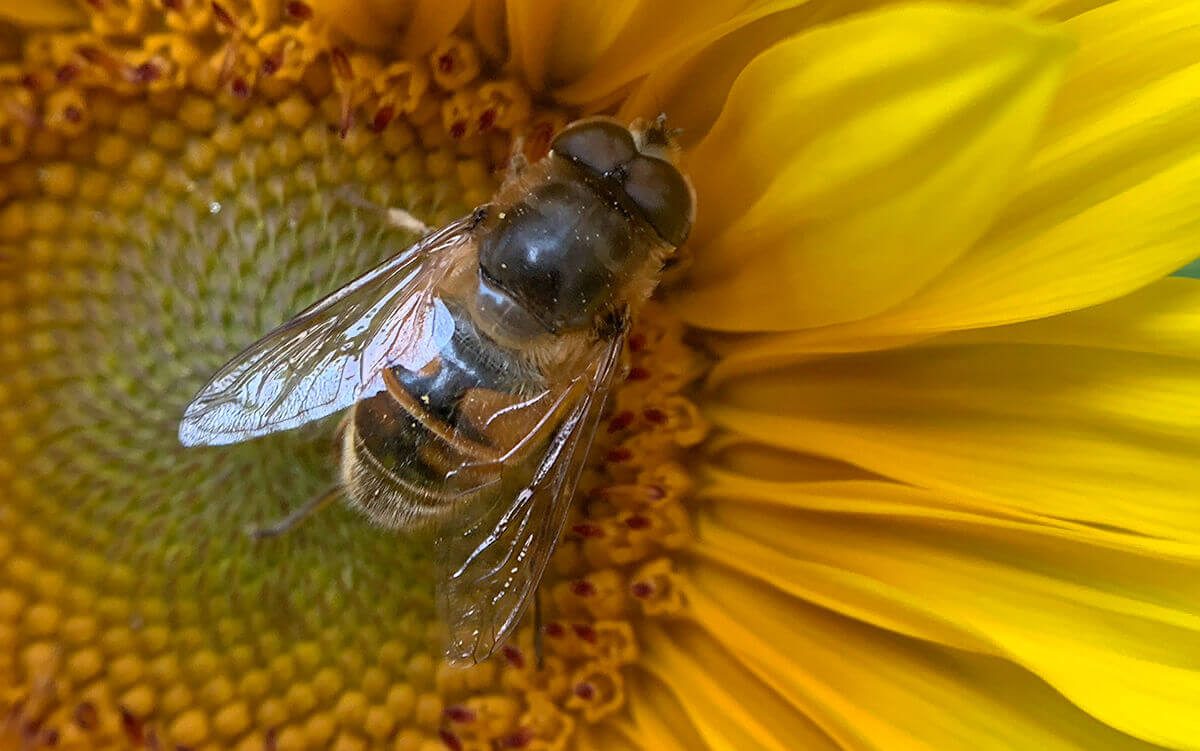
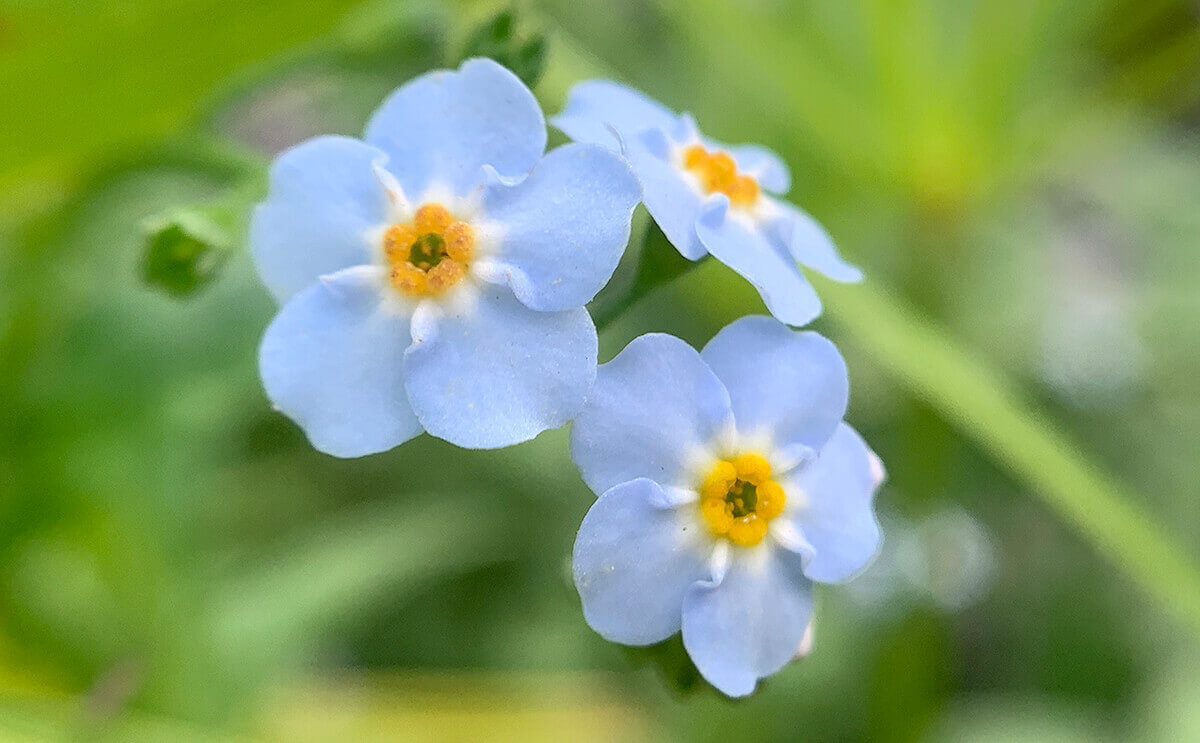
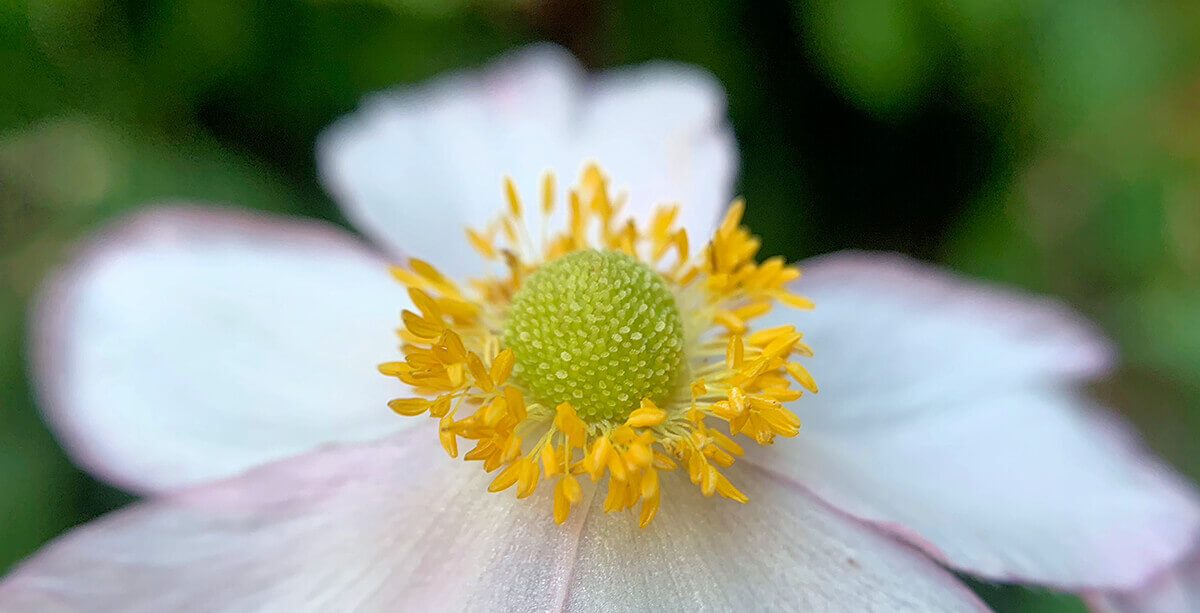
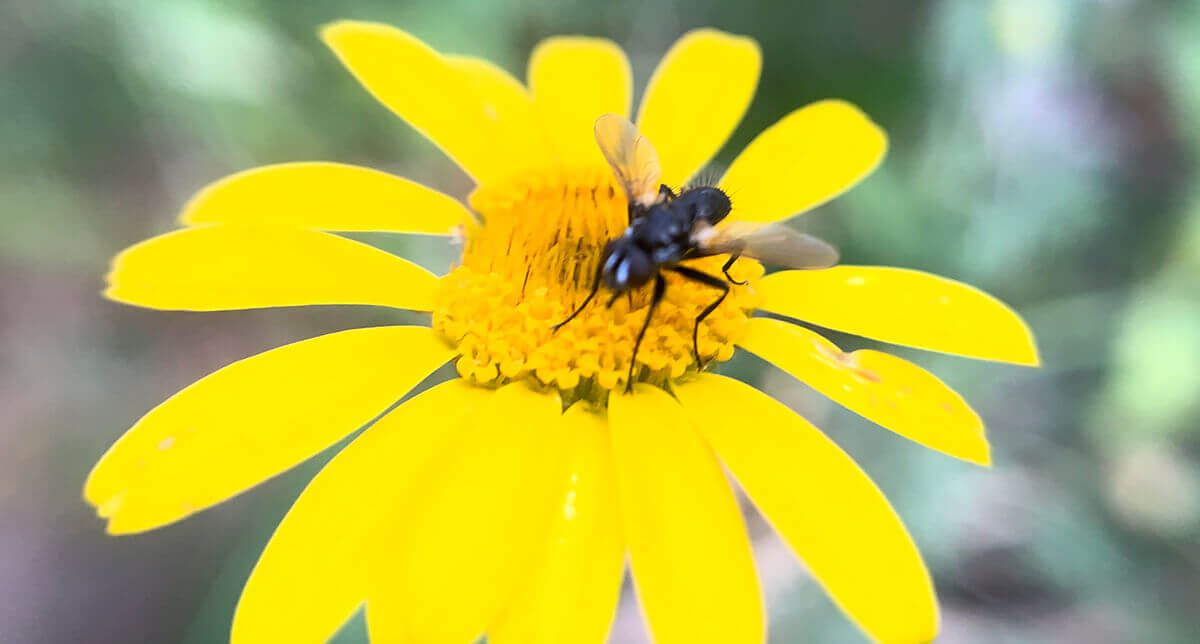
Edited macro photos taken with the Snugle I and iPhone XS
But here are a few recordings that I was able to take with the Snugle and which I feel are quite appealing. I edited all of the photos slightly - that is, cropped them and made slight corrections to color, contrast and the like.


Tip: take lots of photos!
My tip, which by the way applies to all additional lens systems for the iPhone: Better take a few more pictures, because the sharpness is often wrong, the automatic white balance is wrong or you have a wrong image section. The more photos you have to choose from, the higher the probability that there will be a good one with everything right.
Incidentally, when using such lenses, the sharpness is no longer set by tapping the lens on the display, but the distance between the iPhone camera and the photo subject is varied. Since you only have a shallow depth of field available, you have to keep an eye on the display and pull the trigger at the right moment, because with flowers in a light wind or with bees running in sunflowers, you miss the right focus pretty quickly - I speak from experience.
Additional lenses confuse the camera's automatic system
Another problem is the automatic operation of the iPhone camera. This is often irritated by additional lenses, which you notice when you snap it that the colors, the exposure or the contrast become strange. In my case, for example, the 1x lens on the iPhone XS threw out pretty confused colors while the 2x telephoto lens on the iPhone XS worked very well.
When can I buy the Snugle?
Unfortunately, you have to be patient until the three Snugle models are available in stores. The plan is that in October / November 2019 the first models in our own webshop at LilScope.com can be found. Later on, the Snugles can also be ordered from Amazon. I will then add that here accordingly.

Related Articles
 XQD memory cards and card readers at a glance
- TSE memory cards for cash register systems – information and selection
- Amazon scam: Sony FE 24mm F1.4 GM – cheaper new than used
- Google Image Search: Search for exact size or display “larger than” images
- Why the iPhone charging cable gets hot, smokes and melts...
- iOS 17.2 installation strongly recommended due to 11 serious security vulnerabilities
- iPhone display too big and zoomed in? This is how you solve the problem!
- In the test: vegan MacBook Pro case made from old plastic bottles


Jens has been running the blog since 2012. He acts as Sir Apfelot for his readers and helps them with technical problems. In his spare time he rides electric unicycles, takes photos (preferably with the iPhone, of course), climbs around in the Hessian mountains or hikes with the family. His articles deal with Apple products, news from the world of drones or solutions to current bugs.