A while ago, version 1 of Photolemur made a few waves because it was able to convince with surprisingly good results. Now the developers have me (and a few other beta testers) before the sales start (April 18.4.2017, XNUMX) of Photolemur 2 provided a preliminary version so that I or we can put it through its paces. And that's exactly what I've been doing for the past few hours with the Mac version of Photolemur and a good swing of my photo library. My test result is very positive, but I would like to give you some examples and some additional information App bring closer.
Chapter in this post:
- 1 update: Photolemur version 3.0 - currently 35% discount (presale)
- 2 What is Photolemur anyway?
- 3 Operation: One button app - simple!
- 4 Why Photolemur and not Lightroom or Photoshop?
- 5 advantages for professionals too
- 6 Good Photo Tool For Bloggers
- 7 Most important: the results
- 8 Realistic References on Photolemur.com
- 9 My sample photos and the corresponding results
- 10 What does Photolemur do in detail?
- 11 The disadvantages: computing time, slightly too high color saturation and subscription model
- 12 20 to 30 seconds of computing time per image
- 13 Somewhat bold colors and lack of setting options
- 14 Monetization subscription model
- 15 My conclusion on Photolemur
- 16 Similar posts
Update: Photolemur version 3.0 - currently 35% discount (presale)
As part of the major update to the new version 3.0, there is currently a pre-order discount at Skylum. If you want to buy it, you will find it here the offer page. Otherwise I can still meet you my test of the current 3 version I recommend it, in which you can also see many sample photos with a before-and-after effect. This post is a bit older, but it also shows quite well how the software works. So you can also read both posts, as they have different information ready for you.
► Buy Photolemur 3: here at the developer Skylum ◄
What is Photolemur anyway?
The Photolemur 2 software is an app that runs on Windows and macOS. Photolemur's slogan:
Make any picture as vivid as your memories with the help of Computer Science and Artificial Intelligence in one click.
The function of the software is therefore an image improvement of photos WITHOUT having to deal with contrast, tonal value correction, white balance and sharpening yourself. It's kind of the automatic function to improve a bunch of photos without the user having to do anything about it. And all this with the help of “computer science and artificial intelligence”.
One might think that Photolemur would take a few standard steps to "enhance" a photo. For example, more contrast, more saturation, more dynamics and then another round of sharpening, but in practice it does a lot more, because it also analyzes photos according to their content and specifically optimizes certain areas with certain actions. So it doesn't just do things that always affect the entire photo or that would happen without considering the existing content and color values.
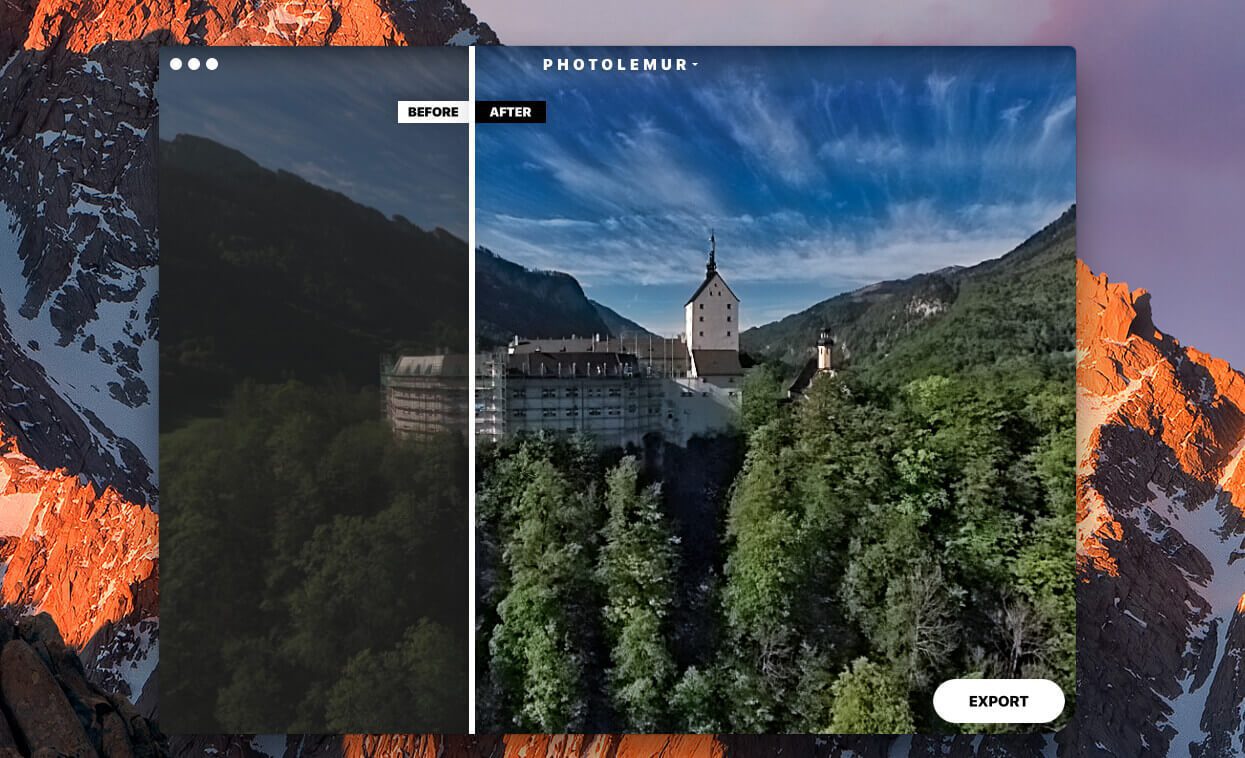
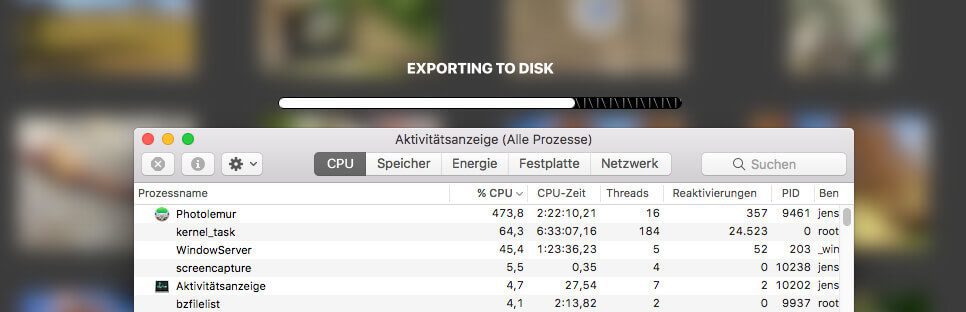
I am very enthusiastic about the operating concept, because the Mac app offers a window into which you can either drag a photo or a whole bundle of photos. Photolemur then starts optimizing the photos and shows funny vector graphics in motion during this time, which should sweeten the waiting time.

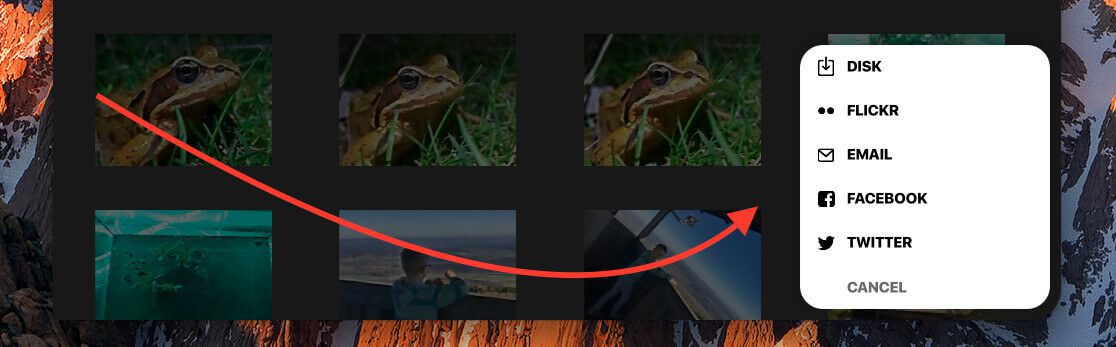
If you drag several photos onto Photolemur, they will be displayed in a small overview, still unedited. You can then click on any photo and use the spacebar to start optimizing the photo in order to edit individual photos. If you want to have everything optimized in one go, click on “EXPORT PHOTOS” at the bottom right and then you have various social media portals, e-mail and disk available. “Disk” is of course the option to choose if you want to save photos to hard drive. ;)
In the menu you will only find the item “Install Plugins”, which did not have any function in my previous version. In the final version, however, it enables the installation of Photolemur under "Adobe Lightroom" and "Apple Photos", so that you can also use the 1-click improvement of Photolemur directly in these programs.
I'm still pondering whether you shouldn't also be given the option of making a few settings, for example to change the intensity of Photolemur in some photos, but that would of course somehow contradict the concept of the software that you can use drag and Dropping hundreds of photos in one fell swoop can optimize.
Why Photolemur and not Lightroom or Photoshop?
I had this question first in my head, because with the Adobe CC subscription I have professional software at my disposal that offers an extremely wide range of options for improving my photos. And yes: I can do all of the optimizations with Lightroom, but I definitely won't get it done that quickly. For this reason I would rather assign Photolemur to the private sector.
Anyone who works professionally with photos usually takes the time to get the most out of each individual photo. It is questionable whether Photolemur can "come up" against one's own taste. Photolemur offers an all-round improvement with no adjustment options. So if you want to get a certain style, you still have to resort to Photoshop and Lightroom.
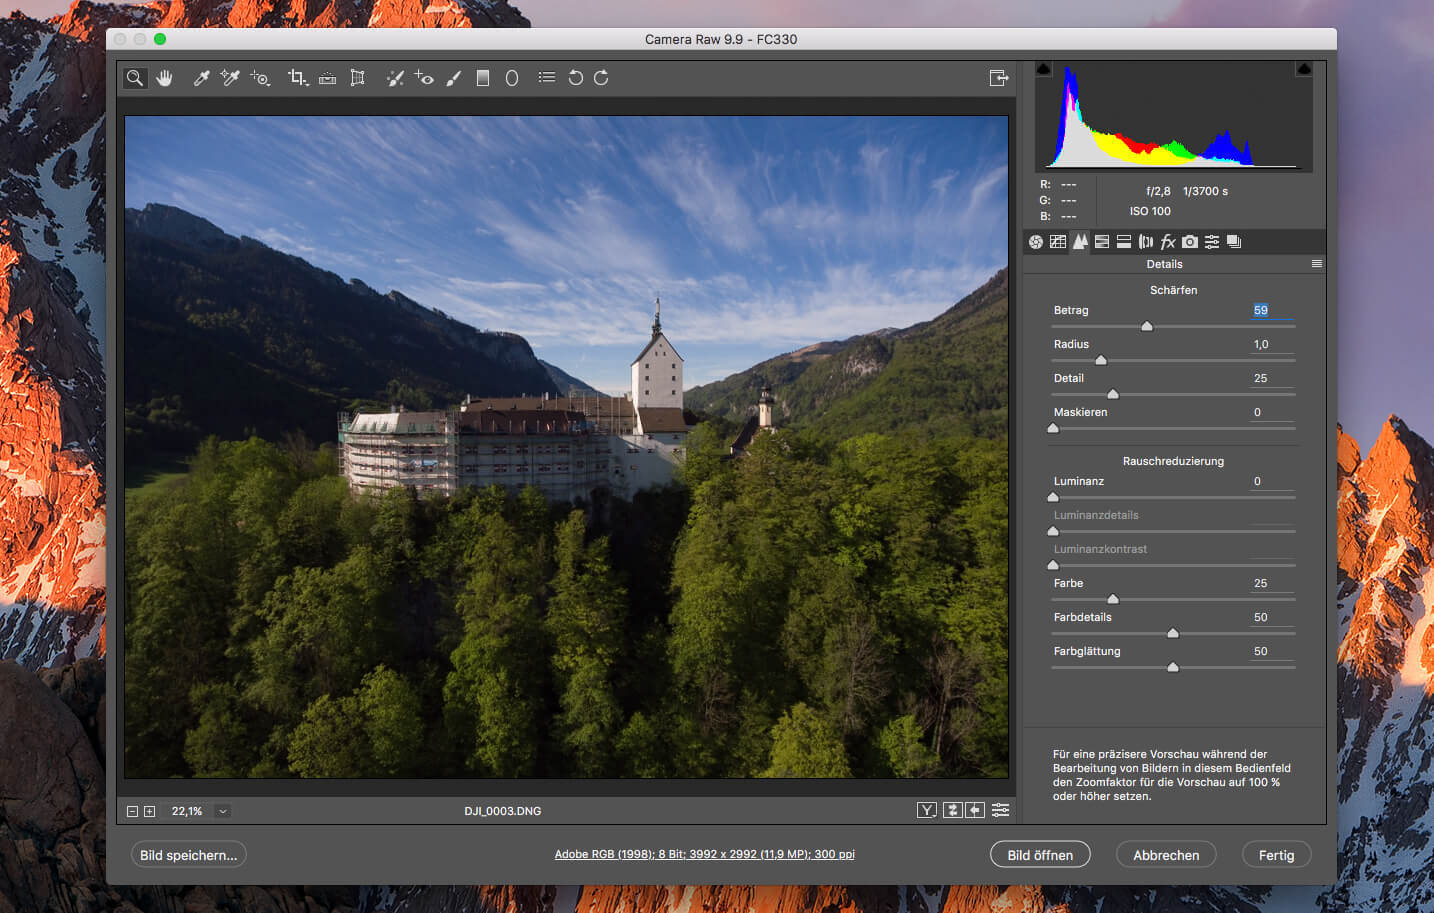
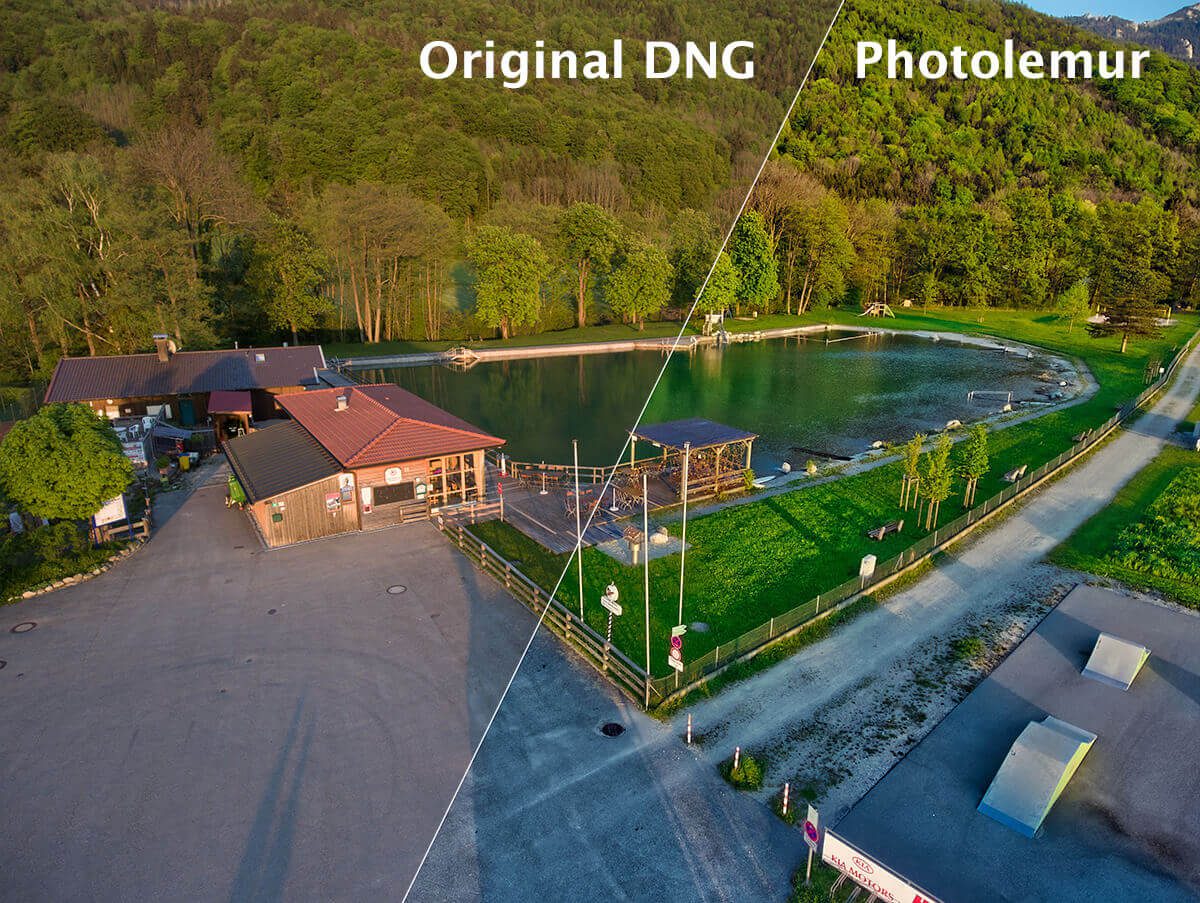
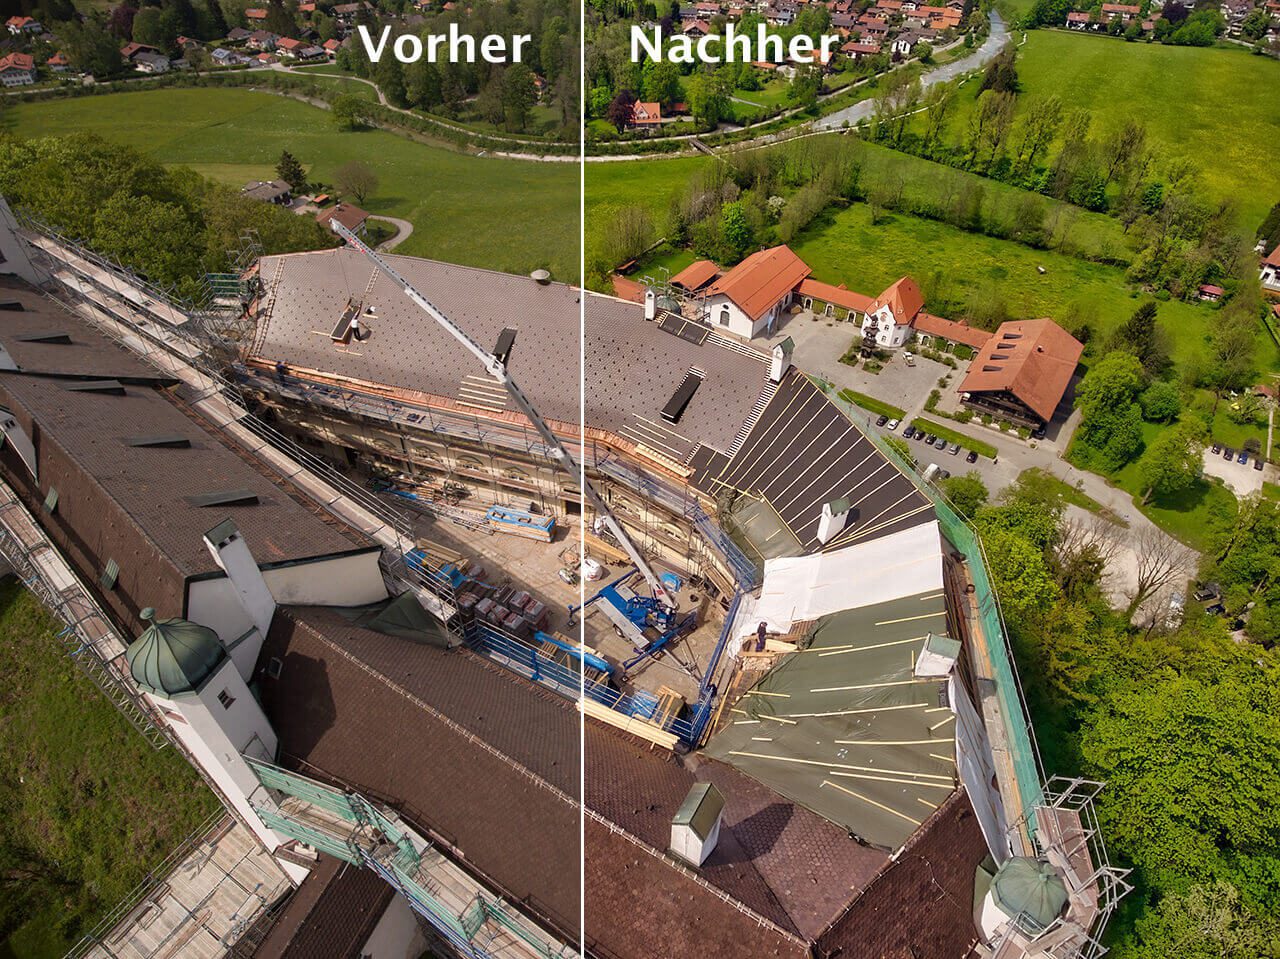
This is what Photolemur shows after 20 seconds of analyzing and editing the DNG file:
The photo was taken as a RAW file with a DJI Phantom 4 drone and shows Hohenaschau Castle. Here is another photo that was also available as DNG:

Advantages for professionals too
Even if I don't believe that a portrait photographer will use Photolemur, I generally see potential for the software in professional photographers. The reason: You can also have RAW files revised in the app and with the software you get a good revision of a large number of photos of different types relatively quickly.
In Lightroom you can copy optimization steps from one photo to other photos, but then you have copied exactly the same changes to all photos. For example, if you have photographed the same motif 20 times, then that can make sense, but with a folder with many vacation photos you usually have a lot of different motifs, which also require very different processing steps. And this is exactly where Photolemur scores from my point of view: You can have a lot of photos individually improved reasonably quickly. These can then be sent to the customer for viewing and they may then choose the photos that can be improved more specifically with Lightroom.
Good photo tool for bloggers
In my opinion, another target group for Photolemur are bloggers who do not have the time and muse to edit every single photo for a blog post by hand. If you do a product test and have taken 10 to 20 photos, you can throw them in Photolemur and after 15-20 minutes at the latest you have nicely processed photos that you only have to crop and perhaps save optimized for the Internet. A time saver that I like to pay for with money.
The most important thing: the results
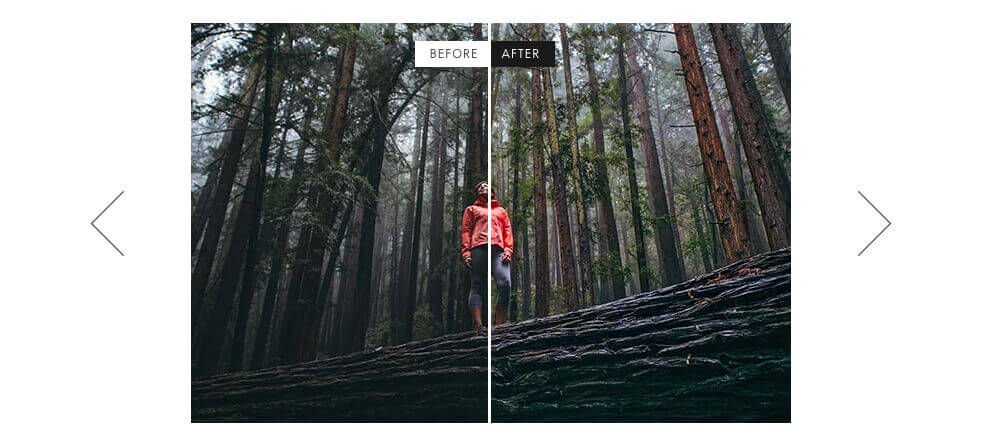
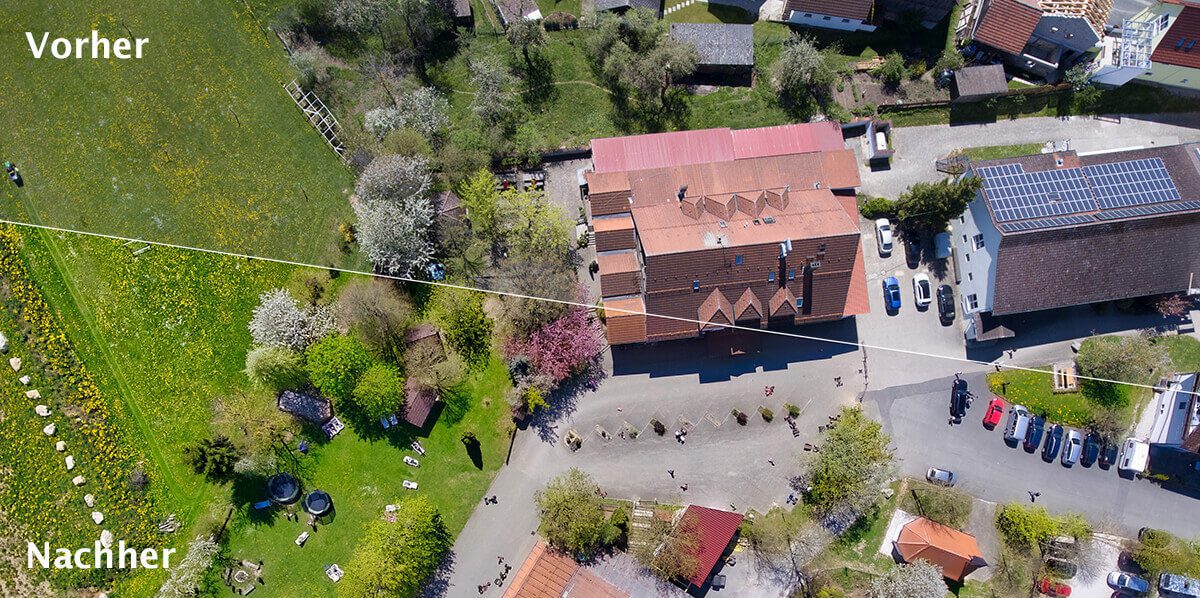
The Photolemur software makes it easy for you to make a before-and-after comparison. If you only open one photo, the image is displayed in a window immediately after the revision, in which you can switch between the original photo and the revised photo with the help of a movable slider. In this way you can see very clearly what the differences are. Incidentally, such sliders can also be found on the Photolemur website to view the results.
Realistic references on Photolemur.com
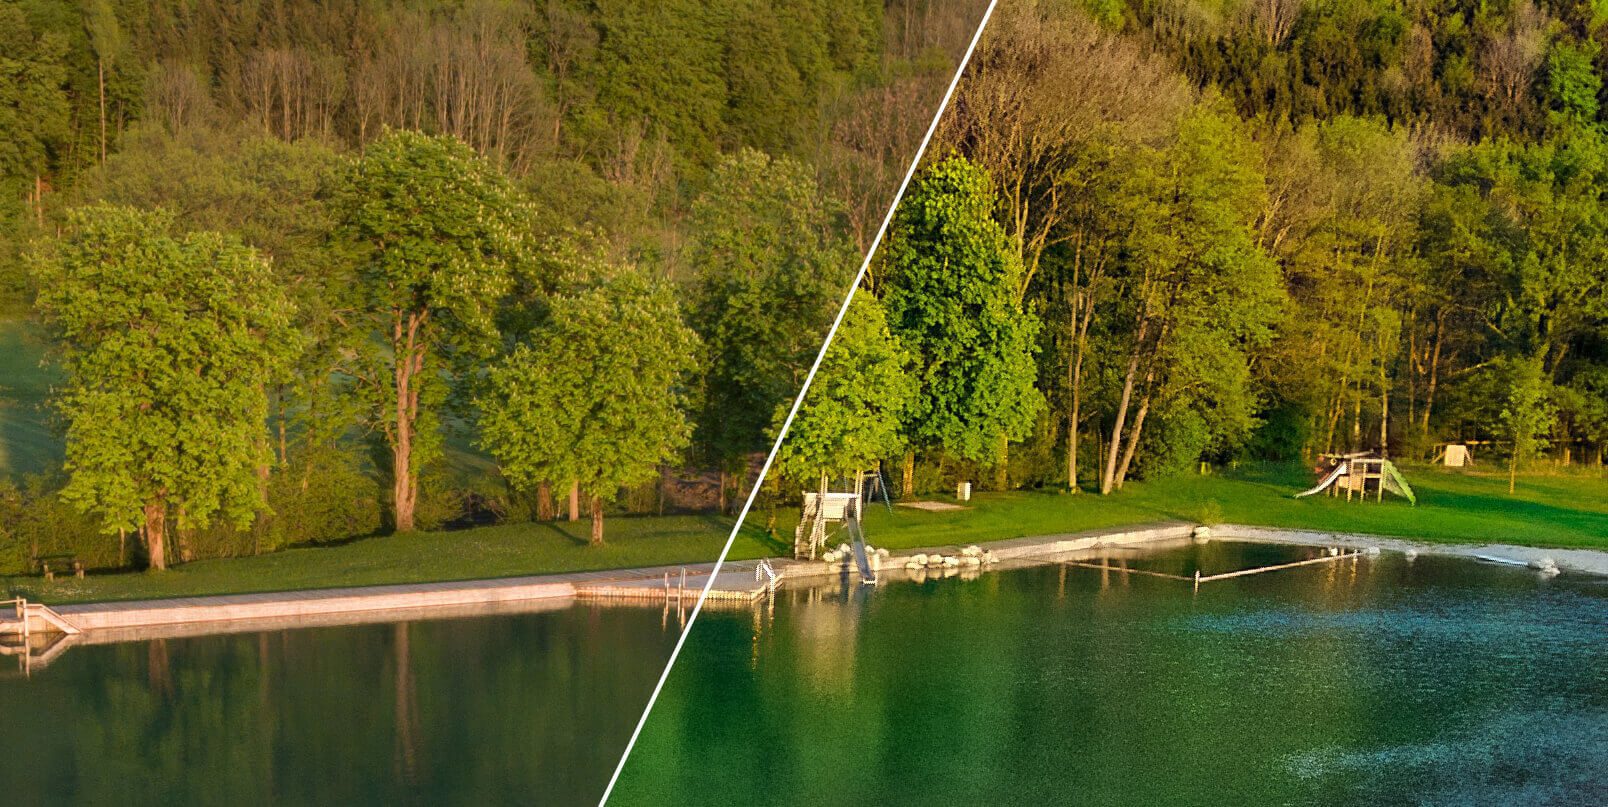
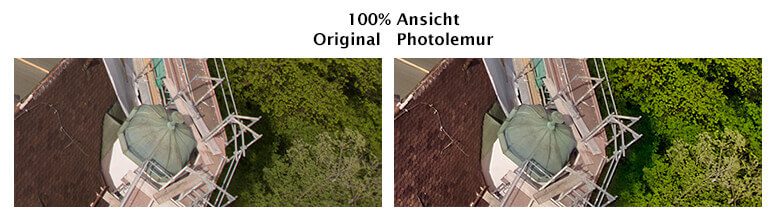
You could now believe the photos on the website photolemur.com are embellished references that "worked" particularly well, but in fact, in all my tests, the software produced a better picture than my original was. Only in the case of the HDR photographs, and in particular the green tones of grass, is the color saturation somewhat unnaturally high after being processed by Photolemur. But check out my examples below in detail. Overall, I think the improvements have been well done.
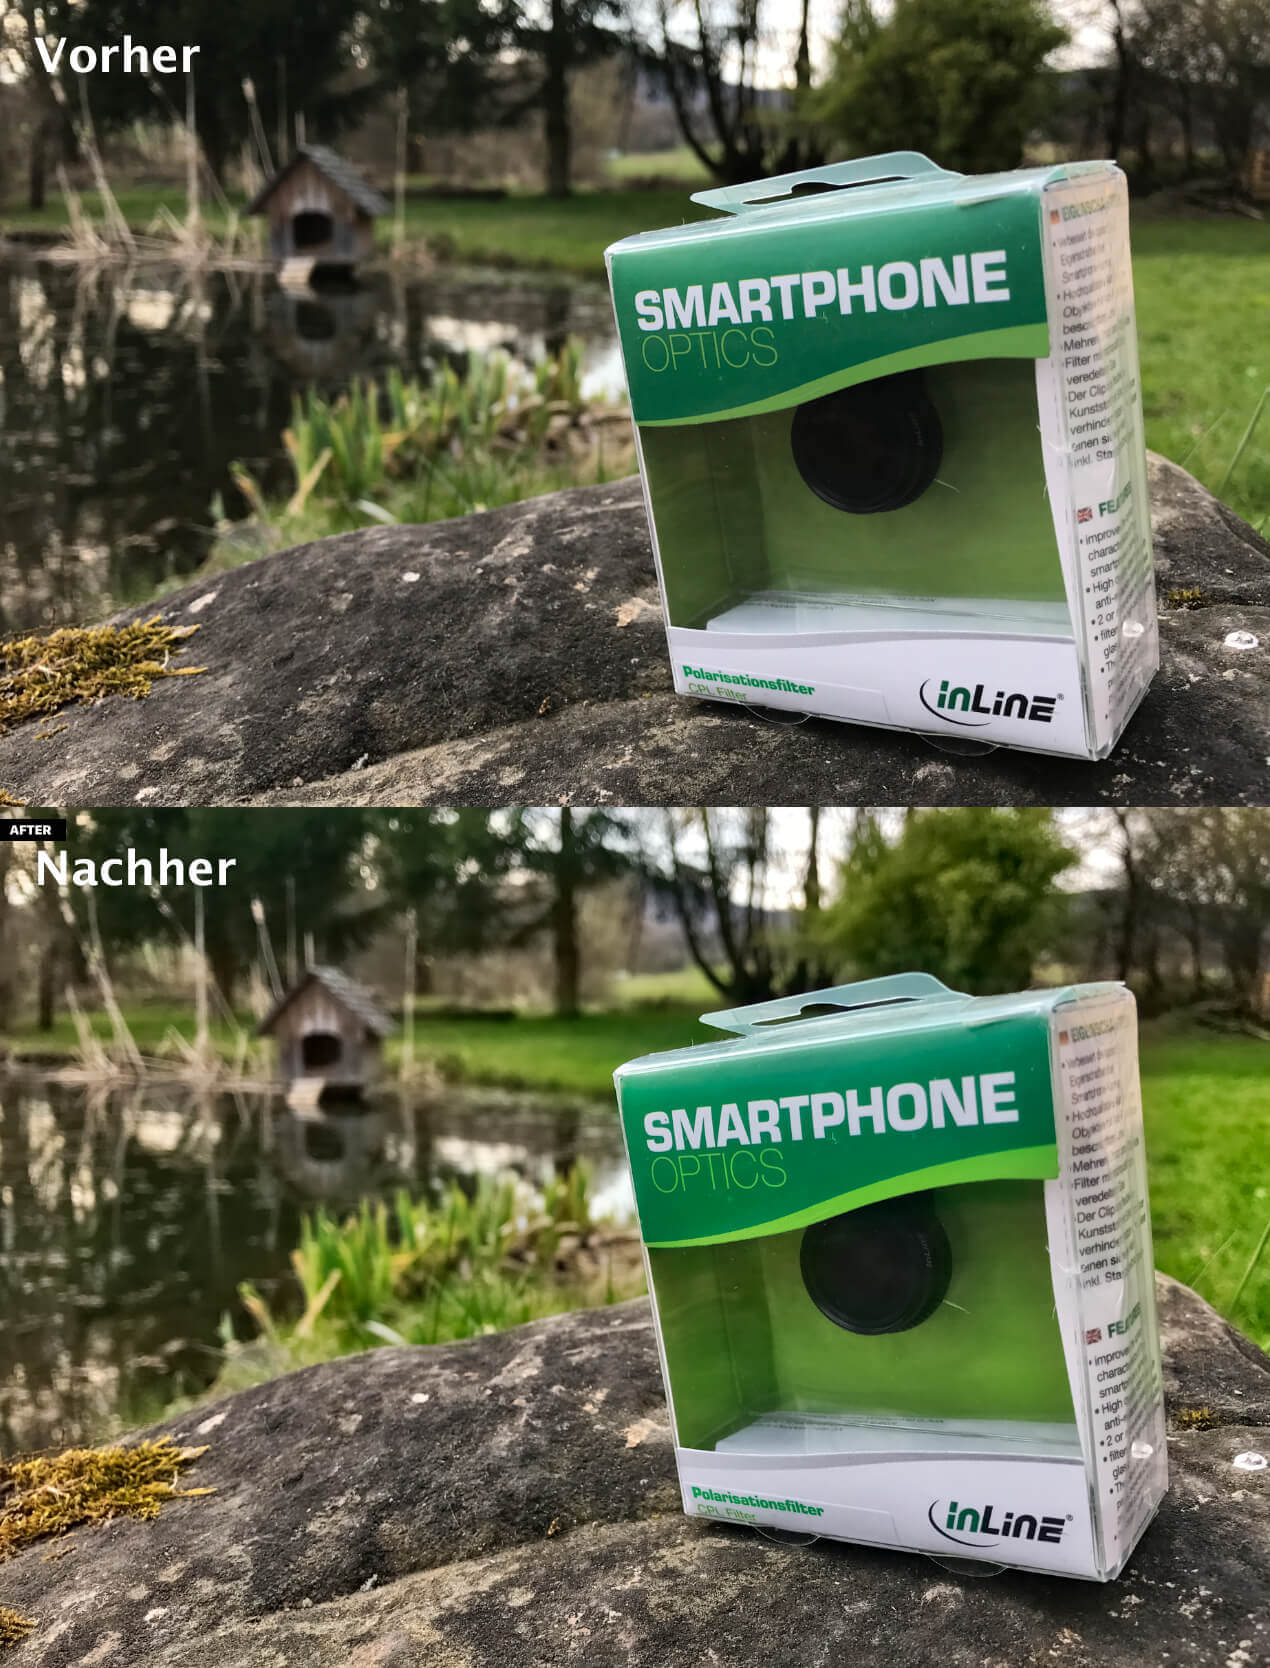
My sample photos and the corresponding results
Here I just show you a few photos that I find particularly remarkable. Sometimes it is also enlargements of certain details that I find worth mentioning. But overall you get a better impression if you go tried the software for yourself and then move the slider back and forth to see the before and after effect. Sometimes it doesn't come out that well in my screenshots.
What does Photolemur do in detail?
If you look at the programmer's website, you will find a graphic that lists the individual points that Photolemur checks and corrects.
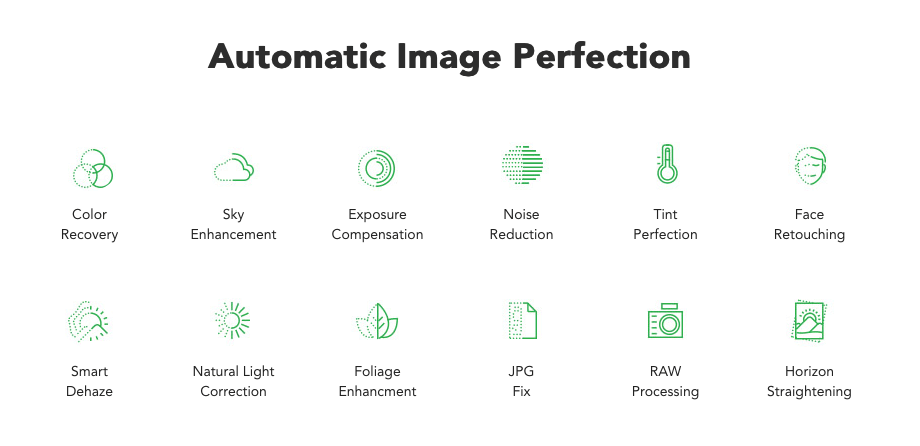
In detail, these are the following points, which I have translated more or less well:
- Color restoration: brings out the brilliance of blue, yellow and red tones
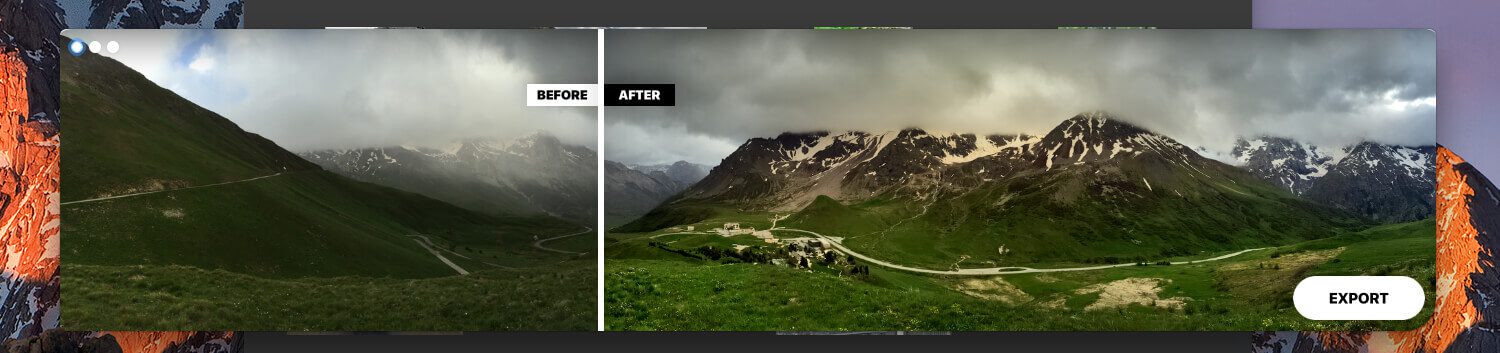
- Improvement of the sky: recognizes clouds in the sky and gives them more details and volume
- Exposure adjustment: detects incorrect exposure settings and adjusts them by slightly brightening or darkening the image
- Pixel Noise Removal: detects noise in low-light photos and tries to remove it
- Perfecting the tint: tries to determine the best tint (cold or warm) and to set it
- Face retouching: recognizes faces and tries to improve blemishes and problem areas
- Removing haze in the distance: detects fog, haze, smog and other distracting elements in the photo and removes them as best as possible
- Correction of natural light: tries to recognize the time of day of the recording and adjusts the color tones, exposure and contrast accordingly and to reproduce the natural colors of this time of day
- Improvement of plant: restores the natural colors in landscape photos by recognizing trees, leaves and plants and processing them in a targeted manner
- JPEG correction: detects errors in JPEG files and corrects them and suppresses artifacts that have arisen through JPEG compression
- RAW processing: recognizes over 600 RAW profiles from cameras
- Compensating for a crooked horizon: adjusts slight deviations in the horizon or the background
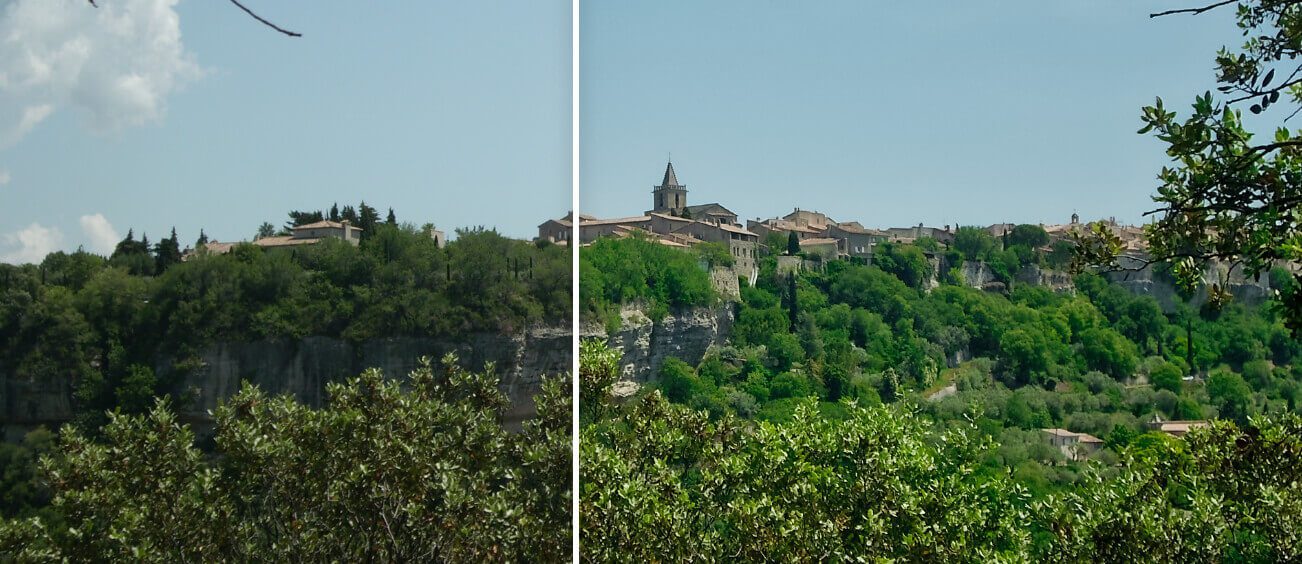
Maybe a few more details. The improvement in foliage can be clearly seen. The software recognizes forests and meadows and gives them crisp green tones. Clouds in the sky also become much more exciting through the optimization. Obviously, the haze removal cannot extract anything that is not there, but overall you can see much more details, better colors and less haze, even in distant areas of the image.
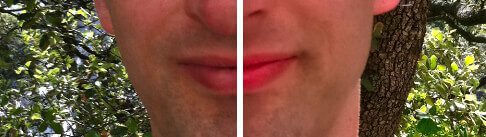
I tested the facial enhancement with a few photos of people and could see that on the one hand the skin color is improved (less gray) and sometimes the areas to the right and left of the corners of the mouth are made slightly smaller to make the face appear narrower at the bottom. But this happens to such an extent that you can only recognize it when it is directly overlaid with the original photo.
Otherwise you can see an improvement in the colors, the sharpness and the detail of the photos. The examples here show what I mean.
By the way: The EXIF data of the photos are adopted 1: 1 and are not deleted or changed. So you can throw the photos again in Lightroom or Apple Photos and still have the display with the map where the photos were taken.
The disadvantages: computing time, color saturation a little too high and subscription model
If you read my report on the test of Photolemur, you probably wonder whether the software has any disadvantages, as I have so much praise for it. And yes, it also has three points that are not so good, but that didn't stop me from buying the software now.
20 to 30 seconds of computing time per image
My first “criticism” is the computing time required to optimize photos with Photolemur. My test with 100 randomly selected photos took exactly 1 hour and 2 minutes. This was carried out on my MacBook Pro Retina 2012 – i.e. on a MacBook Pro model that is now somewhat outdated and certainly not the fastest. The photos ranged in file size from 1,8 MB to 6 MB and were taken with the iPhone 6 or iPhone 7 Plus. An hour of computing time for 100 photos is of course not without it and often you certainly take more photos on vacation. However, it must be noted that the calculation can easily be carried out overnight since you do not have to sit at the Mac. After all, Photolemur does everything autonomously.
If you drag a single photo (from the iPhone 7 Plus with a file size of 6,1 MB) to Photolemur, the software needs around 30 seconds for the analysis and improvement. From my point of view, a time that is quite manageable. If I want to quickly touch up a photo in Photoshop, it probably takes me closer to 5 minutes. So actually "moaning at a high level"... but maybe something will work with the next updates. ;)
Somewhat bold colors and a lack of setting options
My second point of criticism is the high color saturation, which sometimes makes the photos look a bit artificial. Especially green tones of forests and meadows pop a little too much. I would then like to have a global settings panel in which you can adjust certain variables a little bit personally. Not everyone is a fan of such strong colors, but perhaps one would like to have the other - quite useful improvements - that Photolemur is making.
Monetization subscription model
The third point of criticism is the payment, because the software is paid for with an annual license, which is usually $ 5,99. Personally, I am always a bit put off by software that wants to be paid for on a monthly or yearly basis. I prefer to dig deeper into my pockets and then have rest for 2-3 years until the next major update justifies an investment again. But for programs that I use frequently, I also accept monthly or annual subscription payments. As in the case with Photolemur.
Anyone who strikes quickly now (which I would recommend) can still do one Take advantage of the early starter offer, with which I got a 75% discount. But personally, I'd take the software myself for $ 5,99 a month because the results are really convincing. And the computing time can of course also get significantly better with future versions. But even so, it is a great helper to pimp a series of photos.
There is also a 30-day money-back guarantee if you want to test the tool without any risk. I've seen enough and I know that I don't want any money back. :)
Update 06.09.2018/XNUMX/XNUMX: There is no longer a subscription model
The new version 3.0 of Photolemur is currently being promoted. This no longer relies on a subscription model. So for me this point of criticism falls away. Unfortunately, the price isn't exactly cheap, but considering how much time Photolemur has already saved me, I'm happy to pay this "penalty fee".
My conclusion on Photolemur
There will never be software that optimizes photos to suit everyone. Photolemur is already quite good with its improvements and will surely meet the tastes of many people. I think the software definitely has potential and especially for people who want to revise a lot of photos, but who don't really have time to pimp them all in Photoshop or Lightroom, Photolemur should be an interesting software.
I bought it straight away and found the results to be quite convincing. I can accept the sometimes somewhat strong colors - especially because the remaining optimizations are also very good and make more details of the image recognizable.
From my point of view, the software is definitely a recommendation for everyone who finds the "Auto-Optimize" button in Apple's photos practical but not extensive enough. Maybe Apple will buy the Photolemur team and we'll find the optimizations integrated into "Photos" for free. I personally think it makes more sense than buying beats... ;-)
► Buy Photolemur 3: here at the developer Skylum ◄
I hope you found my test exciting. It has become much more extensive than I planned, but more and more things came to my mind that I wanted to show and explain. Sorry if it got boring. ;)
I would be interested in how you feel about automatic photo optimization in general and what experiences you have had with Photolemur. The comments are open. : D
Related Articles
 Surfshark VPN on the Apple TV is now even easier to use (sponsor)
- AltStore in the test: iPhone sideloading (and game emulation) tried out
- 5 app recommendations in April 2024
- Apple iWork 14.0 – Updates for Pages, Numbers and Keynote
- MacPaw releases revised ClearVPN offering
- Epic Games Store announced for iOS and Android
- Adobe alternatives: replacement for Premiere Pro (and partly After Effects)
- Download Apple iLife: Sources for old software and more


Jens has been running the blog since 2012. He acts as Sir Apfelot for his readers and helps them with technical problems. In his spare time he rides electric unicycles, takes photos (preferably with the iPhone, of course), climbs around in the Hessian mountains or hikes with the family. His articles deal with Apple products, news from the world of drones or solutions to current bugs.
Thank you very much for the description! How can you practically test Photolemur?
They have a 30-day money-back guarantee that can be used to try the program. Unfortunately, there is no free download as a demo. Best wishes!
Jens
Hello and thank you for your review. I plan to use PhotoLemur 2.0 to enhance old 8mm film, which is over 50 years old and has faded colors. Each frame of the film has been telecine to individual .tiff photos, and I have about 11 hours of film, which is around 600,000 frames of film. Using both my iMac and PC, I will use a combination of Lightroom / Perfectly Clear / PhotoLemur to enhance it all. We'll see how that looks. . . Then Apple Compressor to put the frames back into a movie, and Final Cut Pro X to edit the video ... to Vimeo. :)
Hi george Interesting project. I am not sure, if you can enhance single frames with Photolemur because it does not care about the last and the next frame to keep colors similar. I would be glad to read about the result of your workflow! :)
Hi. I've tried out the current PhotoLemur 1.0.3, 40 film frames at a time (the limit), for 400 frames testing, and it keeps the exposure and colors the same from frame to frame, so I'd hope the new PhotoLemur 2.0 wants to do the same. I'll comment on the results after I do a full reel of film.
Athentech's Perfectly Clear plugin for Lightroom also does a real nice job, as it also analyzes colors, faces, etc. Then after Perfectly Clear is applied, PhotoLemur brings out everything more and sharpens it very nicely. Both will operate in an automated batch processing mode, where you just click on a folder of film photos (an Image Sequence), and come back in an hour to see the results.
Best and very conclusive comparison. Thank you for this report.
Hello Heinz! Thank you! I'm currently testing the beta of Photolemur 2.2 (Specter). The overdriven color saturation is now under control and you can also set the effect of the optimization with a 0-100% slider. And the best thing is, of course, that they have moved away from the subscription model and are again offering the program for a one-time fixed price. I got it booked via SetAppbut that is not an obligation. There is also Photolemur detached from it.
AI? Artificial intelligence? - Do the 10xTest!
Also, I'm looking for one-click software that produces optimal images, better than out of the camera jpegs (OOC). Why? So that I have 1000 "reasonable" pictures from a shoot, where the main weaknesses have already been automatically eliminated? Why do I want this? So that the tedious and time-consuming selection is simplified and improved.
Because a technically suboptimal picture - even if it is conceptually successful in terms of content - quickly ends up in the garbage when rummaging through superficially or is not selected. It doesn't get the rating, the stars it deserves.
OOC-JPEGs, Perfectly Clear, Portrait Professional and now also Photolemur with AI are a first step on the way to an optimized original photo, fully automatic, very good.
But now comes the BUT: just for fun, do the 10xTest with the programs mentioned! This means that the program applies 10 times in a row to the same, already optimized image. Easy, if a bit laborious.
Clever static algorithms (Perfectly Clear), which are based on an optimum of contrast, exposure, and saturation, will at some point recognize that sufficient optimization has been carried out.
Clever static algorithms (Portrait Professional), which are based on the supposedly optimal face shape, optimal size of the eyes, optimal skin smoothing, should at some point recognize that it has been sufficiently optimized.
Especially clever, dynamic, supposedly AI-based algorithms (Photolemur Specter 2.2) should eventually recognize that the optimization has been achieved and "do nothing" anymore.
The simple 10xTest (delete metadata between the iterations!) Reveals: neither Portrait Professional nor the allegedly AI-based Photolemur Specter 2.2 recognize when there is enough of a good thing! Portrait Professional makes the eyes bigger and bigger, for example, until an alien has emerged at some point. Photolemur Specter 2.2 also gradually degenerates to catastrophic contrasts and colors.
Conclusion: That doesn't mean that the Photolemur Specter 2.2 is unusable. But my hypothesis is that in reality no artificial intelligence (AI: e.g. deep learning, nowadays quite conceivable for optimizing images) is used here and is just a hype word to lure buyers.
The technology of Photolemur Specter 2.2 seems to be much more simple: always a little more saturation, always a little more contrast, a little more sharpness, etc., done. Regardless of what the original image looks like! It's a shame actually.
-Mino
Hello Mino! Thank you for your critical comment. The 10x test is a good idea. I'll do it soon, but I think it's like you say: the image is probably "optimized" every time... but I'd like to give Photolemur Specter a chance... Otherwise, from my point of view, the AI is also correct. I don't think there is much "intelligence" at work here, but what struck me: not all parts of the image are treated equally. There are definitely differences in the sky and landscapes. But it would still be interesting to run an "automatic optimization" of Lightroom (auto tone value correction and the like) against Photolemur. Maybe I'll do a test there soon... Thank you for your assessment! I'm always happy when readers contribute a few new aspects! LG! Jens