Today I had a question from a reader who wanted to transfer the contents of their iPhone display to their iMac. In the conversation we came up with the possibility of making a video recording of the screen with the iPad or iPhone while playing something or working in an app. The function was new to my reader and he asked me to write a short guide to it. Here we go ... ;-)
Chapter in this post:
Step by step to the screencast on iPhone and iPad
In technical jargon, the video recordings of a computer, tablet or smartphone screen are called “screencasts”. Additional software is required for many devices, but since iOS 11 this function has been built into the operating system of the iPad and iPhone.
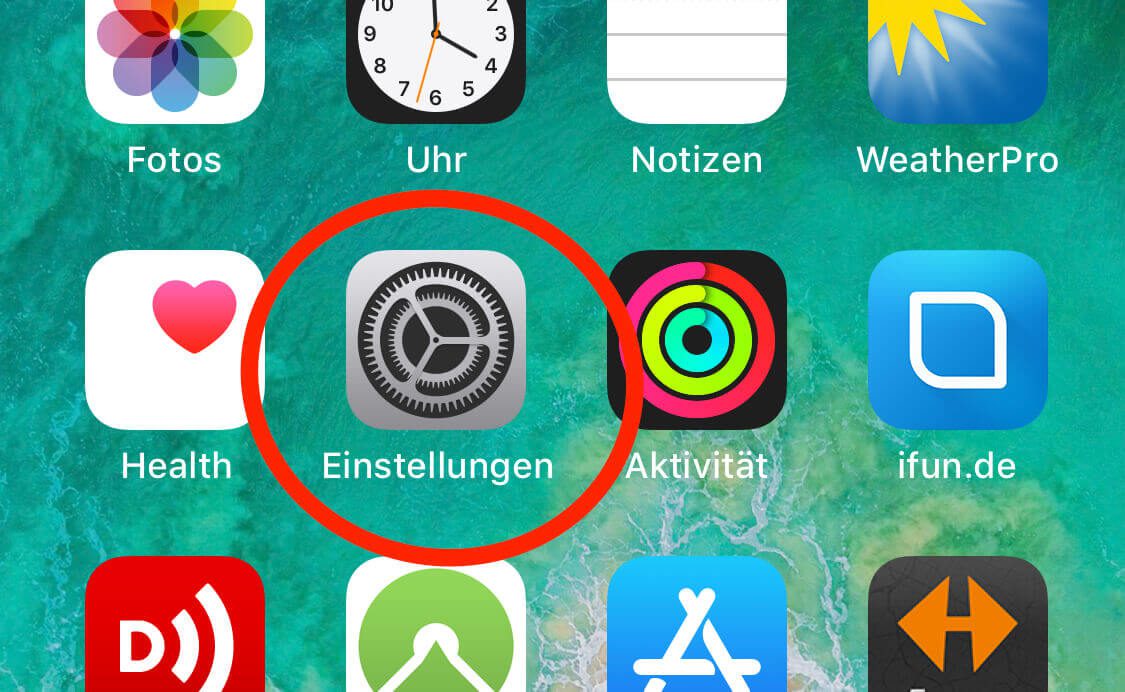
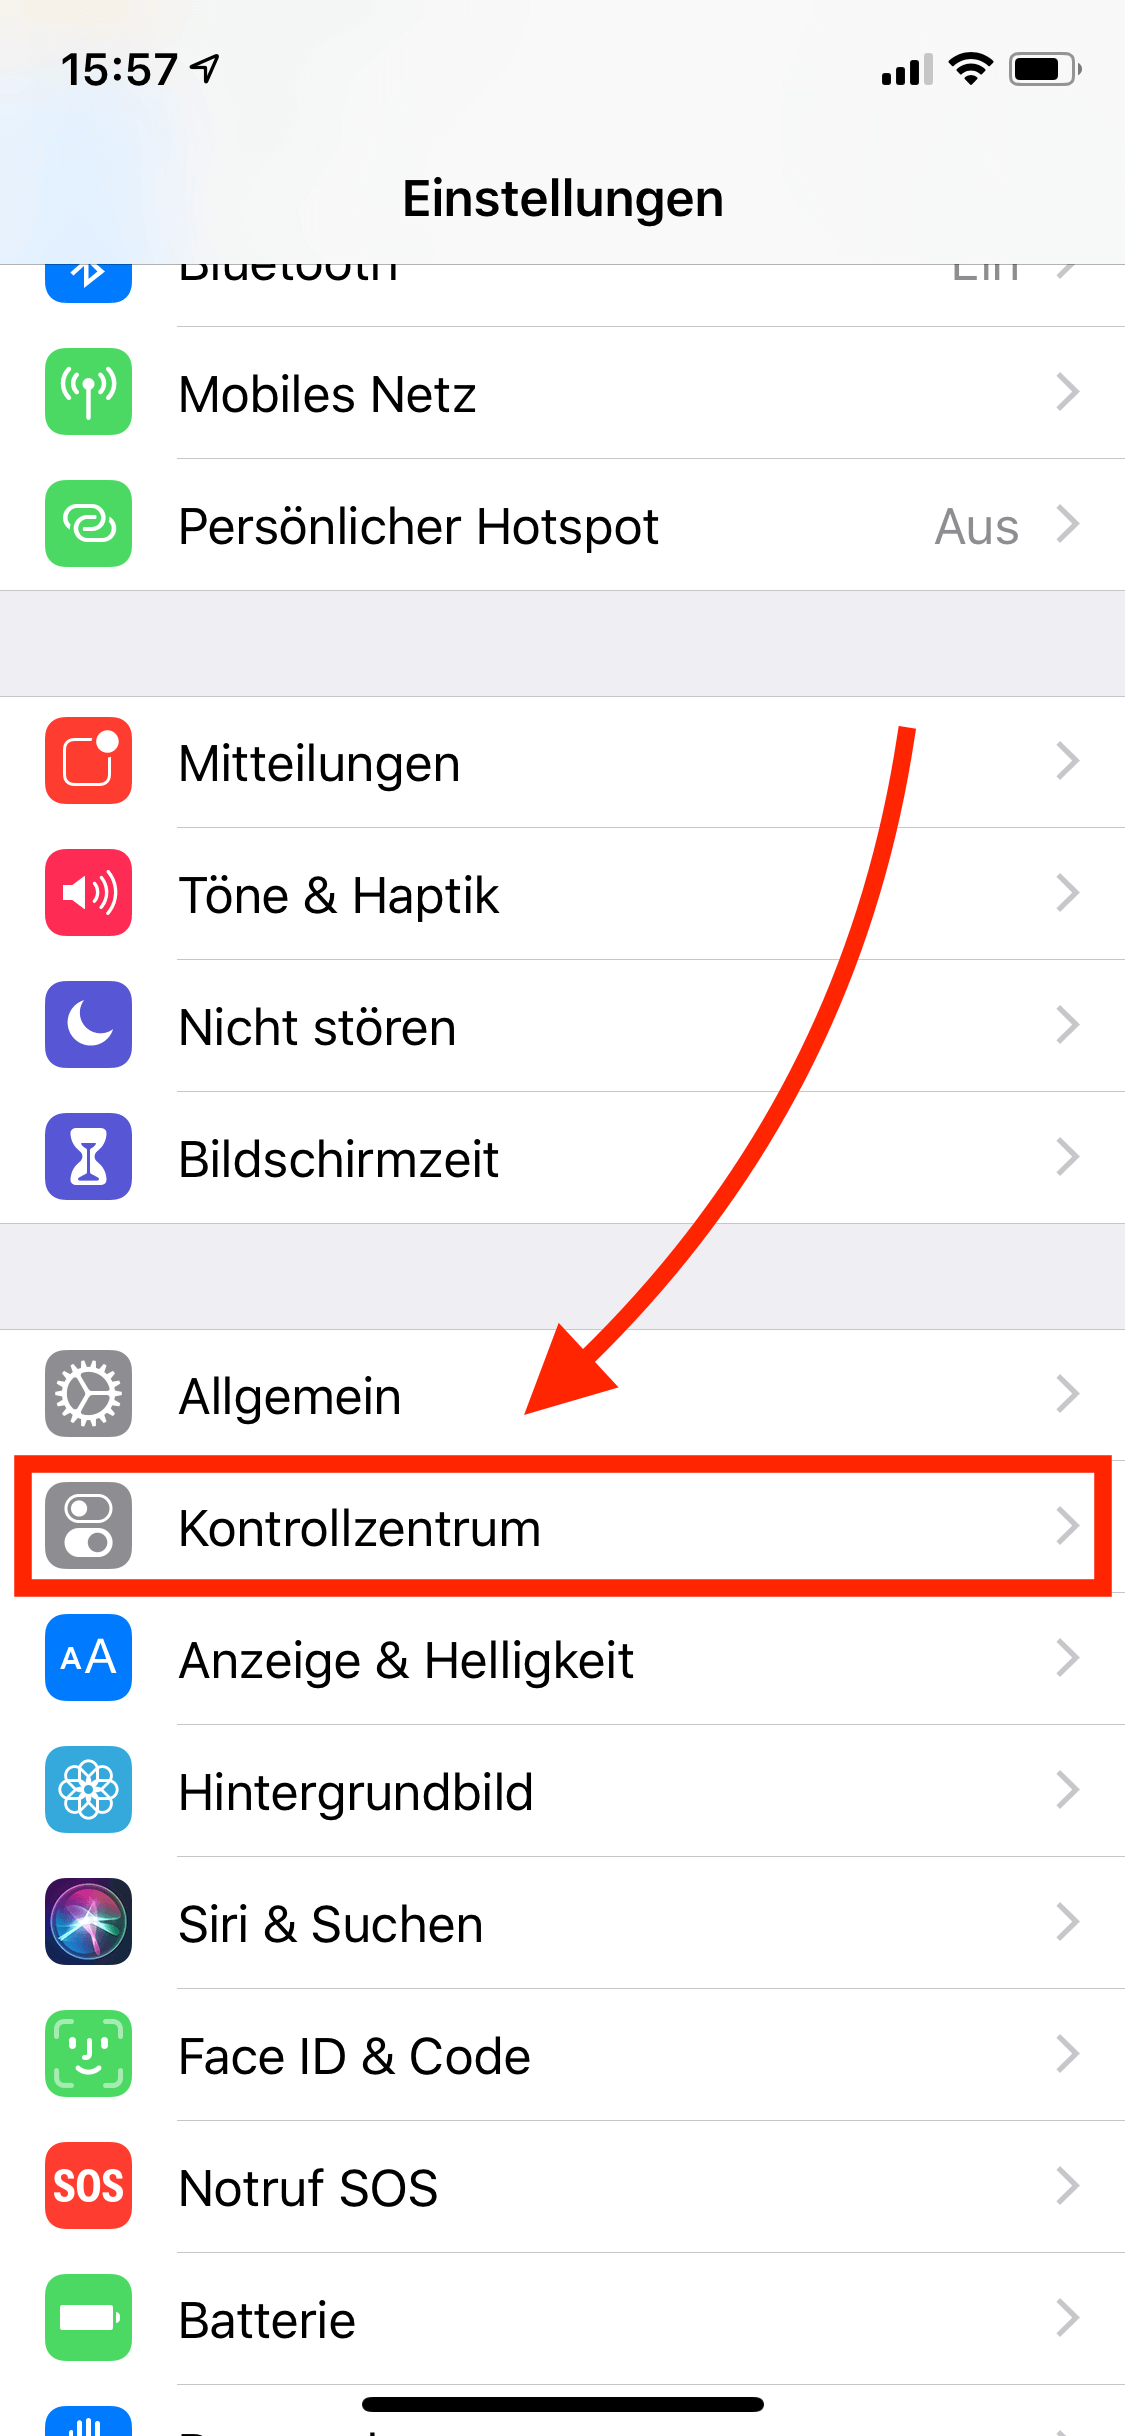
The recording of a screencast is actually started with a button in the control center of the iOS device. However, you have to add it once via the settings of the control center. To do this, go to “Settings” in the iPhone or iPad and then to “Control Center”.
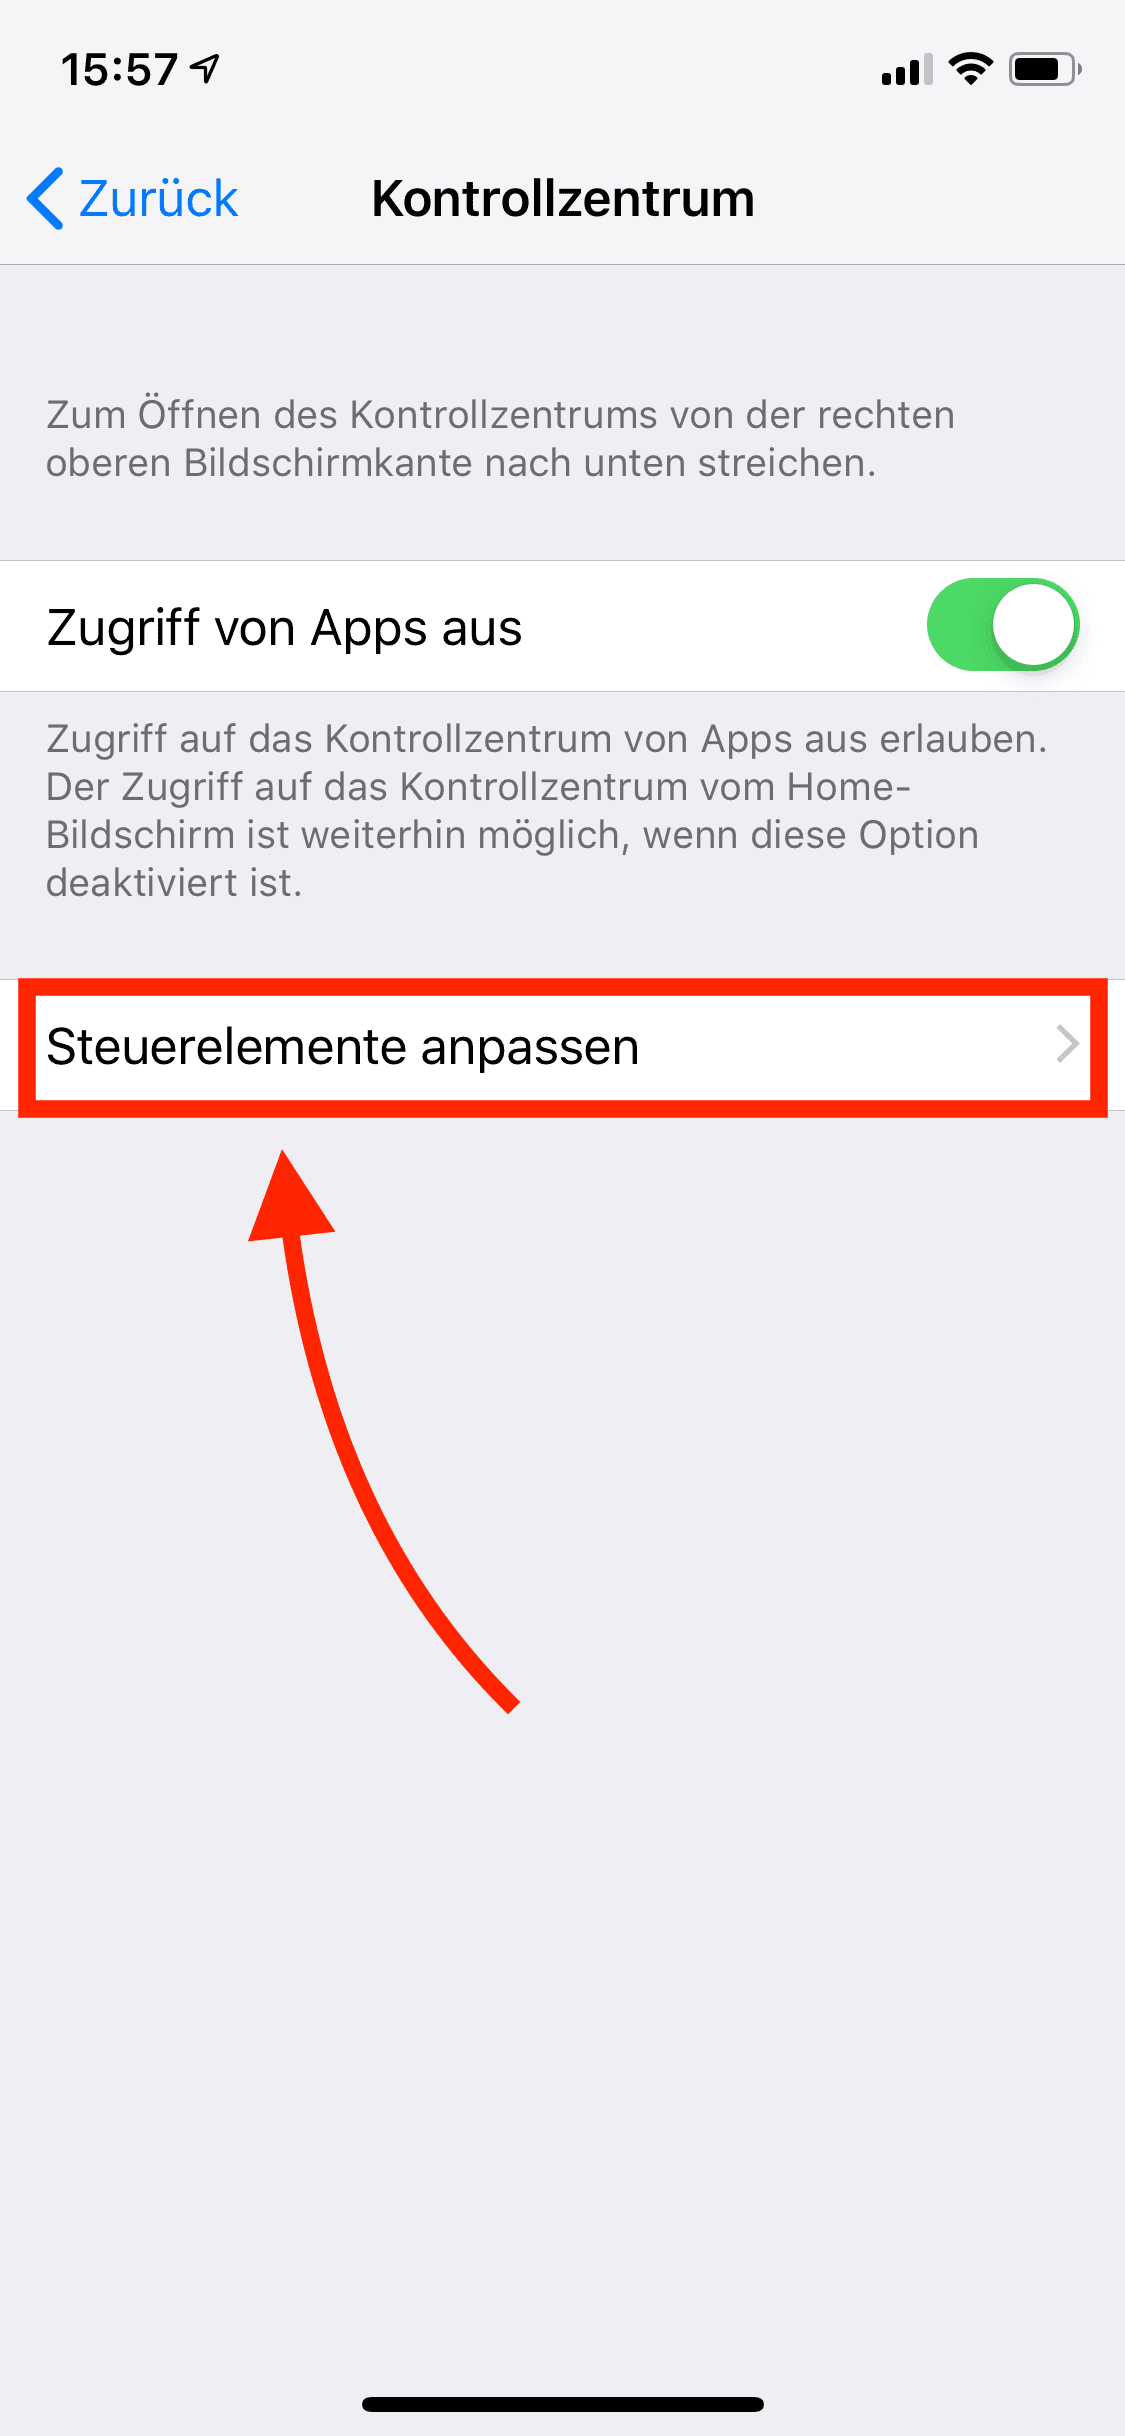
Here you will find the menu item “Customize controls”. If you click on this, you get a list that contains the items that can already be found in the control center at the top and the functions that can still be added at the bottom. At the bottom there should be a “Screen Capture” line. There you click on the green plus sign so that the point slips into the activated functions.
The short form:
- Settings> Control Center
- Customize Controls> Add Screen Capture
- Start recording via: Control Center

Start screen recording
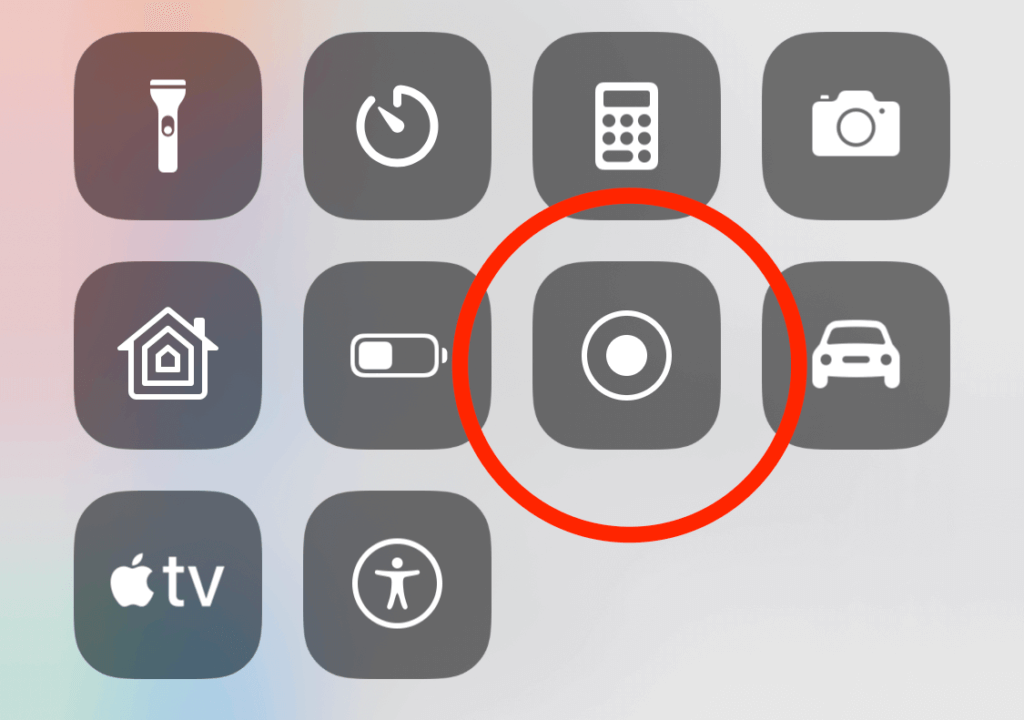
Once the "Screen recording" item has been added to the control center, you can start recording at any time using a record button in the control center.
The control center is called up on a device without a home button by swiping down from the top right corner. With older iPhones or iPads that do not work with the current iOS version, you still have to swipe up from the bottom.
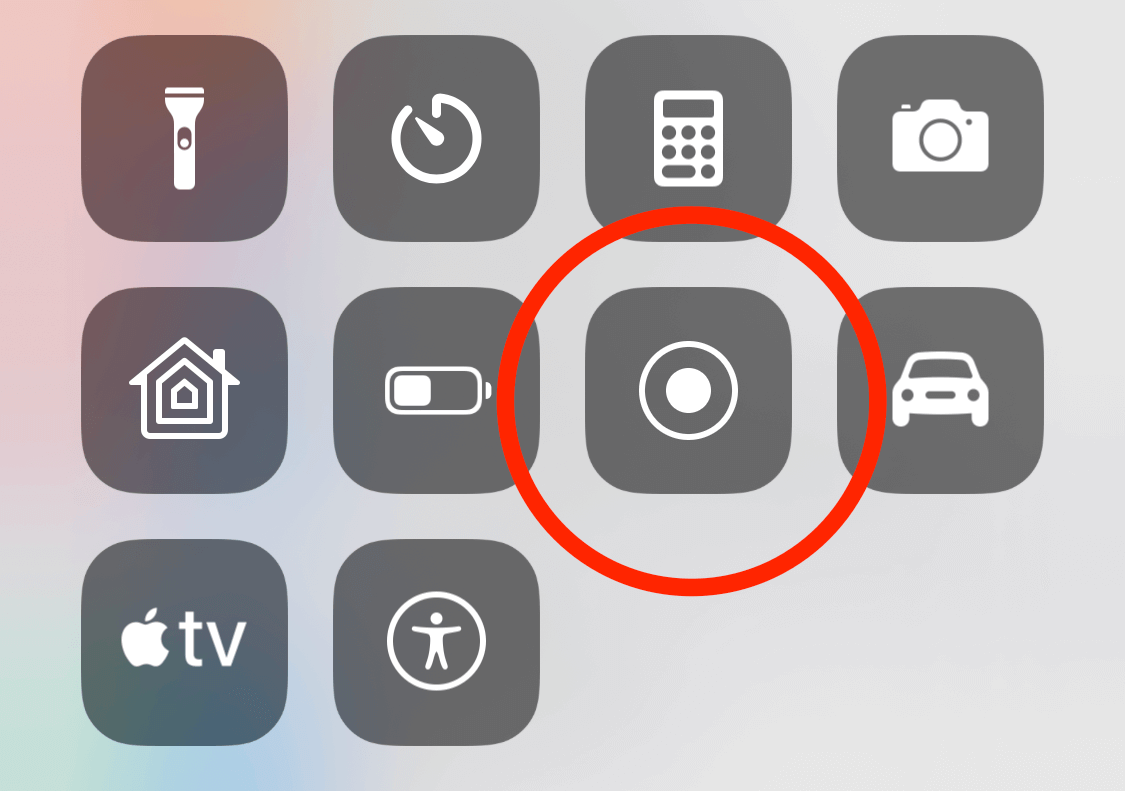
In the control center you can now find the Record button, which is a symbol made up of two concentric circles. If you press the button, a countdown starts. When the countdown reaches zero, the screen recording starts as a video.
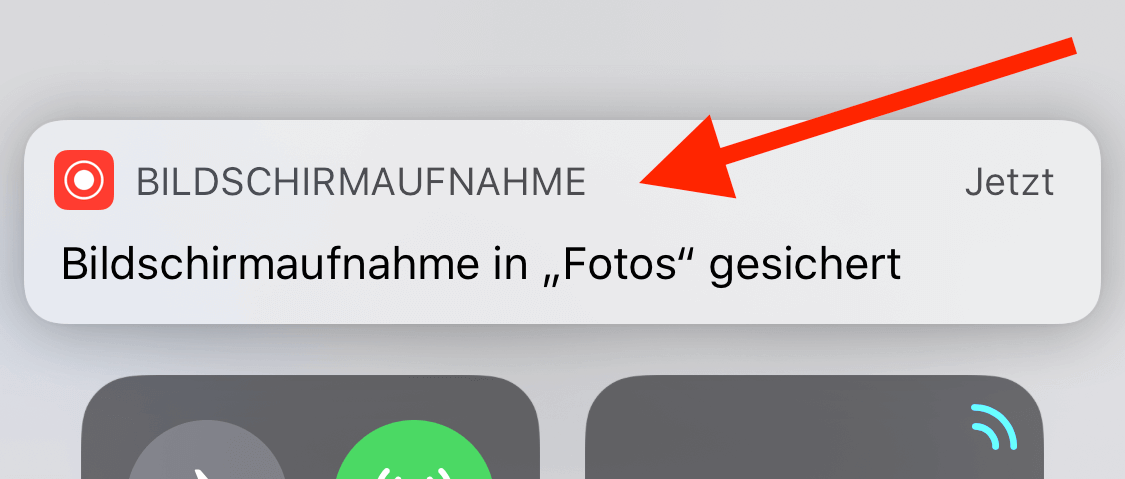
You can now leave the control center and open any app. If you want to end the recording, press the button in the control panel again. You will then receive a notification from the system that the recording has been saved as a video in the photo library.
I hope the instructions will help you to work with your iPhone or iPad. If you want to do screencasts on your Mac, you will find here a post with some good software options.
Related Articles
![[Update] Overview: Battery capacity (mAh & Wh) of the Apple iPad models](data:image/svg+xml,%3Csvg%20xmlns='http://www.w3.org/2000/svg'%20viewBox='0%200%20150%20150'%3E%3C/svg%3E) [Update] Overview: Battery capacity (mAh & Wh) of the Apple iPad models
[Update] Overview: Battery capacity (mAh & Wh) of the Apple iPad models- [Update] Which iPad do I have? Here's how to get it out!
- Internet Archive – possible uses of the worldwide archive
- YouTube Achievements cards and creator awards - a good motivation for creators
- Apple System Status: Find iCloud outages and issues with other Apple services here
- Mac: Find the AT sign (Klammeraffe) on the keyboard of Apple computers
- What is the difference between a plugin and an add-on?
- What is “dogfooding” in the area of hardware and software development?
![[Update] Overview: Battery capacity (mAh & Wh) of the Apple iPad models](https://a391e752.rocketcdn.me/wp-content/uploads/2024/04/ipad-battery-capacity-mah-wh-150x150.jpg)
![[Update] Which iPad do I have? Here's how to get it out!](https://a391e752.rocketcdn.me/wp-content/uploads/2020/07/ipad-modell-bestimmen-anleitung-150x150.jpg)


Jens has been running the blog since 2012. He acts as Sir Apfelot for his readers and helps them with technical problems. In his spare time he rides electric unicycles, takes photos (preferably with the iPhone, of course), climbs around in the Hessian mountains or hikes with the family. His articles deal with Apple products, news from the world of drones or solutions to current bugs.
Thank you for the quick and detailed instructions ???? Bomb ????
With pleasure! :) Now it's time to end and good night!
Thanks for the brilliant tip