Under macOS on the Apple Mac, most people will certainly use the standard mouse pointer with a white border and black filling. Depending on the display resolution, it is sometimes larger and sometimes smaller. But what if it's just too small and you have to keep looking for it? And what if you can't see the standard Mac mouse cursor properly due to a visual impairment? Then you can adjust its appearance in the system settings. In this guide I have summarized how you can adjust the mouse pointer size and color under macOS.
Chapter in this post:
- 1 Three reasons why a mouse pointer customization makes sense
- 2 Change the mouse pointer size on the Apple Mac
- 3 Note: New size is applied to other mouse cursor icons
- 4 Adjust the mouse pointer colors on the Apple Mac
- 5 problems changing Mac mouse pointer color
- 6 Mouse pointer display problem on screenshots
- 7 My tips & tricks about technology & Apple
- 8 Similar posts
Three reasons why cursor customization makes sense
- If you have poor eyesight, a large and conspicuous mouse pointer can be found more quickly
- The mouse pointer can also be found faster on large or multiple monitors with high resolution
- Customization is also an interesting option for system customization, for which macOS generally doesn't offer that many options
Change mouse pointer size on Apple Mac
If you don't see the mouse pointer correctly because of its size, or if you're using a monitor with a higher resolution where the cursor is tiny, then you can change that. To adjust the size of the mouse pointer under macOS, proceed as follows:
- Click this on the top left of the menu bar Apple logo () on
- In its menu select the System settings ... from
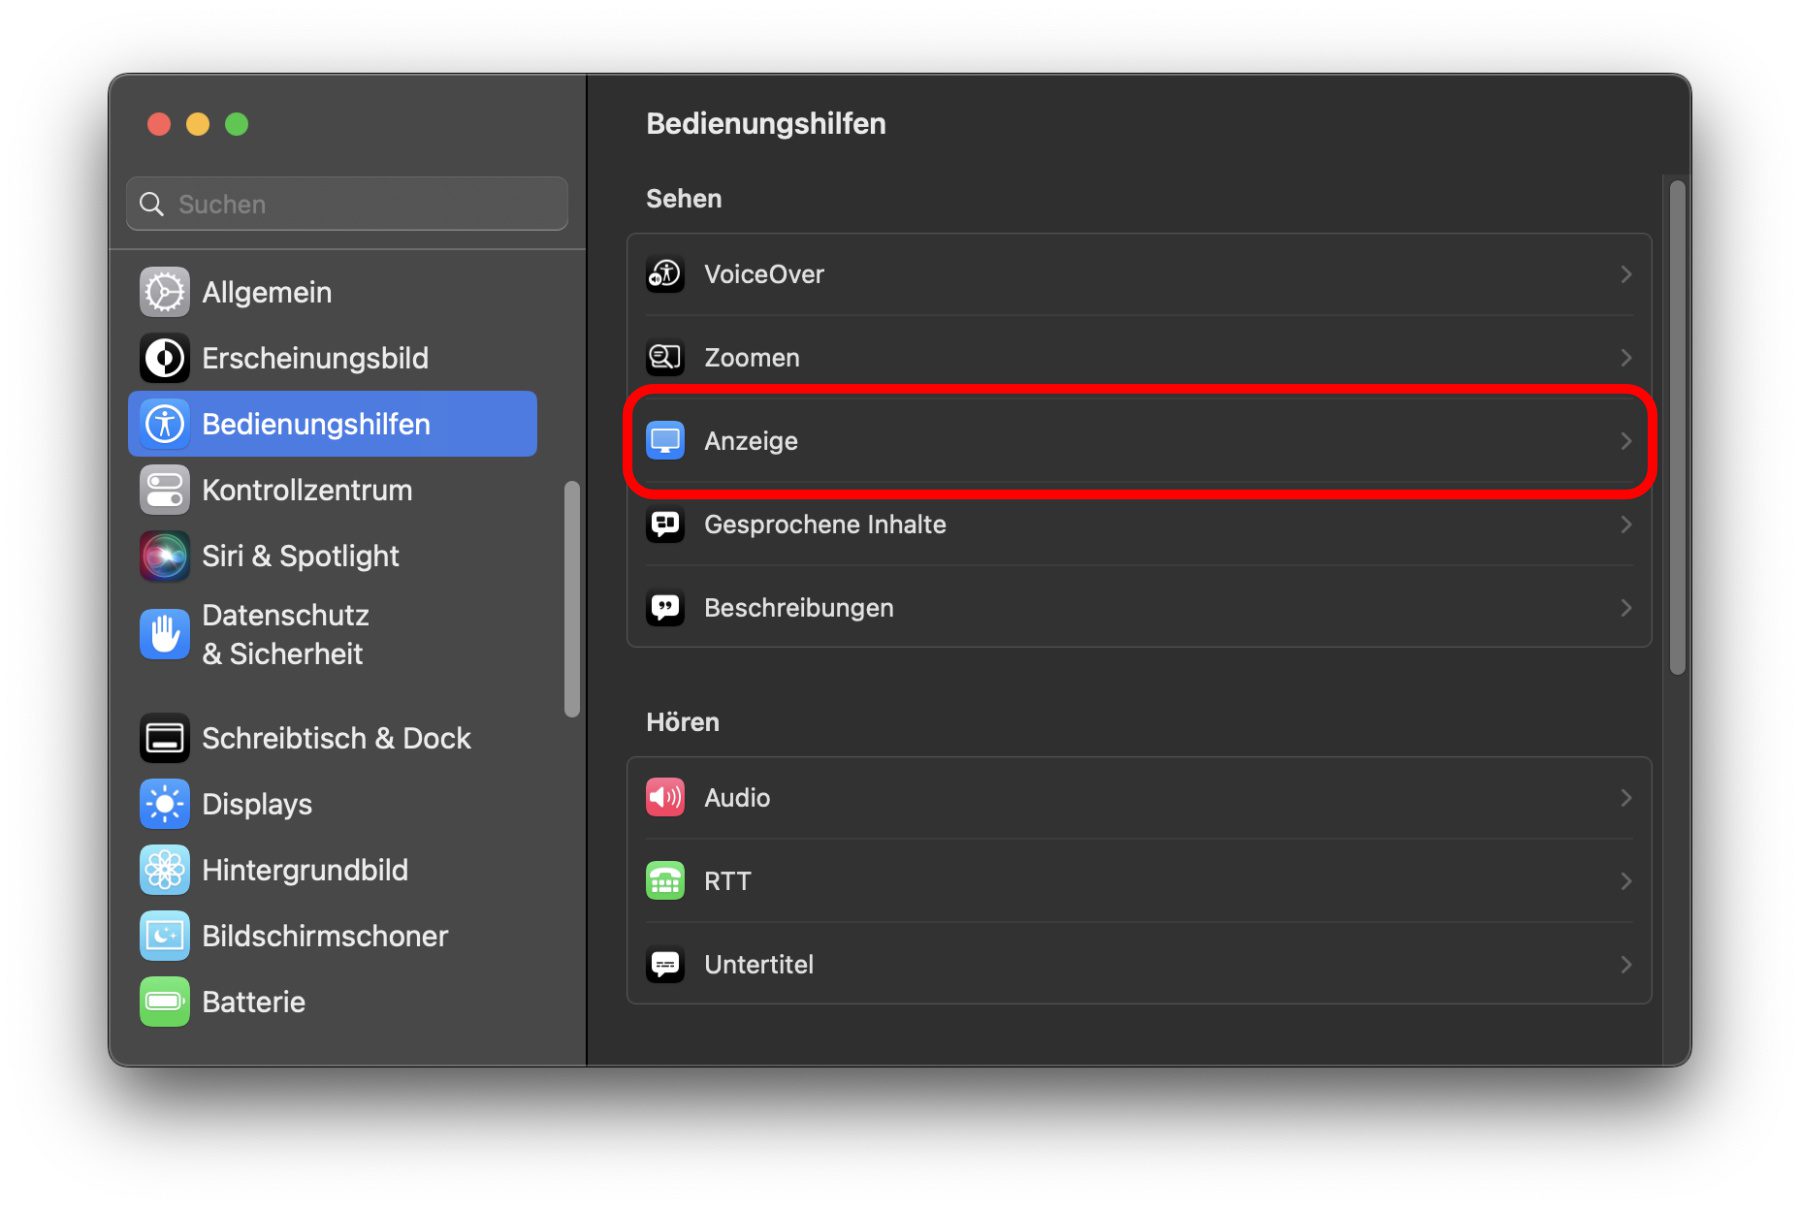
- Now click in the left sidebar Accessibility an
- Then choose on the right Advertising from
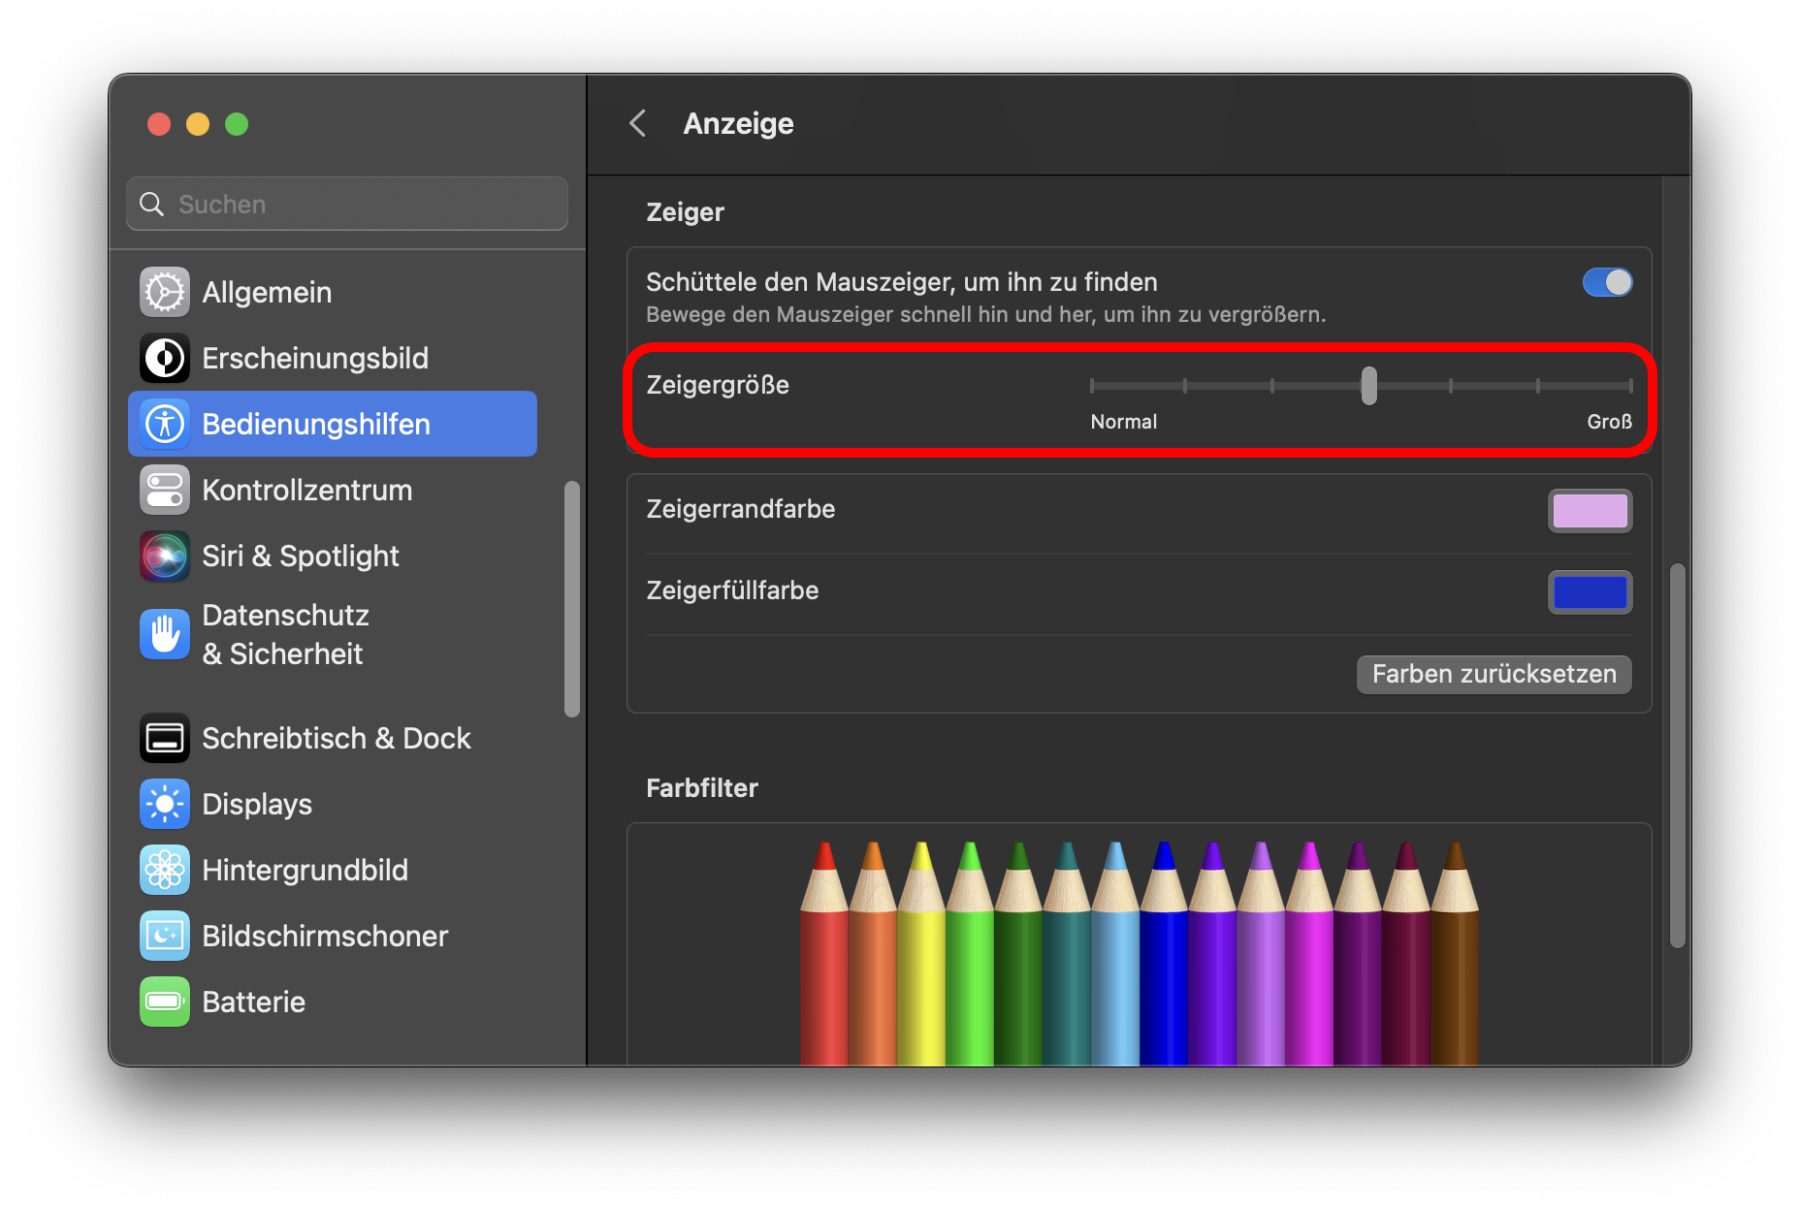
- Under "Pointers" use the slider from Normal up to Largeto adjust the pointer size
Note: New size is applied to other mouse cursor icons
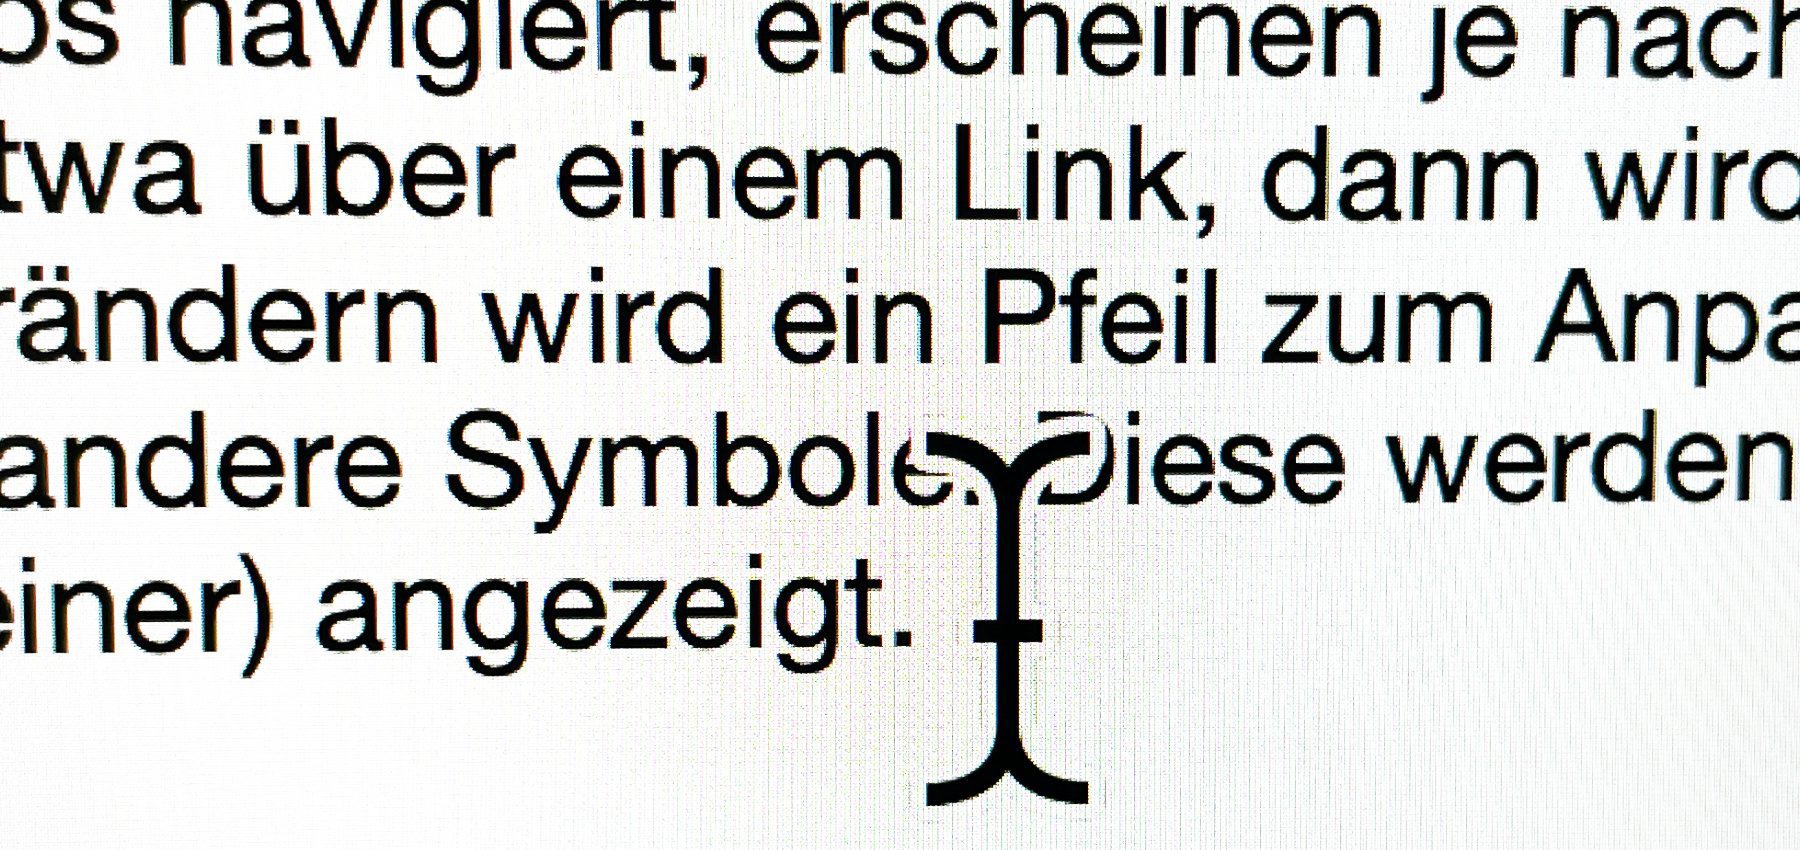
In addition to the arrow, which is used to navigate through macOS and apps, other icons appear under the pointer depending on the content. For example, hover the mouse over a link, then the cursor becomes a hand with an outstretched index finger. An arrow for adjusting the window size is displayed at window edges. And there are plenty of other icons, such as command+shift+4 in window screenshots. These are also displayed larger (or smaller) after adjusting the pointer size.
Adjust the mouse pointer colors on the Apple Mac
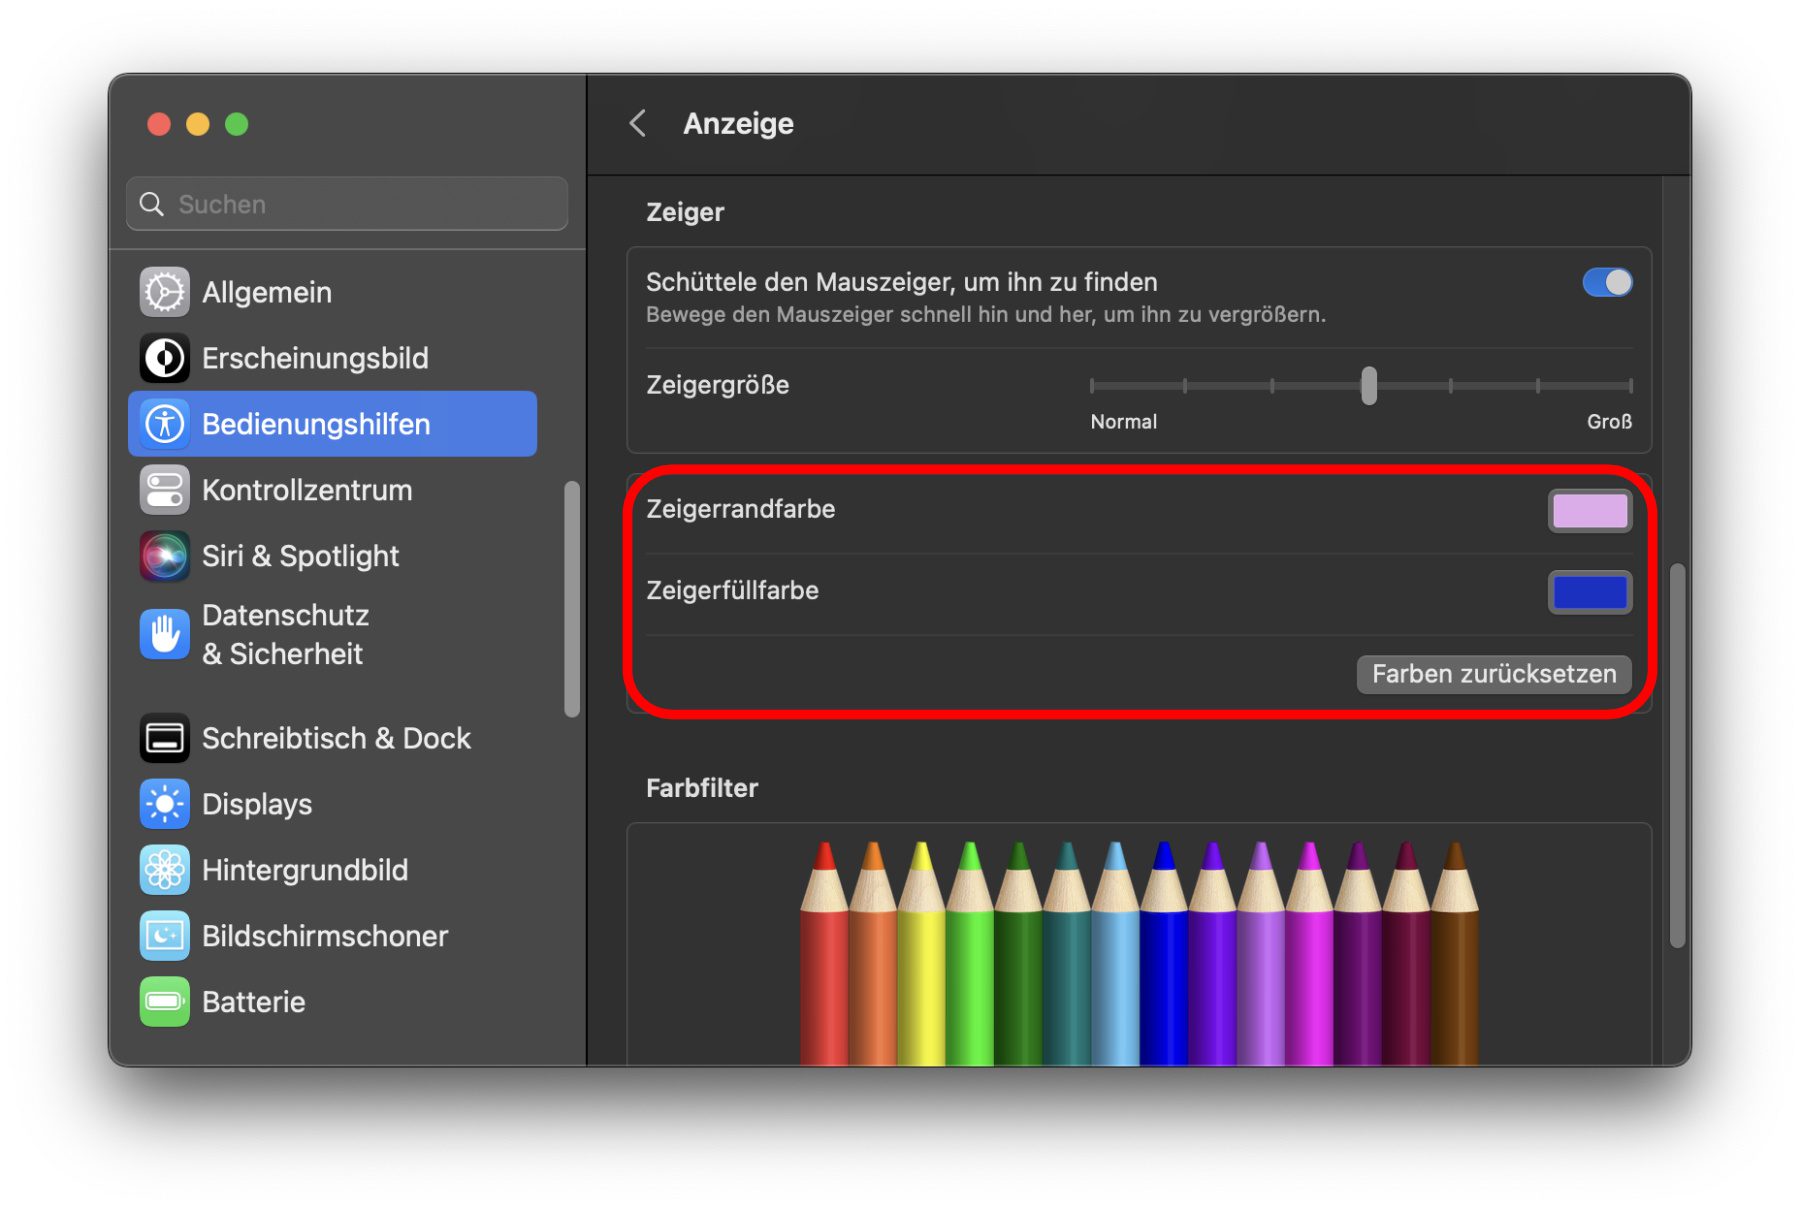
In addition to the size, the color of the mouse cursor also determines its visibility. You can therefore continue to customize the color of the border and the fill of the Mac mouse pointer. To do this, navigate back to the settings described above: System Settings -> Accessibility -> Advertising. Under the pointer size you can set the pointer border color and the pointer fill color.
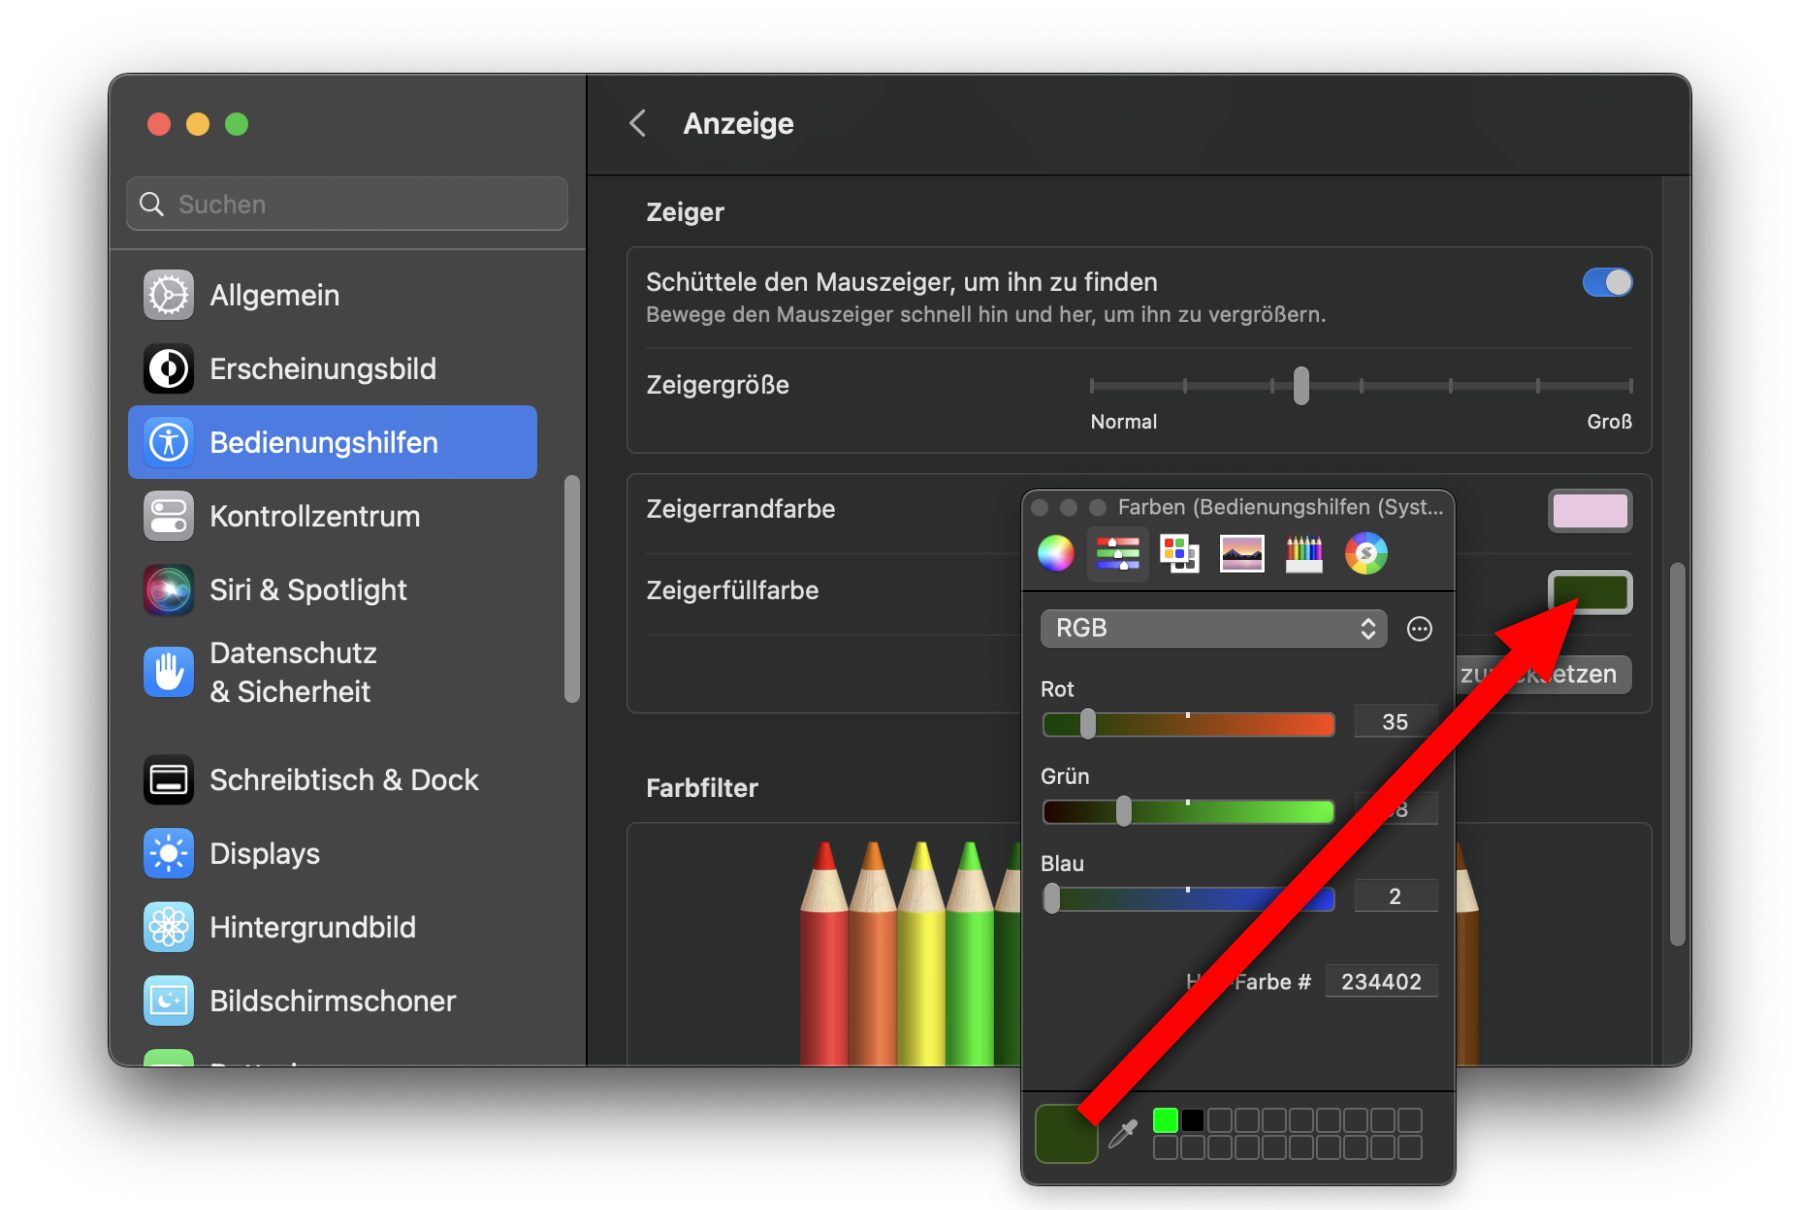
If you click on the respective color field to the right of "pointer border color" and "pointer fill color", a color picker will appear for the color selection. In its toolbar you can choose which color guide you want to use - a color wheel, a large color box, RGB sliders, and so on. All tools let you choose a color and set it for the pointer border or pointer fill. If that doesn't work right away, drag the color from the overview at the bottom left onto the color field next to "Pointer border color" or "Pointer fill color".
Tip: If you click on the "Reset colors" button, the default colors for the mouse pointer will be used again. So white as border color and black as fill color.
Problems changing Mac mouse pointer color
If you try the instructions above and give the Mac mouse pointer new colors, it may initially happen that the selected colors are not applied immediately. Also, the pointer may revert to the old colors when exiting the System Preferences window. If you move the pointer over another window, the colors may jump back and forth again.
Even after the customization is complete and after you close the Settings window, this bouncing can still occur. Restarting the computer helped me so that only the individually set colors are displayed. It could also be enough to log out and back in. Then should the changed .plist file of the responsible daemons loaded properly and only the colors you have set yourself are used.
Problem with the mouse pointer display on screenshots
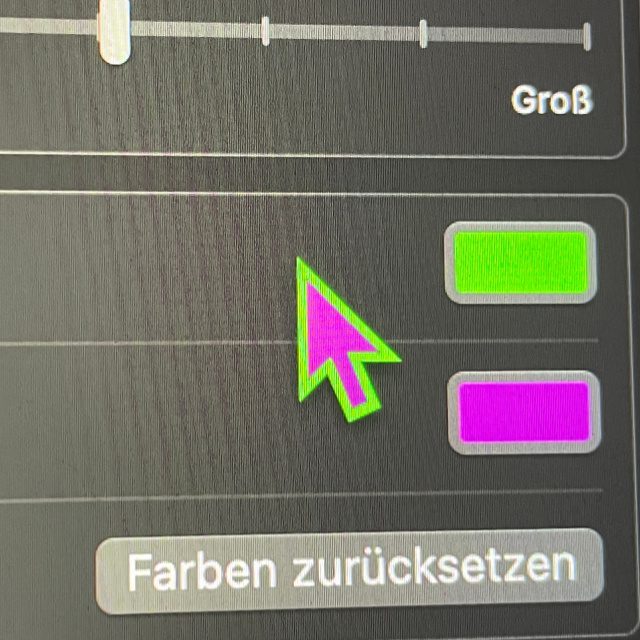
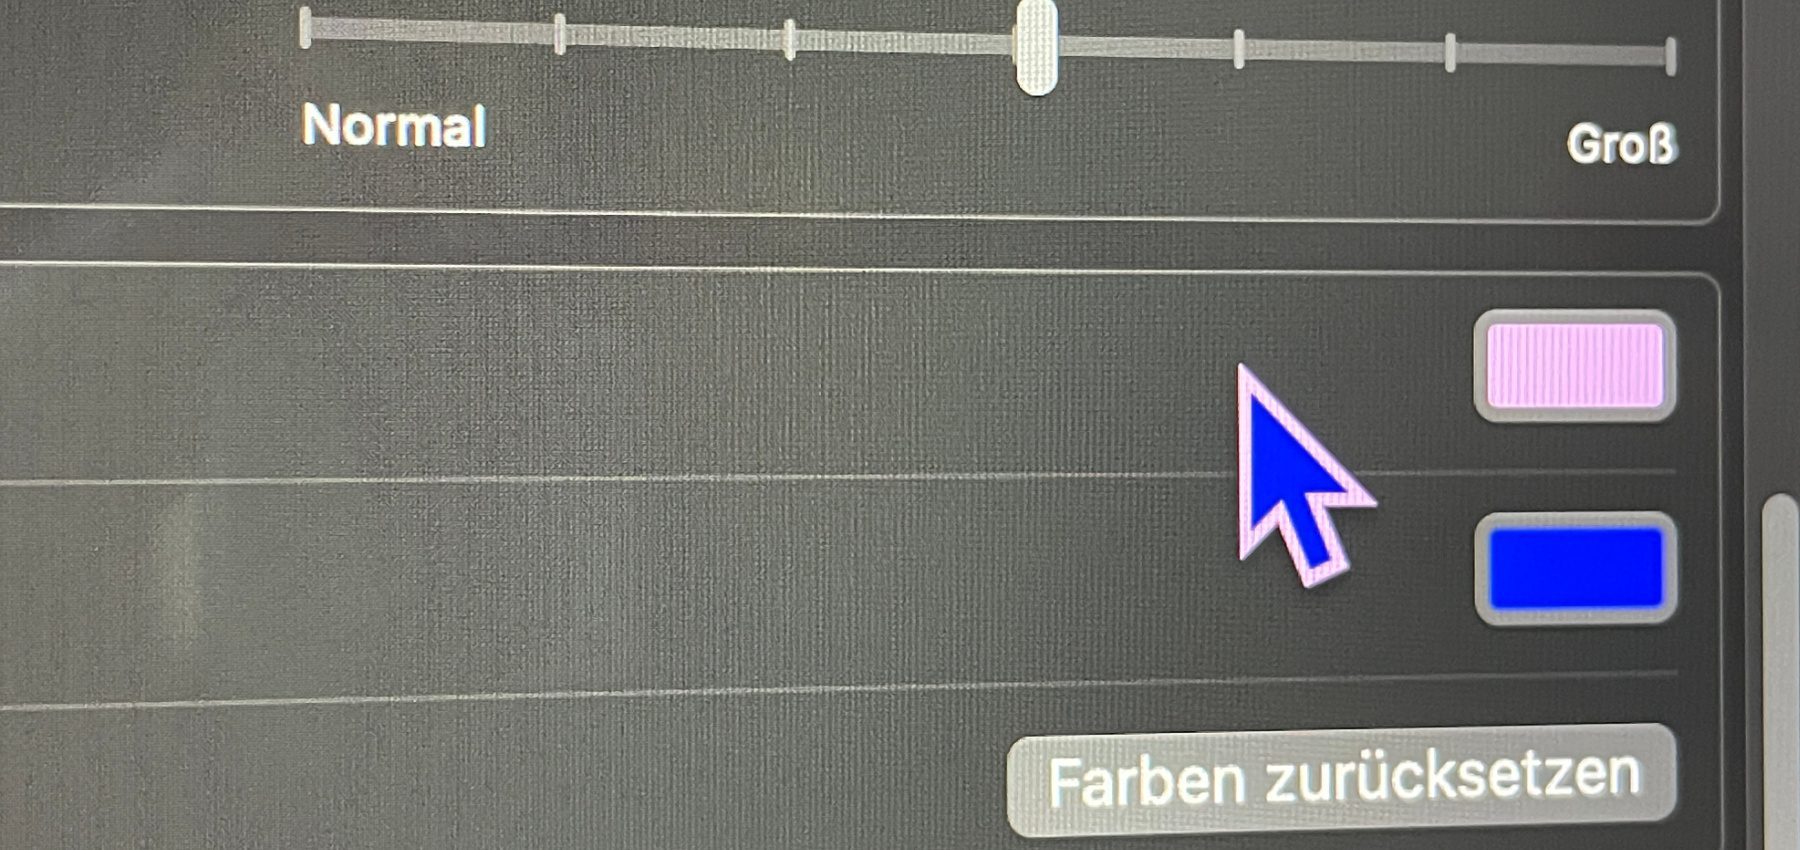
If you create a screenshot using command+shift+3, you can set it beforehand so that the mouse pointer is displayed on it. With the default settings of the cursor, this works quite well. However, if you have changed the size and colors of the pointer, it can appear completely different on the screenshot, and not at all as you set it. That's why I took pictures of the MacBook display here and there for this post instead of taking screenshots.

My tips & tricks about technology & Apple
Related Articles
 What is tccd and why is this process running on my Mac?
- 5 app recommendations in May 2024
- Mac: What is the large “sleepimage” file under /private/var/vm?
- What is rapportd and why is this process running on my Mac?
- What is secd and why is this process running on my Mac?
- What is lsd and why is this process running on my Mac?
- Various tricks: Show the menu bar under the MacBook notch
- Quick Look in full screen mode: This is how it works!


After graduating from high school, Johannes completed an apprenticeship as a business assistant specializing in foreign languages. But then he decided to research and write, which resulted in his independence. For several years he has been working for Sir Apfelot, among others. His articles include product introductions, news, manuals, video games, consoles, and more. He follows Apple keynotes live via stream.