
DiskMaker X is a Mac app that allows you to create a bootable drive from which macOS can be installed on an Apple computer. So if you want to set up a Mac, iMac or MacBook and are looking for a way to create a boot stick, DiskMaker X is a good and easy solution. In addition to the software for creating a bootable drive for the Apple Mac, I also briefly discuss recommended USB sticks and their preparation in this post.
Chapter in this post:
- 1 tip: ANYmacOS as an alternative
- 2 DiskMaker X - Simply do a macOS installer yourself
- 3 Make macOS Installer yourself: Here's how!
- 4 DiskMaker X download
- 5 This is how much memory the last systems need
- 6 Bootable USB stick - guide on the subject
- 7 The right USB stick for the macOS installer
- 8 My tips & tricks about technology & Apple
- 9 Similar posts
Tip: ANYmacOS as an alternative
I happened upon a good alternative to DiskMaker X: ANYmacOS. With this tool you can load macOS versions from macOS High Sierra and up and also create an installation medium directly. Bonus: The public beta of upcoming macOS versions and various seeds can also be loaded with it.

DiskMaker X - Just do a macOS installer yourself
Since Mac OS X 10.7, Apple has been encouraging the major system upgrades for the Mac to be obtained from the App Store. Just download, install and boom - done. But what if you want to set up the Mac again, transfer a faulty system or install an older operating system than the current one? Or what if you want to upgrade on a Mac without internet or with a poor connection? Then you need a way to play Mac OS X or macOS from an external source - and to create this source, there is the DiskMaker X app.
DiskMaker X helps to create a boot DVD, a boot USB stick or another bootable drive quickly and easily - this is also possible with an external Firewire, a Thunderbolt drive or an SD card. The most convenient and compatible way is certainly the USB stick. However, this is first deleted when writing through the app, you should keep that in mind. So if you are not using a new flash memory, but one that is already in use, first save its content;)
Make macOS Installer yourself: Here's how!
If you want to do a macOS installer yourself with DiskMaker X, then it's basically very easy. First download the app (download link see below) and start it. The following steps look like this:
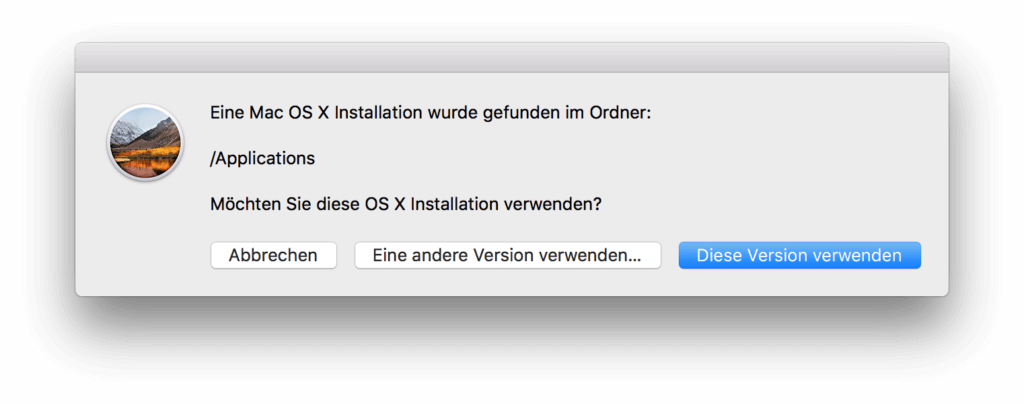
- After starting, DiskMaker X searches for an installation file (available in the App Store)
- If it finds an installer, you can confirm its use or select another file:
- If no macOS installation file is found, this window appears:
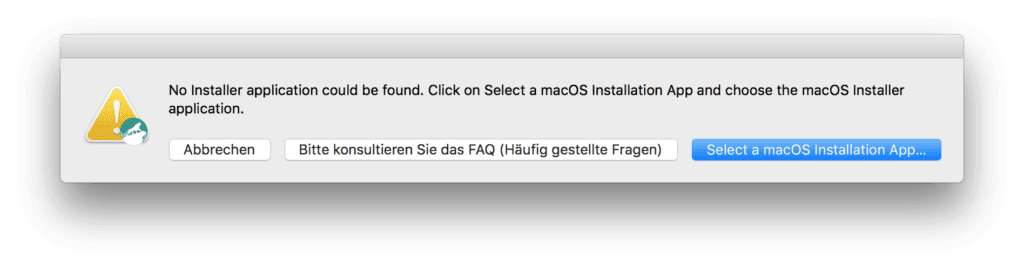
- There you can search for the file yourself by selecting the blue button (or download one first and then select it)
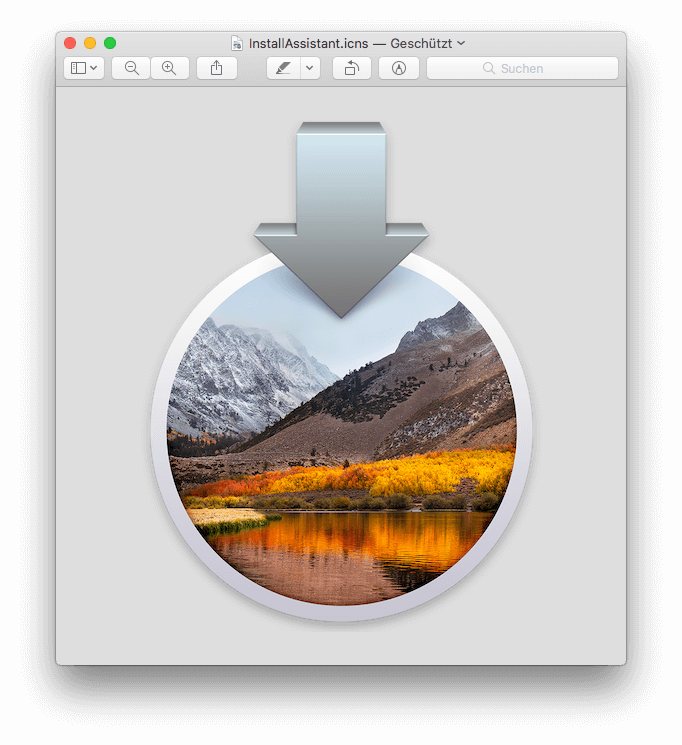
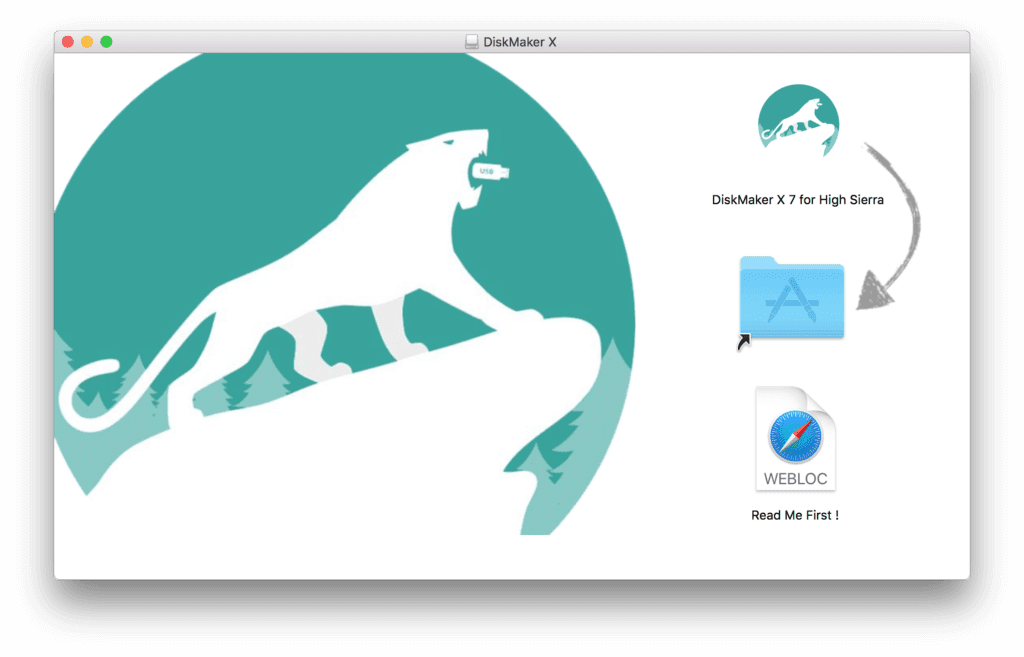
- You can recognize an installation file for the Apple computer by the arrow above the symbol:
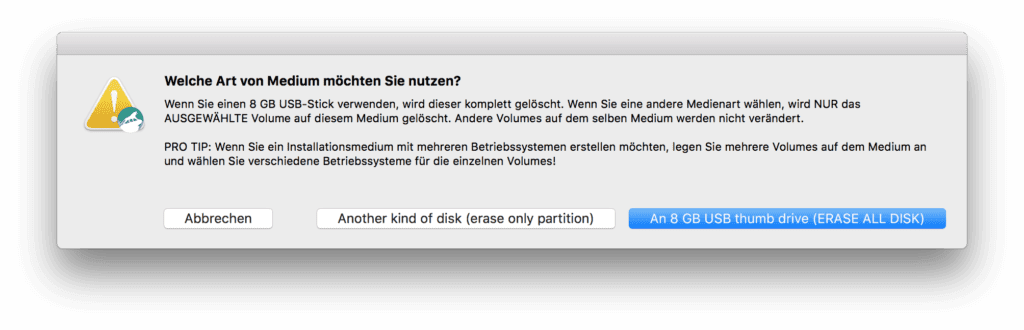
- If you click on "Use this version" when the file is found / selected, you will be taken to the selection of the storage medium - the standard is an 8GB USB stick:
DiskMaker X download
You can find the Diskmaker X download for your Apple computer on the official software website. In addition to the download of the latest version of DiskMaker X, there is also an FAQ with an explanation of individual error messages as well as a changelog, a blog and other interesting sub-pages. There is also the option of downloading older versions of the app, which was initially called "Lion DiskMaker". The versions for Lion, Mountain Lion, Mavericks and Yosemite can also be downloaded accordingly. You will find them on this bottom.
Note on the subject: You should only use the DiskMaker X download on the official software website. With a corresponding Google search you will also find downloads from various platforms such as CHIP, ComputerBILD, ZDNet and Co., but you should avoid these. I have summarized why for you here: Why you shouldn't download software from download portals.
![]()
This is how much memory the last systems need
Operating systems bring more and more features with them to deliver an ever better user experience. But that also means that the installation files get bigger and bigger. Here I have compiled the latest Apple operating systems for Mac, iMac and MacBook as well as the required storage space (as an installed system on the Mac hard drive):
- Mac OS X 10.11 El Capitan: 8,8 GB (More info)
- macOS 10.12 Sierra: 8,8 GB (More info)
- macOS 10.13 High Sierra: 14,3 GB (More info)
- macOS 10.14 Mojave: up to 20 GB (More info)
The numbers indicate the memory requirements for the first version of the operating system. Please note that the latest or most recent version of an OS can be significantly larger due to updates, patches and the like. For example, macOS Sierra 10.12.6 is no longer 8,8 GB, but over 12 GB. So choose a medium with a lot of space for creating a macOS Installer drive; even if the packed installation file is described in a smaller way in the App Store. Better safe than sorry ;)
Bootable USB stick - guide on the subject
How to create a boot and installation stick with a macOS system, you can read here in the blog in several places. Tips and advice on making a USB stick bootable and formatting the medium, along with other articles, are gathered here. So that you don't have to search long, I have put together the most important ones for you:
- Format USB stick on Mac and Windows
- Create a bootable USB stick for Mac and PC
- Install macOS Sierra from the USB medium
The right USB stick for the macOS installer
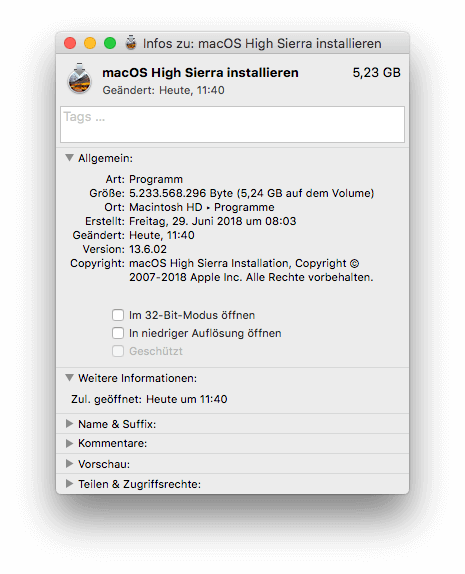
Up to now, 8 GB was always considered sufficient for the installation file of an Apple computer operating system. In the App Store you can see that macOS 10.13 High Sierra is listed as 5,22 GB. As described above, the files and the OS versions extracted from them get bigger and bigger. You are best prepared for the future if you buy a 16 GB stick or, even better, a 32 GB stick for use with upcoming macOS installation files and DiskMaker X. Or the SanDisk Ultra with 128 GB as well as USB-A and USB-C (here in the test): D
- SanDisk Ultra with USB-A and USB-C 3.1 - 16 GB: buy here
- SanDisk Ultra with USB-A and USB-C 3.1 - 32GB: buy here
My tips & tricks about technology & Apple
Related Articles
 First CTF adjustment: Apple weakens unfair developer fees
- SaneBox – Organize, sort and postpone emails with AI (sponsor)
- Solution: “AltStore is no longer available” message on the iPhone
- Cancel AltStore PAL subscription: Here's how!
- Tried it out: Install and use AltStore PAL as an app marketplace on the iPhone
- Surfshark VPN on the Apple TV is now even easier to use (sponsor)
- [Update] AltStore in the test: iPhone sideloading (and game emulation) tried
- 5 app recommendations in April 2024


![[Update] AltStore in the test: iPhone sideloading (and game emulation) tried](https://a391e752.rocketcdn.me/wp-content/uploads/2024/04/iphone-altstore-test-2024-150x150.jpg)

After graduating from high school, Johannes completed an apprenticeship as a business assistant specializing in foreign languages. But then he decided to research and write, which resulted in his independence. For several years he has been working for Sir Apfelot, among others. His articles include product introductions, news, manuals, video games, consoles, and more. He follows Apple keynotes live via stream.
Unfortunately, the direct download of the file no longer seems to work in the new app store - the error message appears that the version is too old. Also a try with Shift/Command/etc. and clicking the 'Load' button did nothing. Does anyone have a hint?
Hi tom! What do you like to download? An updated version of DiskMaker X is now available for macOS Mojave: https://diskmakerx.com/ If you meant something else, get in touch again. Maybe then I can help. : D
Hello Sir Apfelot - sorry, I was ambiguous.
If I want to download the installer from, for example, High Sierra and click on load, the system update window always opens and it checks the version and (logically) determines that it is out of date and aborts the download.
Of course, I would like to download the file / installer directly WITHOUT installing it on my system. But this is not possible with the usual keyboard shortcuts that I remember, nor do I know how it currently works. Google search didn't bring anything.
For example, I tried right-clicking, left-clicking with control / option / command - but nothing helps.
Thanks for the blog in any case.
Hello Tom! Yes, that's right ... I can't do that with the ALT key either. But at some point I loaded the installer ... I'll email you directly! ;-)
Hi tom! Unfortunately, your email address is incorrect. Please write me by email ... you can find my email address in the imprint