Maybe one or the other knows the problem: You have called up a website or app that shows something that does not fit completely on the iPhone screen and you would like to take a screenshot that shows everything. In my case, it was a website that I called up on the iPhone and that I wanted to send to a developer as a complete screenshot to point out a graphic error.
Chapter in this post:
- 1 Take an iPhone screenshot of the complete content
- 2 Create iPhone screenshots of entire documents, notes, etc
- 3 Problem: long screenshots don't work for some apps
- 4 Create screenshots on different iPad and iPhone models
- 5 iPhones or iPads with a home button
- 6 iPhones without a home button
- 7 iPads with Face ID
- 8 My tips & tricks about technology & Apple
- 9 Similar posts
Take an iPhone screenshot of the complete content
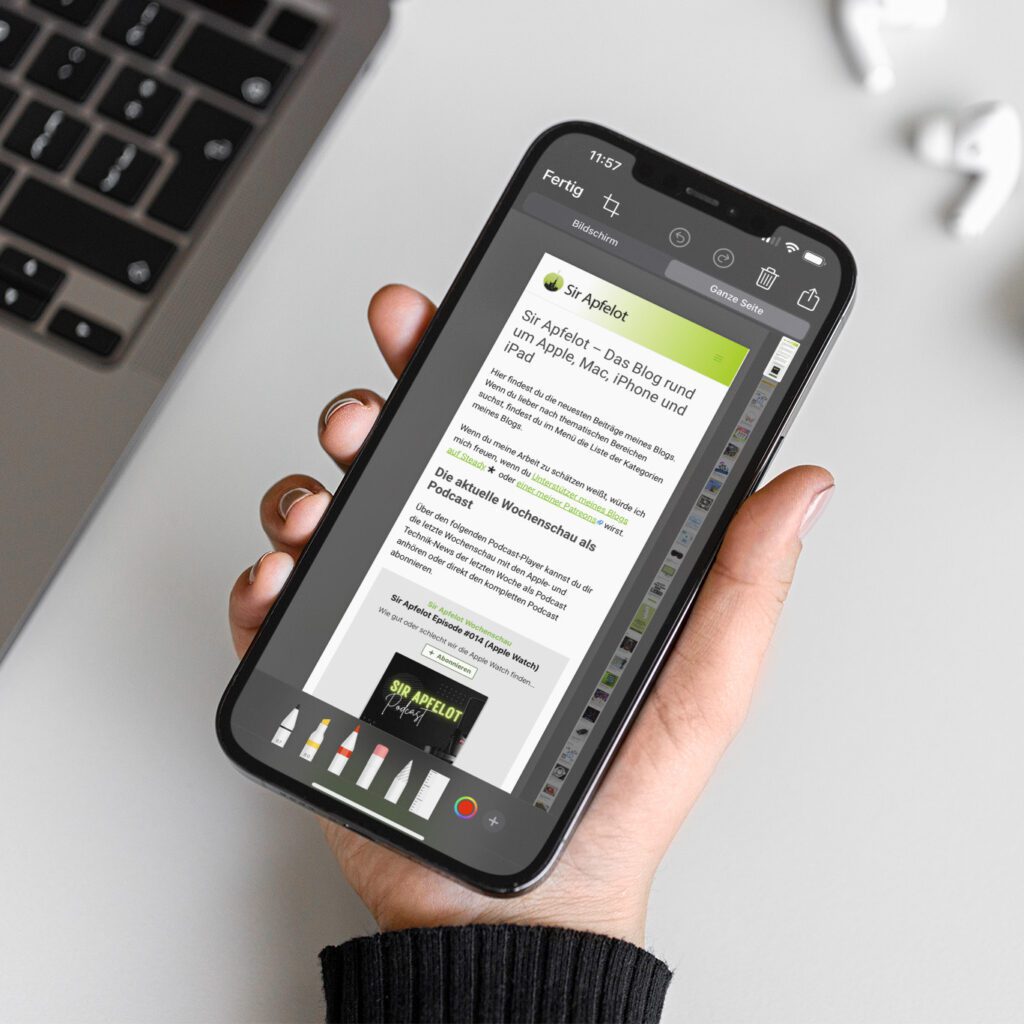
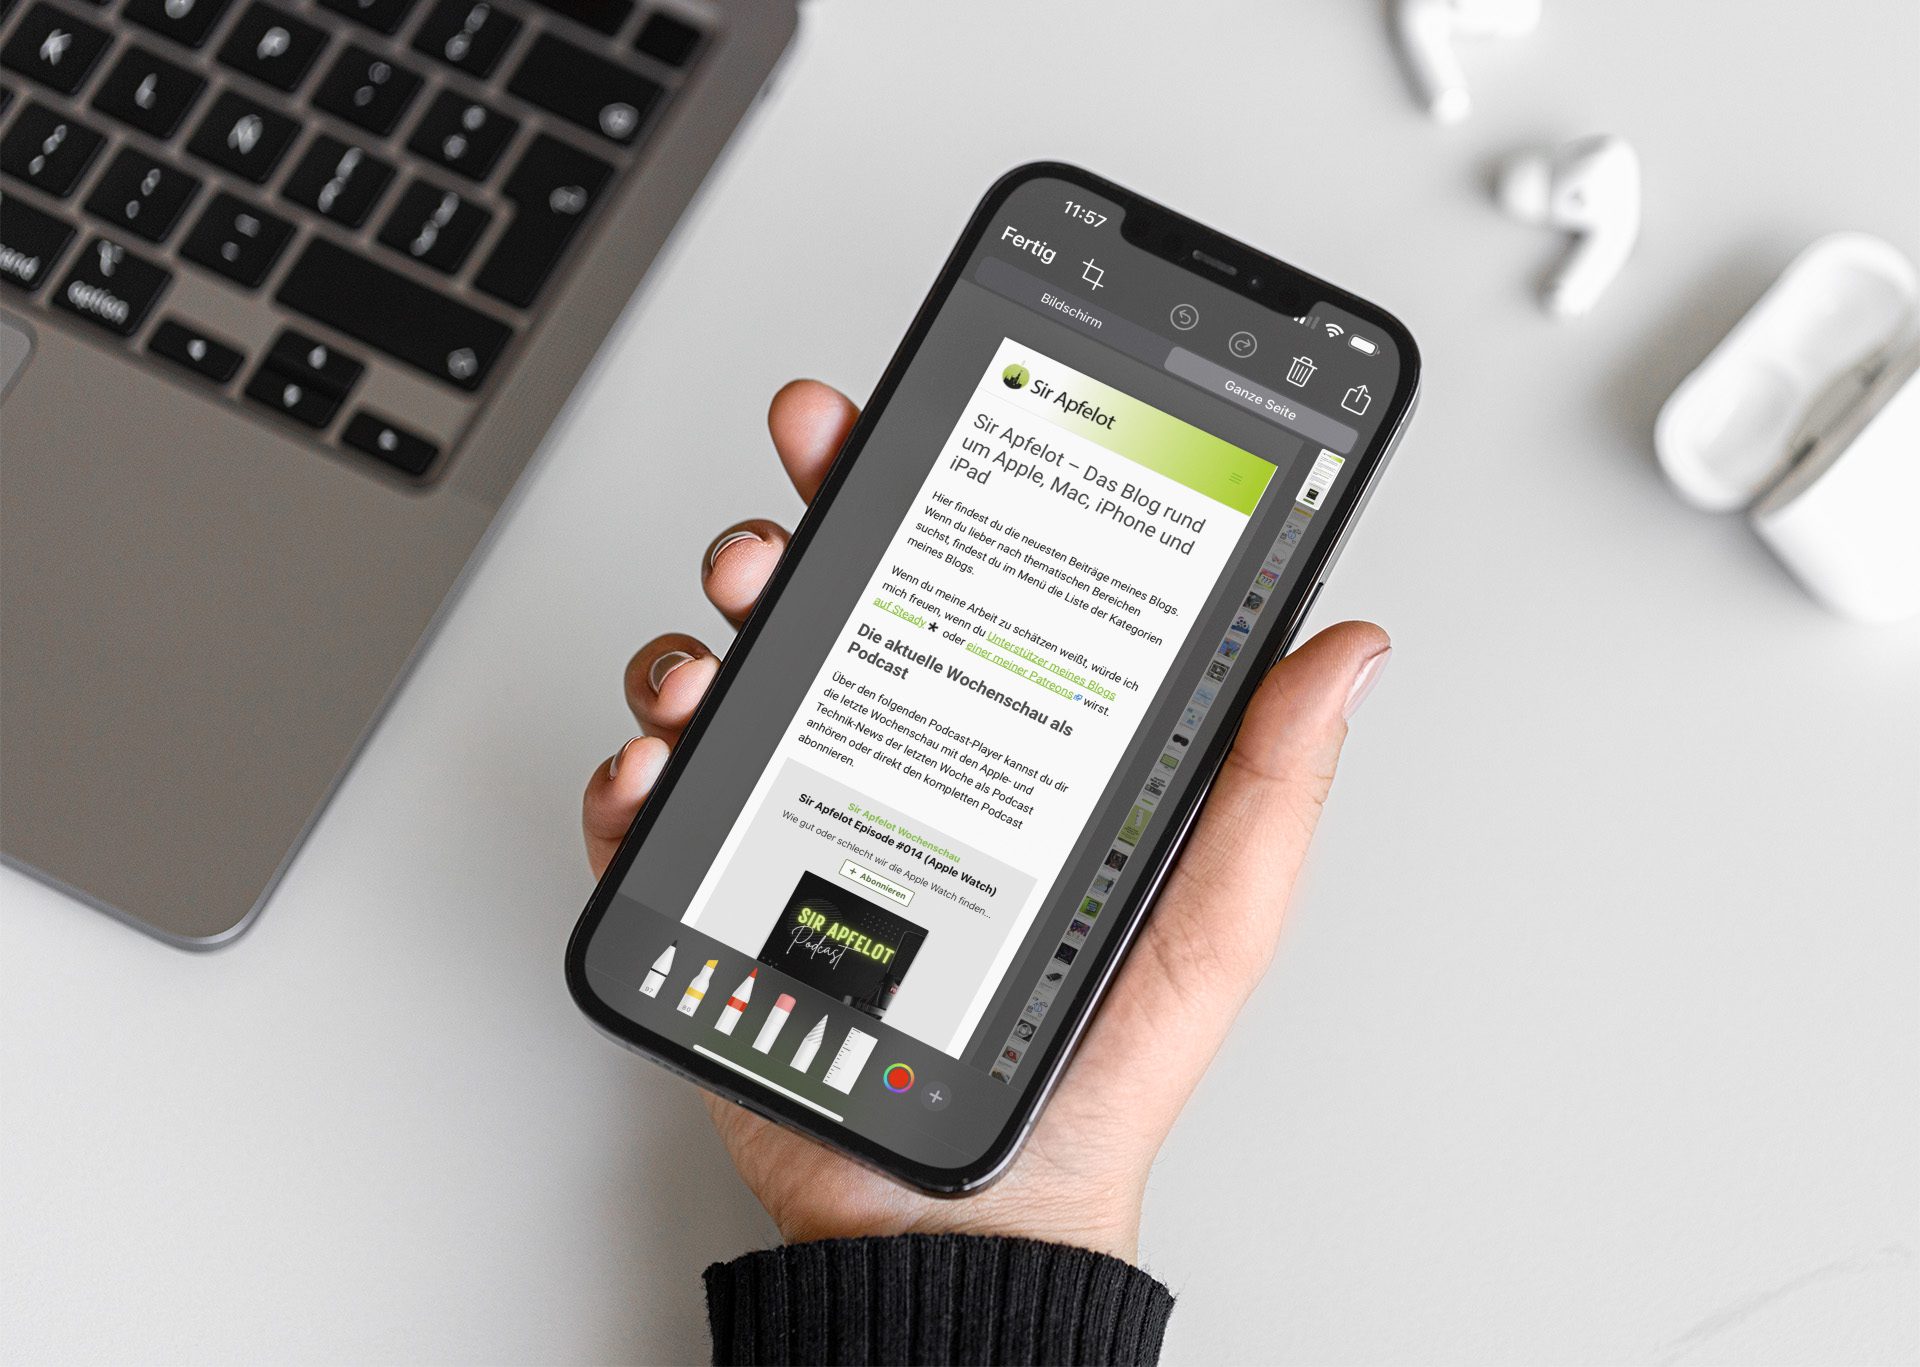
If you now take a regular screenshot, only the respective section that is currently visible on the display is shown. But there is an easy way to capture the complete, scrollable content:
- as usual, one Take a screenshot with the iPhone (press the standby button (right) and volume up button (left) at the same time)
- Now tap on the screenshot preview in the lower left corner of the display
- in the screenshot editing view, there is a “Full Page” item at the top that you tap
- now a scroll bar is displayed on the right and the complete website or app is displayed
With these simple steps you now have a more or less long graphic that you can continue to use. Either send it by mail, build it into the messages or save it as a PDF in a file folder.

Create iPhone screenshots of entire documents, notes, etc
You can not only store websites in their entirety as PDF files, but also other screen content. Do you have e.g. For example, if you wrote a long text in the Notes app and want to quickly convert it into a PDF, then the instructions above will work just as well. Just bring up the note, take a screenshot, and then edit it in the "Full Page" tab.
You can tap, delete, add markers and more on individual pages in the scroll bar (on the right in the editing view). For notes, documents, presentations and more with images you can e.g. B. remove their pages if only text should be found in the finished PDF. If you only want to extract the images, then remove the text pages and leave the graphics to finally save them as a PDF.
Problem: long screenshots do not work for some apps
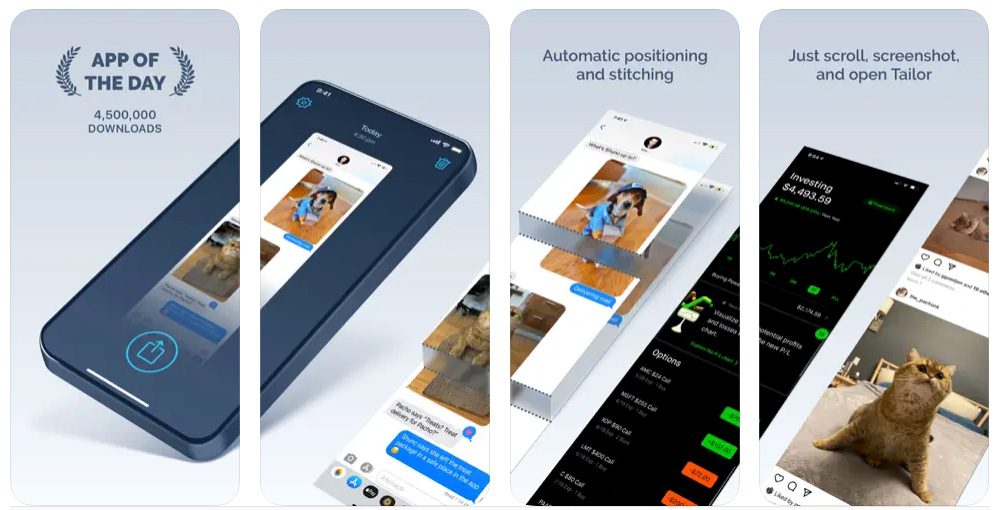
A reader drew my attention to the fact that the technology does not work in Apple's stock app, for example. You just don't get a button that says "Whole Page" and consequently you can't save the entire app view.
But fortunately there is also a direct solution to this problem and it is called “Tailor-Screen Stitching“. And yes, it does exactly what you'd expect from the name: it merges multiple screenshots you've taken into one large screenshot. And that fully automatically and also with over 30 individual screenshots, if necessary.
Create screenshots on different iPad and iPhone models
There are now many different iPad and iPhone models, some of which still have a home button. I have presented you with various methods here so that you know how it works for you on the iPad or iPhone. Once you've taken the screenshot, for a scrollable screenshot, all you have to do is find and tap the "Full Page" button again.
Examples of these models include iPhone SE (1st and 2nd generation), iPhone 8 and earlier, and most iPads.
To take a screenshot on these devices, follow these steps:
- Open the app or screen you want to capture.
- Simultaneously press the side button (or the top button, depending on the model) and the home button. Release both buttons immediately.
- If the screenshot is successful, you will see a brief screen flash and a thumbnail of the screenshot will appear in the lower left corner of your screen.
- Tap the thumbnail to open and edit the screenshot, or swipe left to save and continue.
These models include iPhone X and newer models, like the iPhone 12, 13 and above.
To take a screenshot on these devices, follow these steps:
- Open the app or screen you want to capture.
- Simultaneously press the side button and the volume up button. Release both buttons immediately.
- As with the home button models, you will see a brief screen flash and a thumbnail of the screenshot will appear in the lower left corner of your screen.
- Tap the thumbnail to open and edit the screenshot, or swipe left to save and continue.
iPads with Face ID
The iPad Pro (3rd generation and newer) falls into this category.
The procedure for taking a screenshot on these devices is the same as for the iPhones without a home button:
- Open the app or screen you want to capture.
- Simultaneously press the top button and the volume up button. Release both buttons immediately.
- A brief screen flash and a thumbnail of the screenshot will appear in the lower-left corner of your screen.
- Tap the thumbnail to open and edit the screenshot, or swipe left to save and continue.
With these steps, you should be able to create scrollable screenshots on any iPhone or iPad. If you have any questions, please let me know.
Instructions from the iOS manual: View here
My tips & tricks about technology & Apple
Related Articles
 New iPad models: Will Apple introduce the M4 chip next week?
- What's coming to the Apple iPhone with iOS 17.5?
- [Update] AltStore in the test: iPhone sideloading (and game emulation) tried
- Share the screen in FaceTime: Instructions for iPhone, iPad and Mac!
- [Update] Overview: Battery capacity (mAh & Wh) of the Apple iPad models
- Apple iPad Hard Reset – Force restart on the tablet
- All iPad generations at a glance
- [Update] Which iPad do I have? Here's how to get it out!


![[Update] AltStore in the test: iPhone sideloading (and game emulation) tried](https://a391e752.rocketcdn.me/wp-content/uploads/2024/04/iphone-altstore-test-2024-150x150.jpg)

![[Update] Overview: Battery capacity (mAh & Wh) of the Apple iPad models](https://a391e752.rocketcdn.me/wp-content/uploads/2024/04/ipad-battery-capacity-mah-wh-150x150.jpg)


![[Update] Which iPad do I have? Here's how to get it out!](https://a391e752.rocketcdn.me/wp-content/uploads/2020/07/ipad-modell-bestimmen-anleitung-150x150.jpg)
Jens has been running the blog since 2012. He acts as Sir Apfelot for his readers and helps them with technical problems. In his spare time he rides electric unicycles, takes photos (preferably with the iPhone, of course), climbs around in the Hessian mountains or hikes with the family. His articles deal with Apple products, news from the world of drones or solutions to current bugs.
The tip is really great. Thanks.
This does not work with all types of screenshots. My guess is only with PDF screenshots, or whatever...
For me, a counter-example was the stock app screenshot. The “Screen”/”Whole Page” bar was missing for me.
The solution has a downside!
A PDF is always created.
But if you want to keep pictures, App Tailor will help you.
You take overlapping screenshots and then open Tailor, the app then assembles them. My experience: do not share from the app but choose "save & delete originals".
Then you have a good screenshot in the gallery.
The free version contains a watermark, which can be removed for a one-time fee of €2,99. I've been using the app for many years.
https://apps.apple.com/de/app/tailor-screenshot-stitching/id926653095
Hi Jonas! Thanks you for the tip. I just tried my method with the shares app and: You're right. You don't get the "Whole Page" button at all. But it's great that you provided the solution directly. I'll add the app to the post above.