In the iWork app "Keynote", which you can download free of charge from the App Store on the Apple Mac, you can export inserted content and slides of a presentation as GIF. Even videos that you add on a slide are output as an animated image file. With this, Keynote closes the gap that Apple leaves open with iMovie: Save videos and clips as GIF with one-stop shopping. Because there is also third-party software for this, but sometimes you have a watermark here, and sometimes only a subscription option, etc.
Chapter in this post:
Create GIF on Mac: Keynote app offers storage option
If you have created a presentation, created a kind of flip book with Keynote slides, or simply inserted a video on a slide, you can save the whole thing as a GIF file. The instructions for doing this are just a few simple steps:
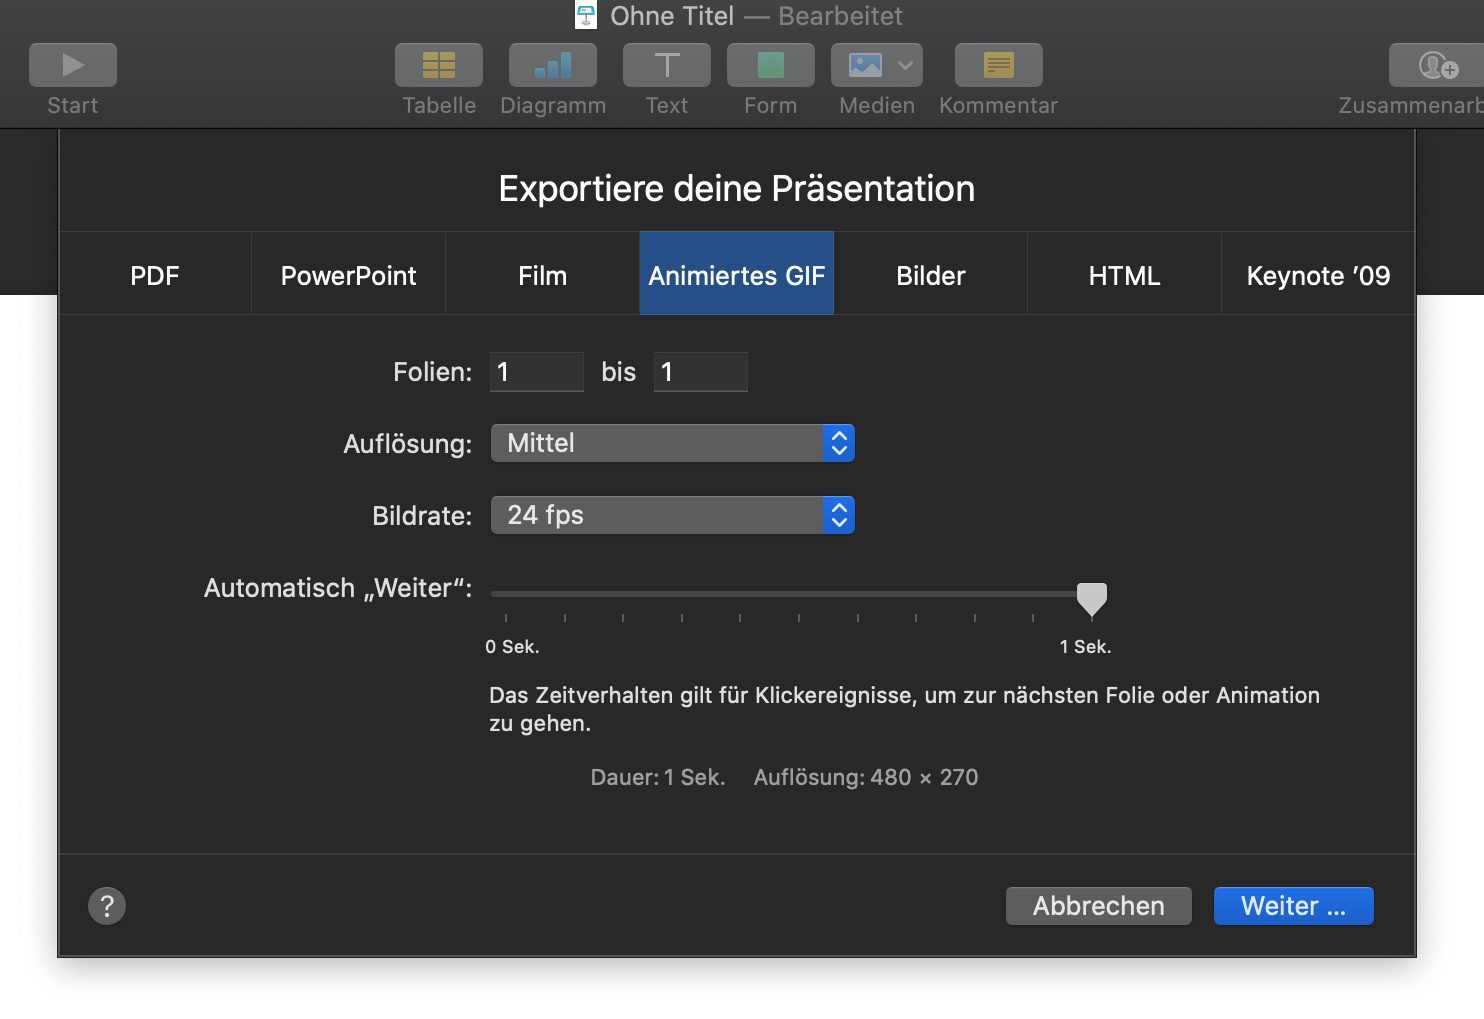
- In the menu bar filing -> Export... -> Animated GIF here
- Now set various parameters (number of slides, resolution, fps, usw.)
- Then click on the "Next ..." button
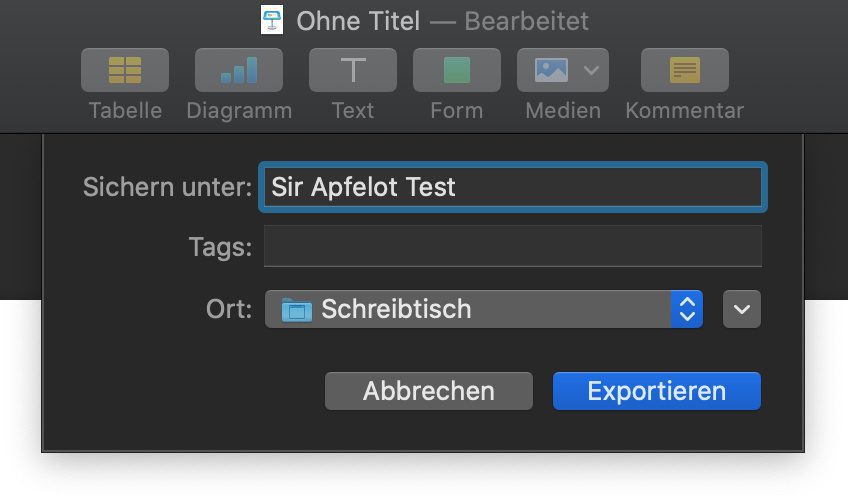
- Select / enter a name, a storage location and, if necessary, tags
- Finally click on the "Export" button
I found this out from Apple's official user guide for the Keynote app. You can find the entry "Create an animated GIF in Keynote on the Mac" with this link.
GIF resolution when creating animated images with Keynote
In the second step you can set the resolution of the target file, among other things. You will not be given any number of pixels to choose from in the corresponding drop-down menu, only the options "Small", "Medium", "Large" and "Very large". With a standard slide size (for 16: 9 playback) this means the following:
- Small: 320 x 180 pixels
- Medium: 480 x 270 pixels
- Large: 720 x 405 pixels
- Very large: 1080 x 608 pixels
Other formats are possible if you z. B. want to output a video via Keynote as a GIF. Then classic 4: 3 or 16: 9 formats are also possible. With some things you just have to try out a bit and play around with the settings.
Create GIF with Keynote on macOS: Instructions in pictures
I have packed the above step-by-step instructions for creating GIF images with the free PowerPoint alternative from Apple under macOS into screenshots. Depending on the version of the software, the procedure may change slightly in the future, but it should not be completely different. Under the following images you will find a few more tips and details on each step of creating GIFs on the Mac with Keynote.

My tips & tricks about technology & Apple
Related Articles
 First CTF adjustment: Apple weakens unfair developer fees
- SaneBox – Organize, sort and postpone emails with AI (sponsor)
- Solution: “AltStore is no longer available” message on the iPhone
- Cancel AltStore PAL subscription: Here's how!
- Tried it out: Install and use AltStore PAL as an app marketplace on the iPhone
- Surfshark VPN on the Apple TV is now even easier to use (sponsor)
- [Update] AltStore in the test: iPhone sideloading (and game emulation) tried
- 5 app recommendations in April 2024


![[Update] AltStore in the test: iPhone sideloading (and game emulation) tried](https://a391e752.rocketcdn.me/wp-content/uploads/2024/04/iphone-altstore-test-2024-150x150.jpg)

With Lynne, a graphic artist and designer has joined the team who contributes articles on the topics of homepage, web development and Photoshop. YouTube has recently become one of her areas of activity. Lynne is (unintentionally) very good at generating error messages and thus ensures a steady influx of problem-solving articles, which repeatedly make the Sir Apfelot blog a popular contact point for Mac users.