
You are using the hosts file all the time, but most likely you will not even know about it. The reason for this is that you usually don't have to change anything. In my case, however, it is necessary to make a few entries every few weeks in order to avoid waiting times if I have to move a customer domain including website. How the hosts file comes into play is explained further down in the post, but for those people who don't want this information, I have here briefly the links to my two software recommendations.

Chapter in this post:
HostBuddy: fee-based Mac tool for editing the hosts list
On the Mac, the said file is under this path: /etc/hosts. If you want to change this, you usually have to go along with it Port and text editor and then clear the DNS cache. Depending on how often you have to do this, it can be very annoying. For this reason there is a program called "HostBuddy" that offers a nice GUI with DarkMode support for this type of work.
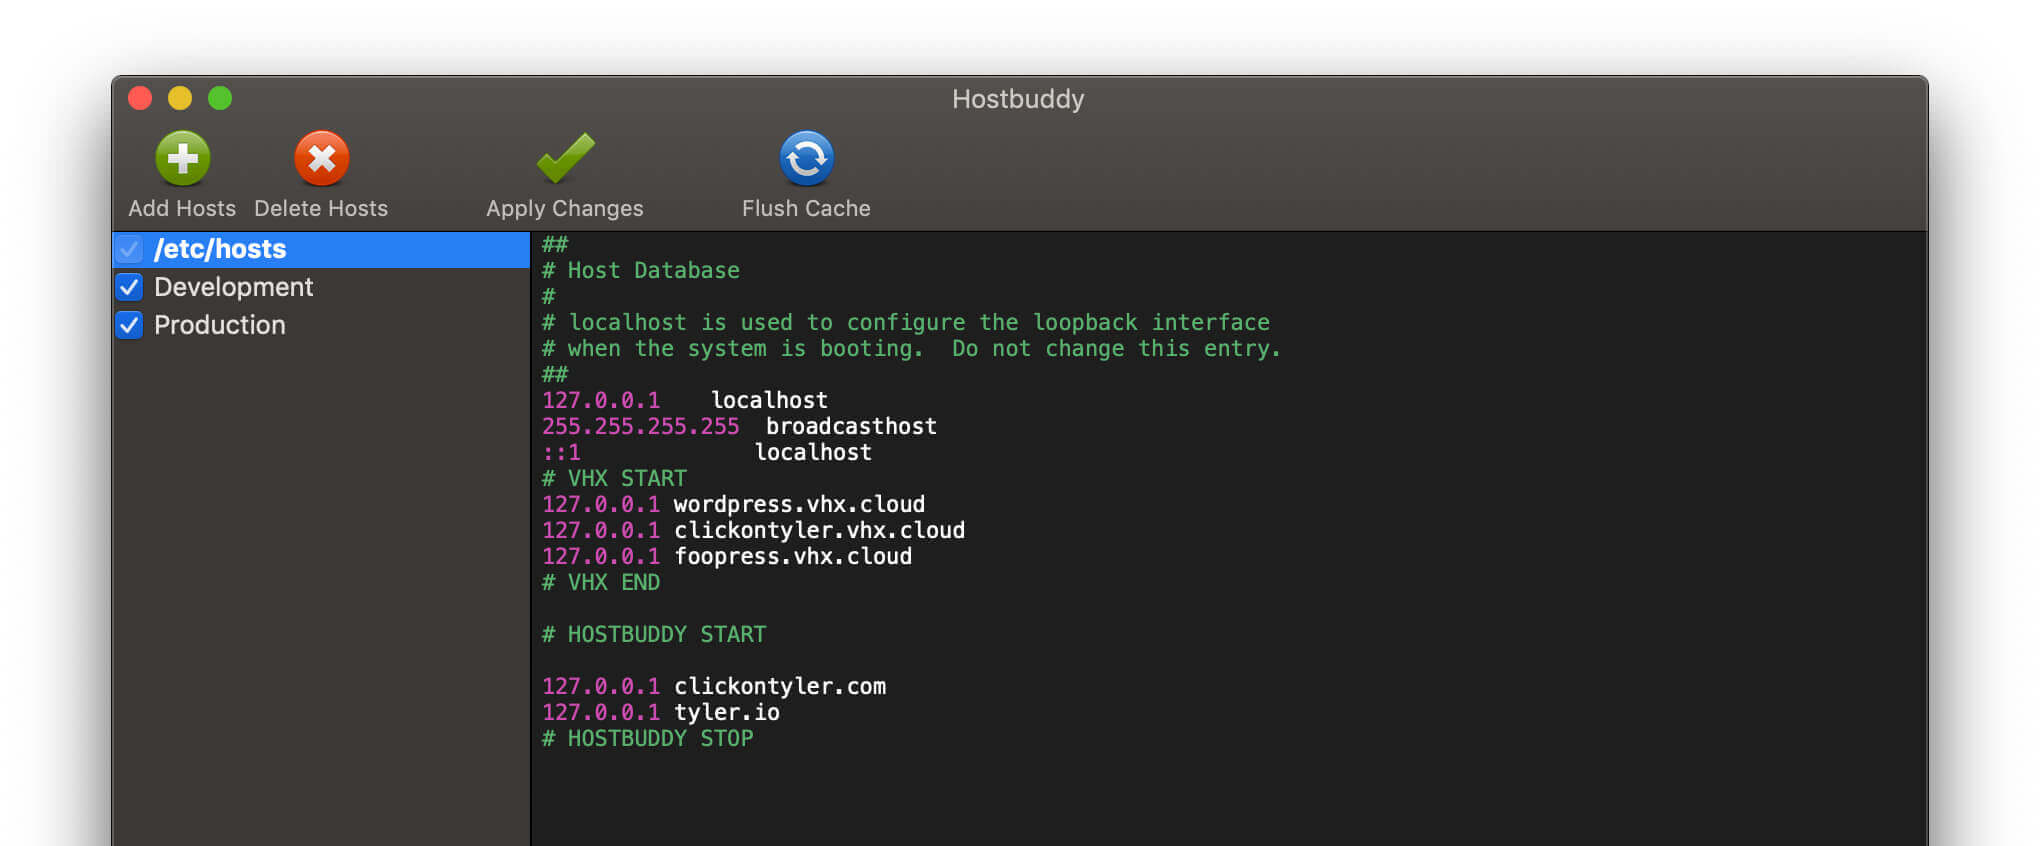
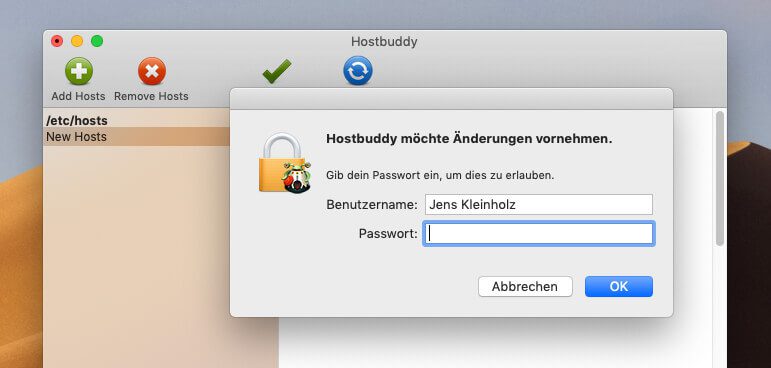
In HostBuddy you can easily create new entries for the hosts file and comment out other entries and refresh the DNS cache after the work is done - with a button. You still have to enter your administrator password for the Mac to carry out this job, but overall you are significantly faster with it than with the terminal - at least if you only work in the terminal in emergencies, as I do.
The HostBuddy software is currently available in the 2.0 version download here and use it first in the demo version. I have now bought the full version because I find the software extremely practical and want to support the developers. With version 2.0 you have brought a number of bug fies and also built in compatibility with the Mojave Darkmode.
HostsMan: Freeware for Windows
If you want to change the hosts file under Windows 10, 8 or 7, you usually have to do this in this path:
C: \ Windows \ System32 \ drivers \ etc
But of course there is also a tool under Windows - and here even a freeware - which offers a comfortable way to change the hosts file. I haven't tried the software myself, but still wanted to leave it here as a recommendation for Windows users. If you want to download the program, you will find it here under the name HostsMan.
How I use HostBuddy to move websites and domains
As already mentioned, I use HostBuddy when I move a website including a domain from one customer to another hoster. When you do this normally, the changes made to the DNS server spread across the network within a few hours. This means that you have a certain amount of time in which you can reach the old or the new server when calling up the domain. You can only find out which one you are currently querying if you use a ping command to check which IP address you are receiving or by making changes on one of the two servers and seeing whether they are displayed on the website.
But since I like to know whether the domain is running properly on the new server BEFORE I actually switch the domain to the new hosting, I can use HostBuddy to tell my Mac that it will call up the IP address of the new server when the domain is called up should. As a result, I can already see the website on the new hosting, while the rest of the world is still accessing the old hosting.
This is particularly helpful with content management systems such as Wordpress, since the domain occurs in hundreds of places in the database and there is hardly any opportunity to test the website on the new server without moving the domain. It's possible, but it's cumbersome.
Have fun with HostBuddy and friends
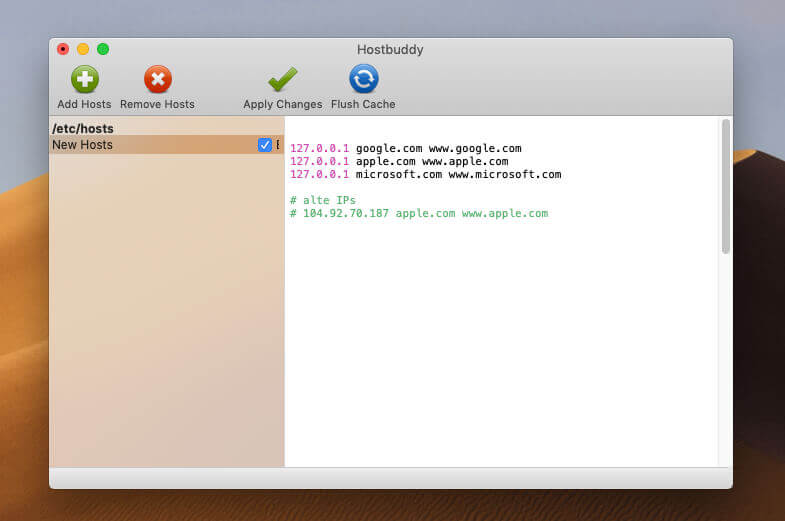
If you want to impress your friends a bit, you can also route well-known domains such as www.google.com or www.apple.com on your own Mac. Instead of the real Apple or Google page, your own Mac is addressed and with a free software package such as MAMP or the web server built into macOS you can then display another website that you created yourself.
Change the host file on the Mac with the terminal
For the sake of completeness, I would like to briefly show the path that you have to take if you want to change the host file on the Mac with the terminal and the Nano-Editor:
- Start Terminal (Programs> Utilities> Terminal)
- Enter: sudo nano / etc / hosts
- Now enter your Mac user password
- You can now change the hosts file in the Nano editor
- To close, press CTRL + X and confirm the save with the "Y" key.
- Enter: sudo / usr / bin / dscacheutil -flushcache
- Enter Mac user password
Complete. Now you can see how many steps a HostBuddy saves. You can simply make changes and click on “Apply Changes”. ;-)
Related Articles
 SaneBox – Organize, sort and postpone emails with AI (sponsor)
- Solution: “AltStore is no longer available” message on the iPhone
- Cancel AltStore PAL subscription: Here's how!
- Tried it out: Install and use AltStore PAL as an app marketplace on the iPhone
- Surfshark VPN on the Apple TV is now even easier to use (sponsor)
- [Update] AltStore in the test: iPhone sideloading (and game emulation) tried
- 5 app recommendations in April 2024
- Apple iWork 14.0 – Updates for Pages, Numbers and Keynote


![[Update] AltStore in the test: iPhone sideloading (and game emulation) tried](https://a391e752.rocketcdn.me/wp-content/uploads/2024/04/iphone-altstore-test-2024-150x150.jpg)


Jens has been running the blog since 2012. He acts as Sir Apfelot for his readers and helps them with technical problems. In his spare time he rides electric unicycles, takes photos (preferably with the iPhone, of course), climbs around in the Hessian mountains or hikes with the family. His articles deal with Apple products, news from the world of drones or solutions to current bugs.