To get a glimpse of the Mac operating system that will be officially released in the fall macOS 14 Sonoma to be able to throw, I installed the corresponding beta version over the weekend. I only went through the official steps required by Apple. But I quickly chose an alternative path because I didn't get any further. If you're looking for a quick way, the macOS Sonoma Beta version next to your current operating system, you will find the solution here - including a direct download of the necessary .pkg file. Note: I am using the macOS Sonoma Beta on a MacBook Pro with M1 Pro chip from 2021 macOS 13 Adventure.
Chapter in this post:
- 1 Join Apple as a developer
- 2 Problem: Only the Ventura beta is available
- 3 Direct download of macOS Sonoma Beta pkg file
- 4 Create installer from pkg file
- 5 Back up the current system
- 6 Create additional APFS volume on Mac hard drive
- 7 Install macOS Sonoma Beta on the new volume
- 8 How do I start the installed beta version?
- 9 Manually select boot disk and operating system at startup
- 10 Set startup disk to start Sonoma manually only
- 11 Account portability does not provide for all settings
- 12 My tips & tricks about technology & Apple
- 13 Similar posts
Register as a developer with Apple
Don't worry, you need no paid developer account to view the beta of macOS Sonoma to be able to use. This is still possible free of charge. However, it says in numerous instructions and officially from Apple that you have to in the developer area Sign in to Apple's website with your Apple ID, agree to the Terms and Conditions, register your Mac, and then proceed to download and install the beta. To do this, you can use the download area of the website, to which you will be directed after agreeing to the terms and conditions.
Problem: Only the Ventura Beta is available
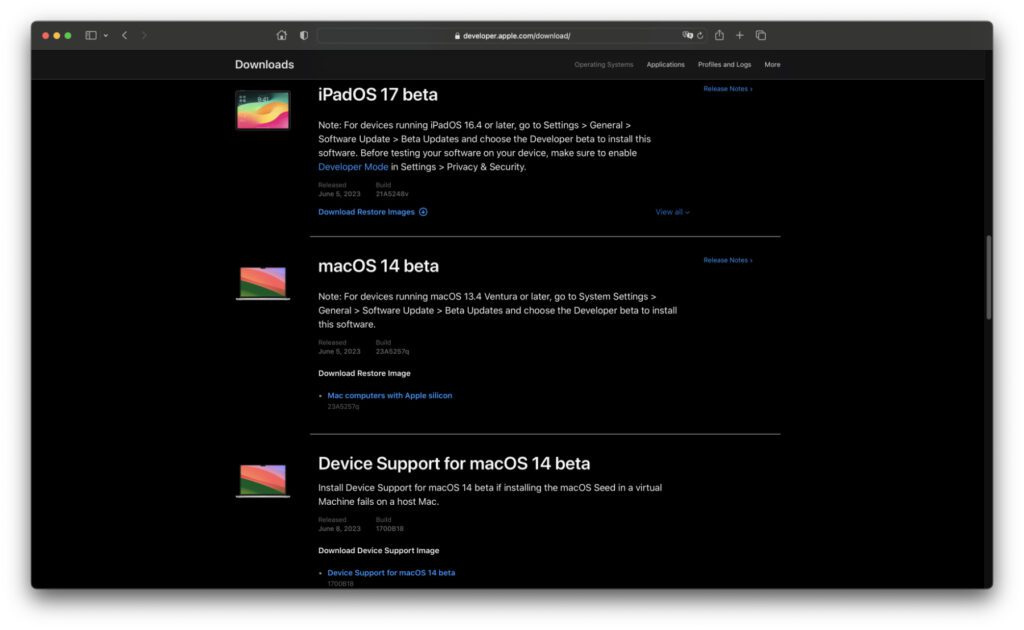
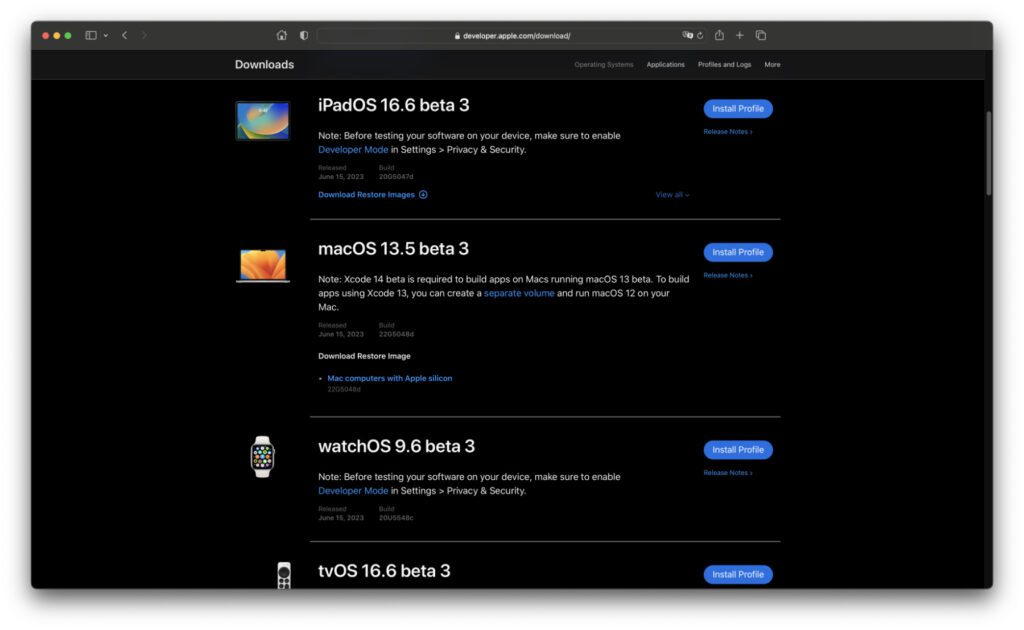
There are currently no public betas for macOS 14, iOS 17, watchOS 10 and the like. These will probably not be rolled out until July. You will receive more information about this with this link. But I couldn't find a Sonoma beta either on the developer page or in the system preferences where the beta updates are displayed after registering the Mac for the developer program. I don't know what exactly I did wrong, but I was only presented with options for the Ventura beta.
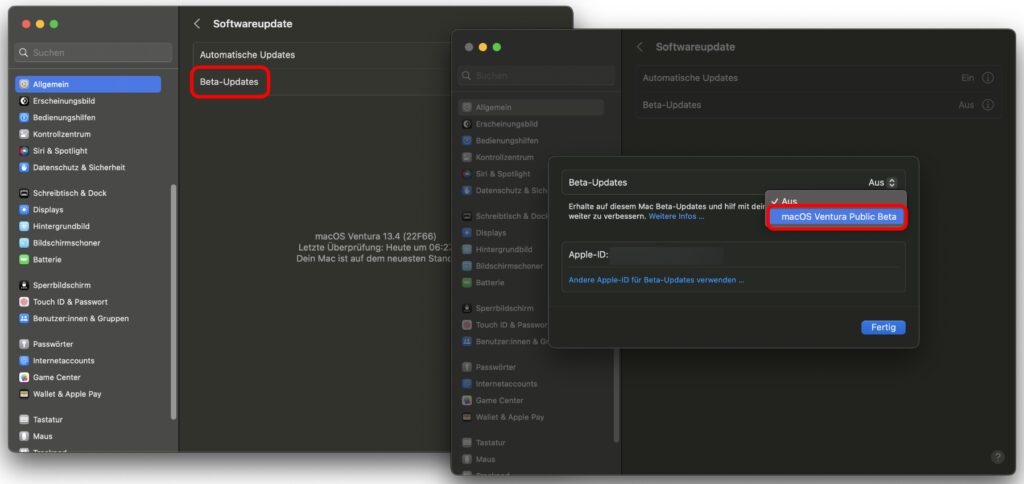
Direct download of the macOS Sonoma Beta pkg file
So since the official ways didn't work (or I was too stupid to track down the right option), I looked around for a direct download from Apple's servers, i.e. a link rather than some system settings or hidden developer websites . I found what I was looking for: Start the download here (size: 13 GB).
Build installer from pkg file
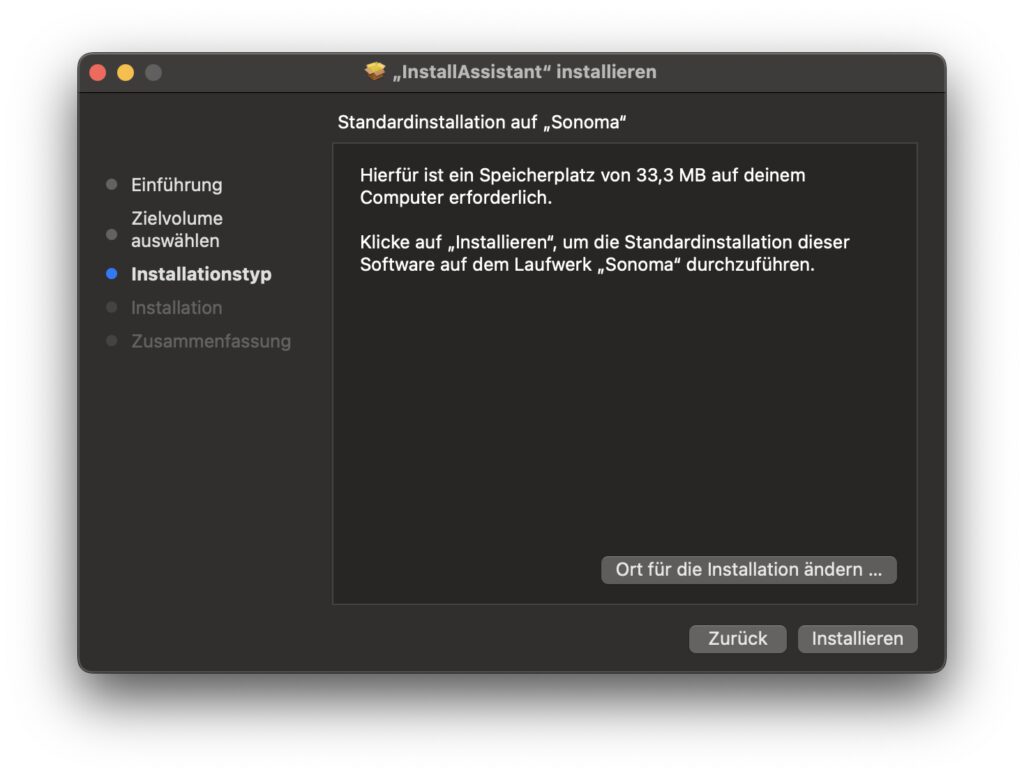
Double-clicking on the downloaded file will launch an installer. But don't worry, it won't overwrite your current system. You will be advised that only 33,3MB (or similar MB size) is required for installation. So no whole system is installed, but an installer is created first. This installer is then used to install the macOS Sonoma Beta. But we only get to that after a few intermediate steps.
Create a backup of the current system
Before you start creating a target volume and installing the Sonoma Beta, first create a backup of your current system. Use Time Machine, a cloud backup, a backup program and an external hard drive or other method to back up your data. This allows you to quickly restore the system if installing or using the beta should disable your Mac. Proceed with the following steps only after the backup.
Create additional APFS volume on Mac hard drive
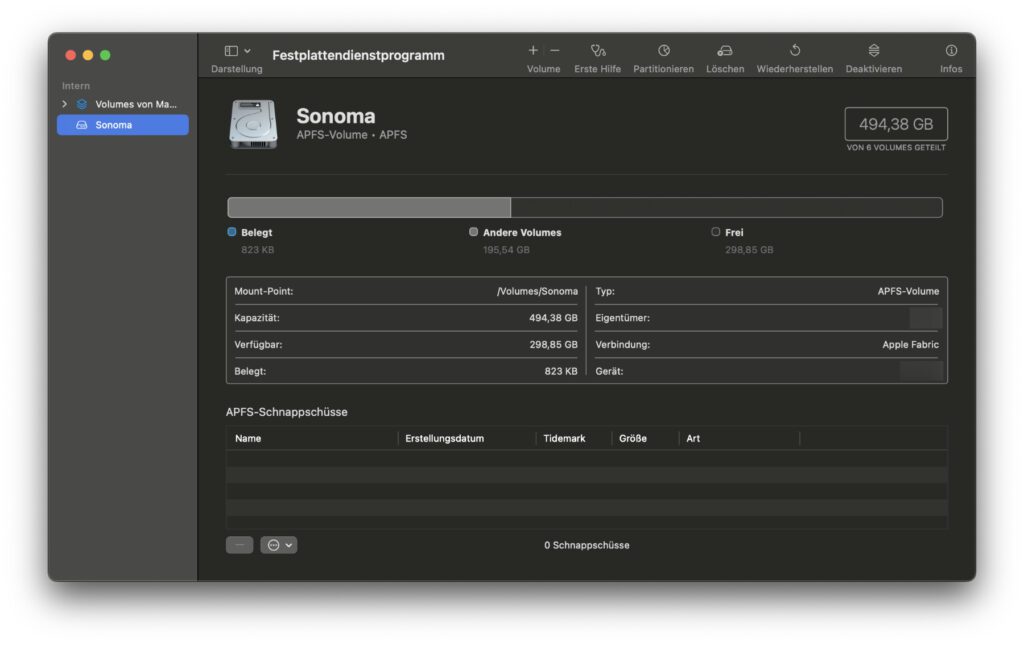
If you want to install and use the beta version of the new operating system alongside the current one, you will need a new volume on your hard drive. You create it like this:
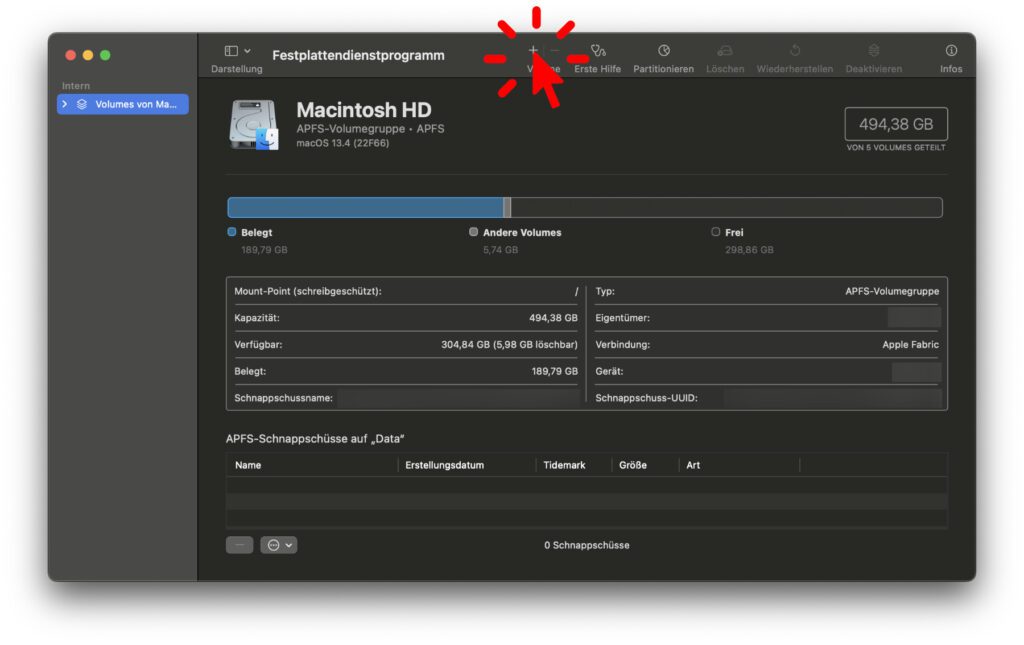
- Open that Disk Utility (Macintosh HD -> Applications -> Utilities)
- Click on the "+" above "Volume" in the upper toolbar of the program window
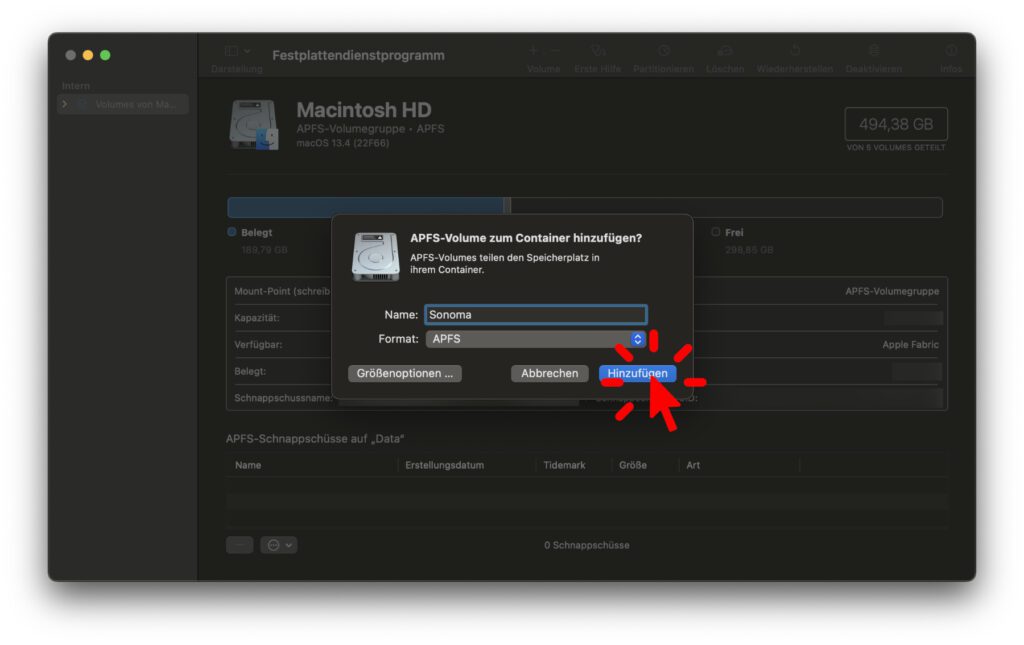
- Select a name (e.g. "Sonoma") and the format "APFS" for the new volume and click on the "Add" button
Install macOS Sonoma Beta on the new volume
Above we have worked out a small 13 MB installer file with an app extension from the 33,3 GB pkg file. You will find these in the programs folder by default if you have stored them on your standard volume. If you have chosen an individual storage location, then look for it there. her name is Install macOS 14 beta.app. Double click it to start installing Sonoma.
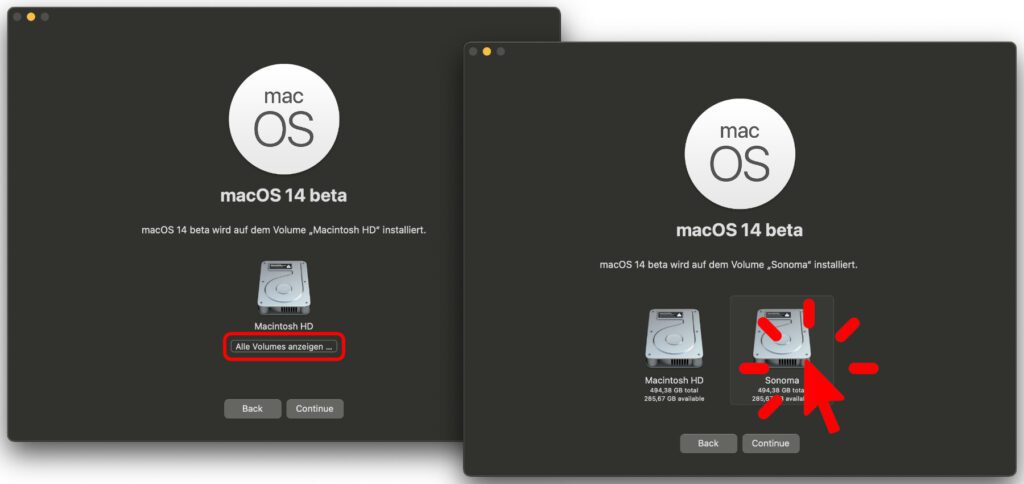
After agreeing to the license agreement in the installation wizard, you can select a target volume. If only the Macintosh HD is displayed, the "Show all volumes..." button is located below it. Click on it and then select the newly added volume (called "Sonoma" for me). Only then click on “Continue”.
You can take your account settings with you and also log in with your Apple ID in the beta. The good thing is that you take many (but not all) settings with you and don't have to set up as much. In addition, e-mail, calendar, keychain and Co. with all your iCloud data are then also available. What I personally haven't done is use Migration Assistant. Since I already have everything under Ventura, I don't have to copy everything over to Sonoma again and use up the Mac memory twice.
Tip: In order to skip individual steps (migration assistant, account setup, etc.), there is often a “Later” or “Skip” button on the bottom left in addition to the buttons on the bottom right. It's not always so easy to see, especially in dark mode.
How do I start the installed beta version?
After the installation, which depending on the Mac model can be completed faster than previously displayed in the installation window, you can already log into Sonoma and try things out. If you then shut down and/or restart the Mac, Sonoma should be loaded as the boot system by default. So even if you install the beta as a "secondary system", the Mac will now start with it - at least until you change that.
Manually select boot volume and operating system at startup
The key or combination of keys to press and hold to select the startup disk when the Apple Mac starts up depends on the processor. The process on Intel Macs is a bit different than on Macs with Apple silicon (M chip). To get to the Startup Manager with the system selection, proceed as follows:
- Intel Mac: Hold down the Option key (or Alt or option or ⌥) at startup
- Mac with Apple chip: Press and hold the power button while turning it on
"Keep holding for startup options..." appears under the Apple logo. When "Load Boot Options" appears, you can release the button. The volumes (in my case "Macintosh HD" and "Sonoma") will then be displayed. Choose accordingly whether you want to start your usual system or the beta installed as above.
Set startup disk to start Sonoma manually only
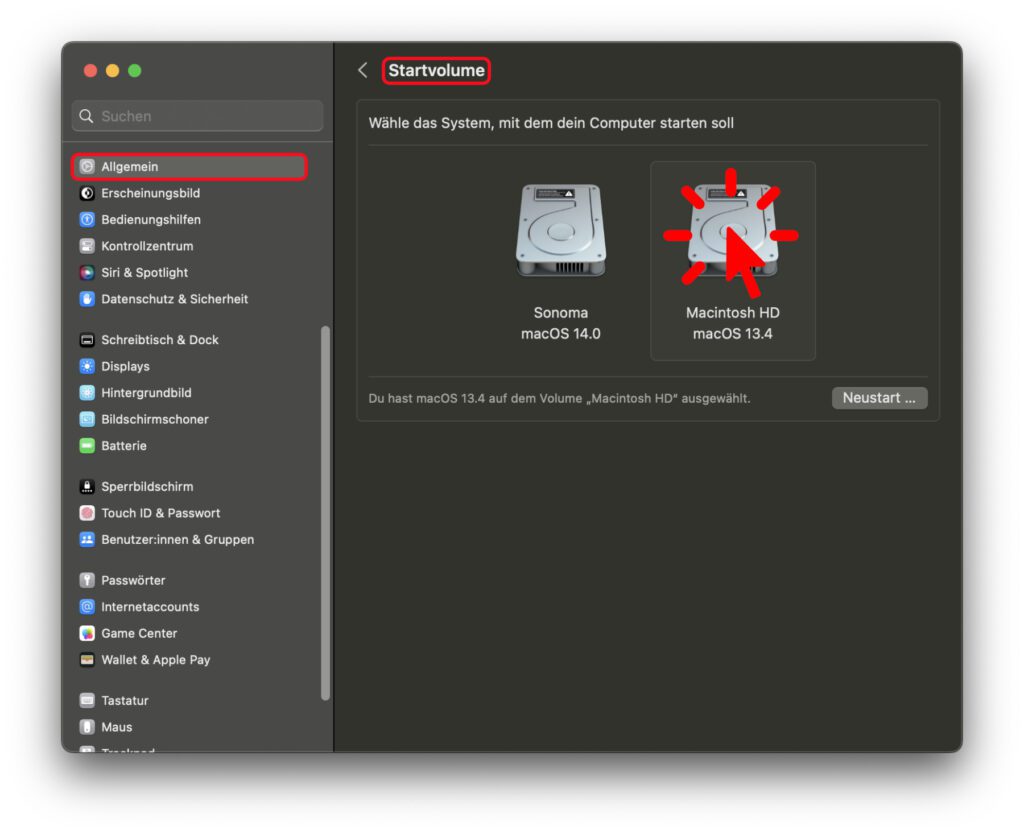
Personally, I continue to mainly use macOS 13 Ventura and only occasionally for tests macOS 14 Sonoma in the current beta version. That means I don't want Sonoma to automatically boot and only manually select Ventura. If you feel the same way, then you set a startup volume as follows:
- Click on the in the menu bar at the top left Apple logo
- Now choose the System settings ... from
- Click the dot in the list on the left General an
- Right now you choose at the bottom Startup disk from
- Click on the desired volume / system (to take over, a restart is required, which is offered directly via a button)
Account portability does not take care of all settings
As noted above, although I transferred my user account and signed in to Sonoma with my Apple ID, I did not run Migration Assistant. At least I didn't want to clutter up the hard drive with a copy of all programs and files. The fact that I didn't copy everything one-to-one was noticeable straight away:
- I had to magnet download it again to be able to arrange windows more conveniently (of course, no other programs were taken along either, I only noticed Magnet directly because window management is important to me)
- The adjusted mouse pointer speed was not adopted
- Not only are Sonoma screenshots not moved to my specified Dropbox folder, but also under Ventura the screenshots ended up on the desktop again for the time being instead of in the specified cloud folder (this can be fixed in the screenshot app under "Options" if to re-specify the save location)
As I keep trying, I'm sure I'll notice even more small and large hurdles on the way. But so far I'm generally satisfied. The Mac has remained whole, switching between the volumes and operating systems works quite well with a restart and everything else runs smoothly. I will now try out the new Sonoma functions and be able to tell you about them.
My tips & tricks about technology & Apple
Related Articles
After graduating from high school, Johannes completed an apprenticeship as a business assistant specializing in foreign languages. But then he decided to research and write, which resulted in his independence. For several years he has been working for Sir Apfelot, among others. His articles include product introductions, news, manuals, video games, consoles, and more. He follows Apple keynotes live via stream.

